
Please note: Statistics are updated once daily on Recast for Business
Total Purchases: The sum of all purchases of your video(s) from this Channel (in the selected period and for selected videos)
Total Earnings: The sum of all your earnings across your Channel for purchases, shared video purchases (in the selected period and for selected videos)
Earnings Direct: The total of all your earnings from your own videos
Earnings From Videos You Share: The sum of your earnings from others’ videos after being shared by or on this Channel (in the selected time period)
Total Referrals: Total number of Users who have signed up after following a referral link from this brand's account
No. Referrals Spent 200: Total number of Users who have spent 200 Cast Credits after signing up after following a referral link from this brand's account
Avg. Earnings per Video: The average earnings amount per video (in the selected period and for selected videos)
Avg. Daily Referrals: The average per day of the number of Users who have signed up after following a referral link from this brand's account
Total Purchases From Shares: Quantity of all purchases made by Users from links you shared to others’ videos
Avg. Share Purchases Per Video: The average quantity of purchases generated from links you shared per selected video
Avg. Purchase Price: The average price of your videos (in the selected period and for selected videos)
Total Number of videos: The total quantity of all videos uploaded over time
This guide explains how to manage a live stream using Recast, from establishing a connection with the broadcast software, to starting and ending your stream.
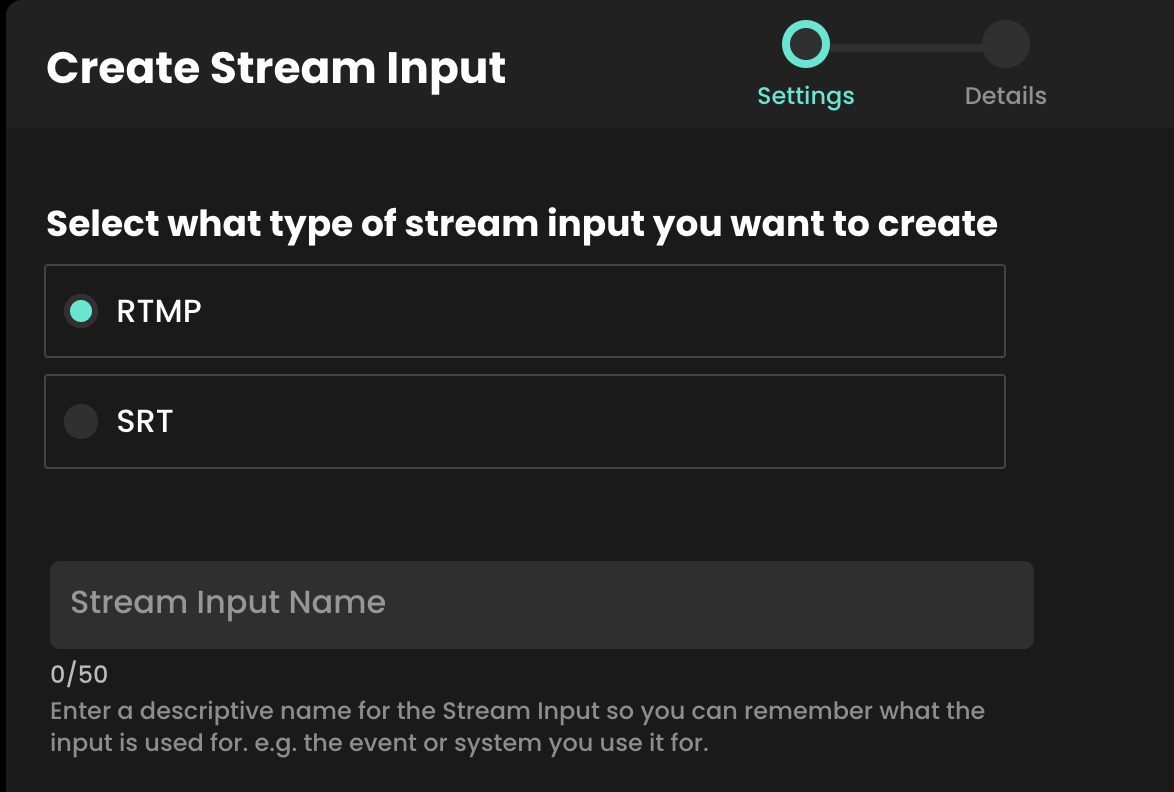
Streaming with Recast requires you to connect your broadcasting equipment to Recast, using a stream input method. Recast supports live streaming using two different streaming protocols: RTMP or SRT. Those managing the stream will have a preference.
Please note: Recast’s SRT streaming option works on a Listener Mode basis. If you wish to use Caller mode, please select RTMP. If you are unsure, please get in touch at partnersupport@recastpay.com and we can assist.
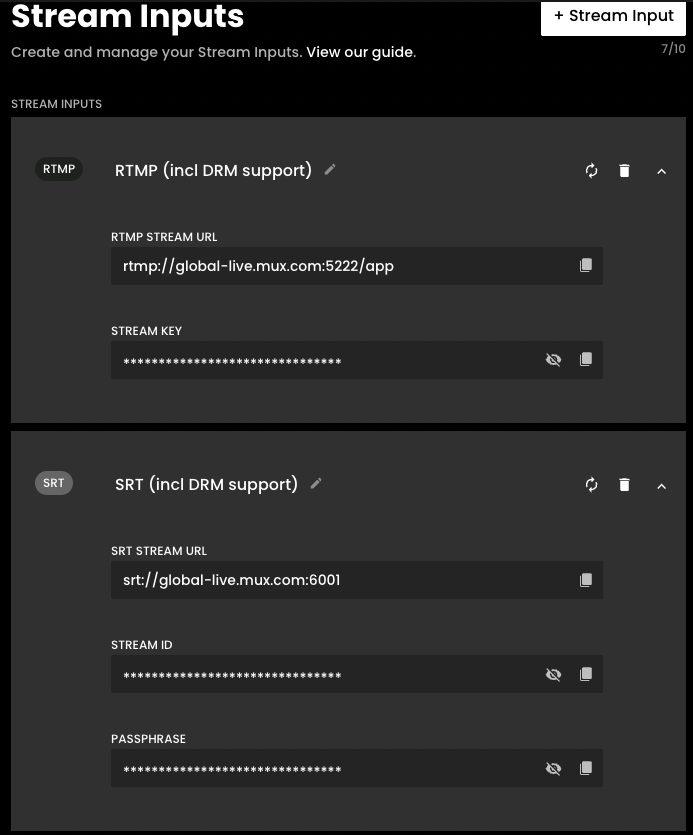
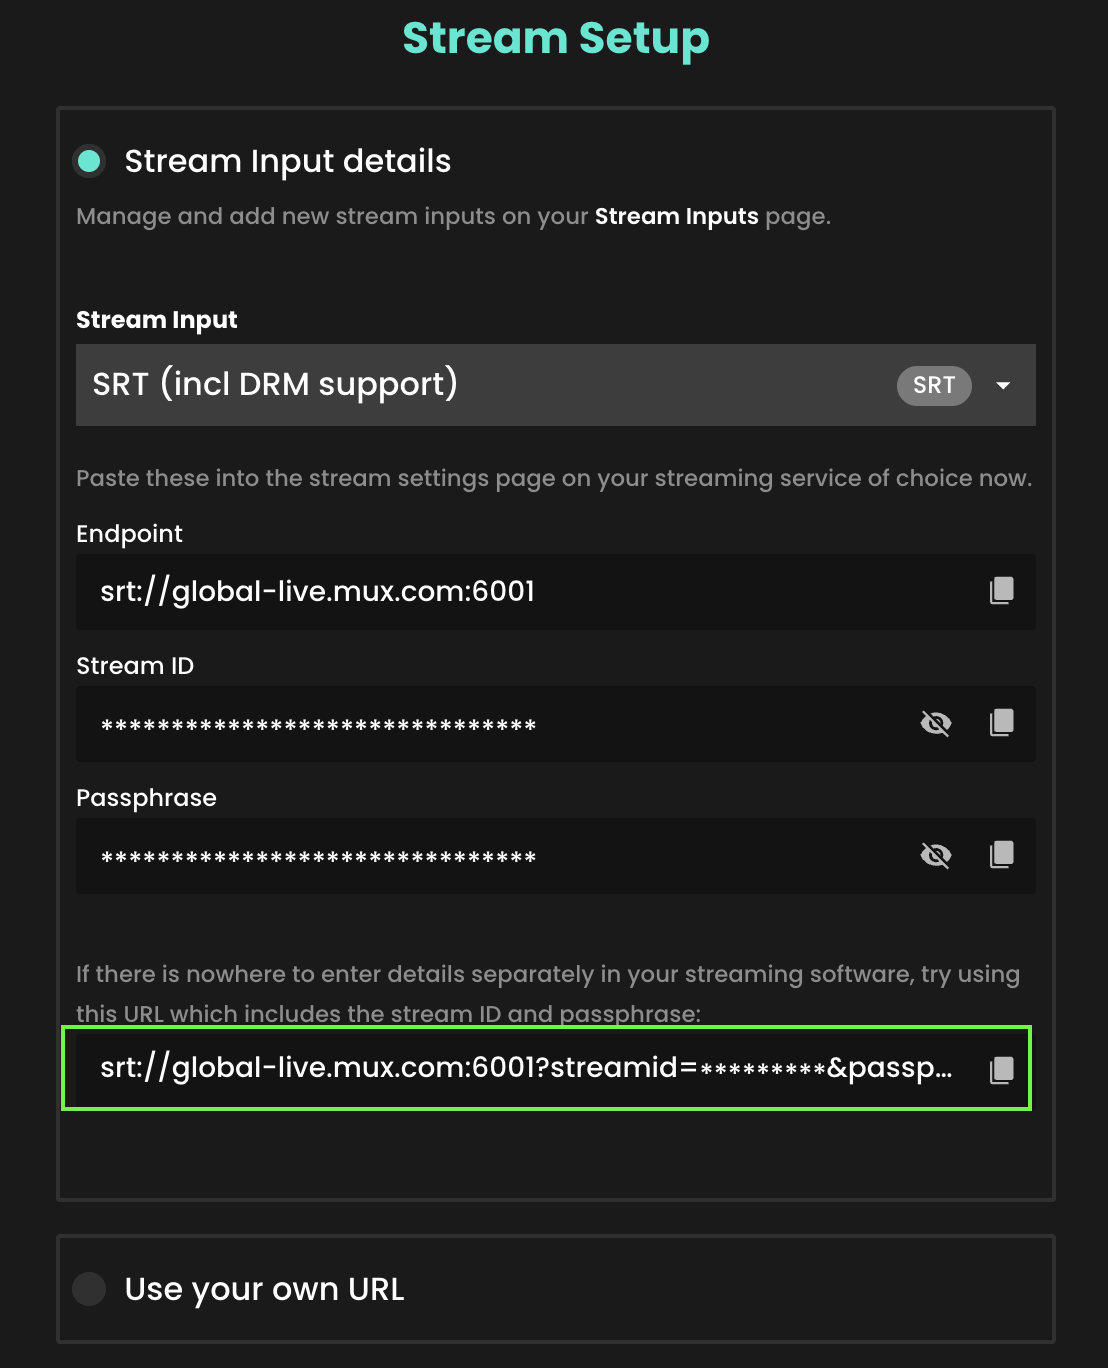
One you've determined which streaming protocol you'd like to use, you need to set up the stream input:
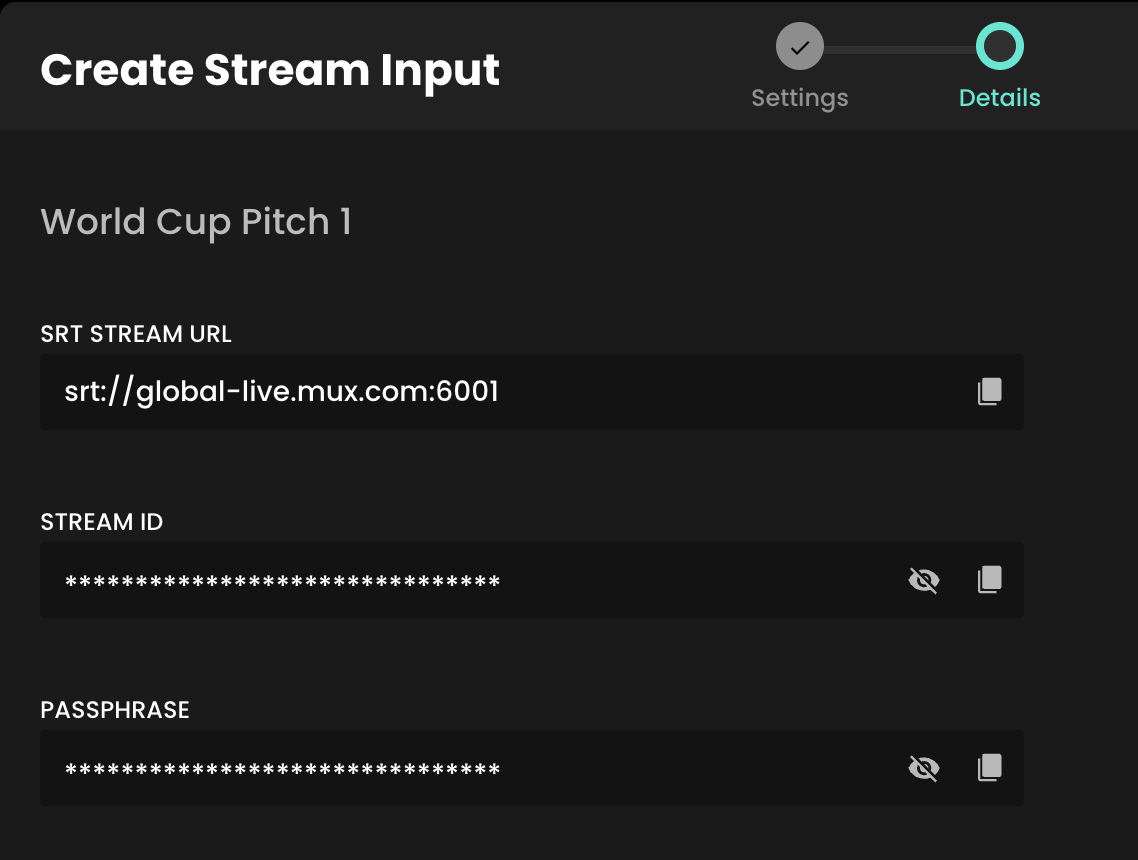
Firstly, make sure your streaming equipment is on, and that it's sending a signal to Recast via the stream input method you selected. You do this by inputing the information you copied from the step above into the relevant fields into your streaming solution.
For SRT this is typically the Endpoint, Stream ID and Passphrase.
For RTMP this either the Endpoint, the Stream Key, or a combination of both which makes up the Stream URL.

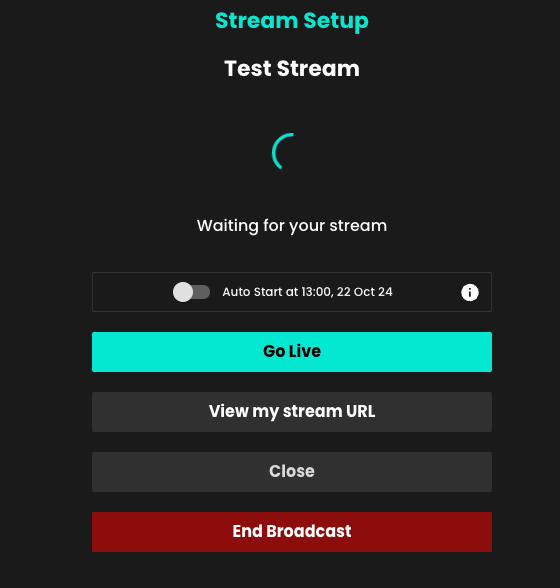
Once you have seen the preview you can click ‘Go live’ when you are ready to start the stream. The stream will then go live immediately on your Embed Widget(s).

If after a few minutes your steam is not appearing in the preview window, please contact Recast via our On Call support number provided or the dedicated WhatsApp group as the partnersupport@recast.tv inbox is not monitored 24/7.
You can now also set your stream to go live automatically simply by toggling on the Auto Start feature. Set up your stream using the above steps then, once you are happy with how things look, you can set the stream to go live automatically at the scheduled start time of the event.
Please note: You can only enable this earlier than 5 minutes before the scheduled start time.

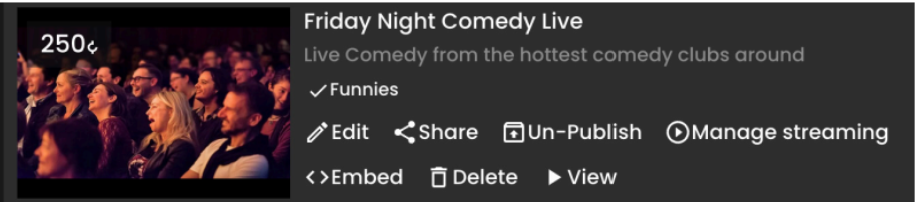
Once the stream is live, you can close the event page and return to it at any time in the ‘Live Events’ tab in Recast for Business. Click ‘manage streaming’ to return to where you were, or if you just want to view the stream itself, choose ‘view’. You can then view it as an admin in Recast for Business or via an embed widget.
Live streams scheduled for a future date/time can be accessed via the ‘Upcoming’ tab in the ‘Live Events’ section. ‘Start streaming’ will take you to the stream page to start the stream. The scheduled time/date and thumbnail can be changed via the ‘edit’ function.
To end your stream, go to the ‘Live Events’ section of your Recast for Business page, click ‘Manage Streaming’ on the event and select ‘End Broadcast’. Once you have stopped a stream, there is no way to restart it. It takes around 1 minute to end the broadcast, please wait for the ‘stream deleted’ message to appear.
If you would like to create a new account, click here, sign up and create your new Vendor account and Brand.

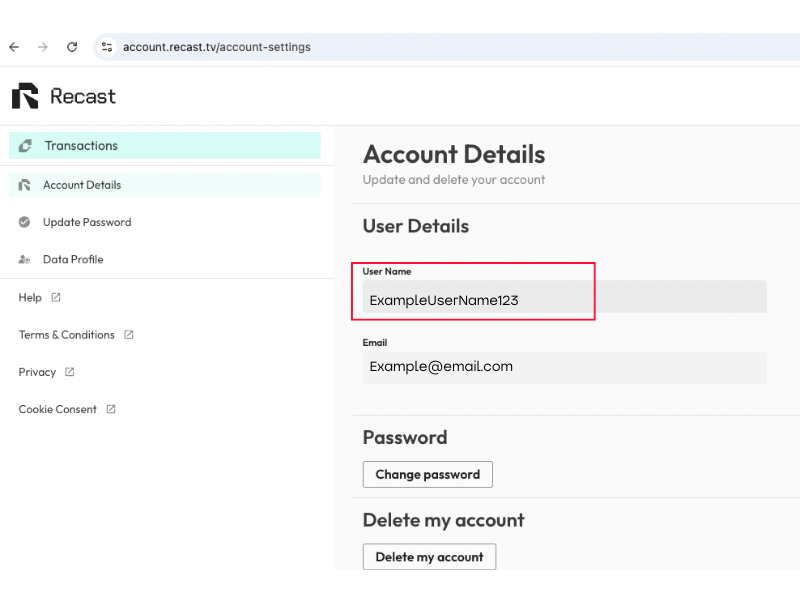
TIP: A ‘Username’ can be found in Recast in the ‘account details' section of https://account.recast.tv/. If you do not know the correct ‘username’, please contact partnersupport@recast.tv
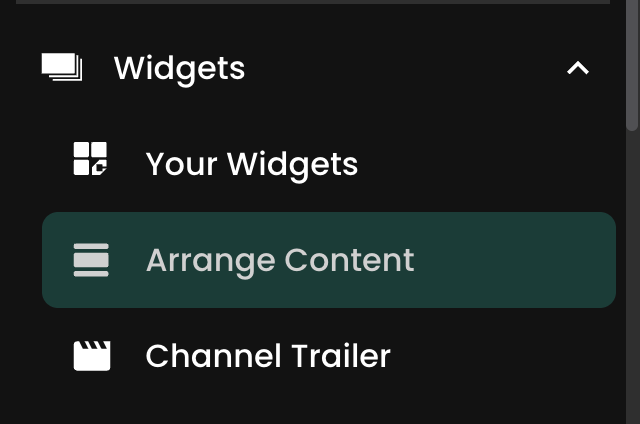
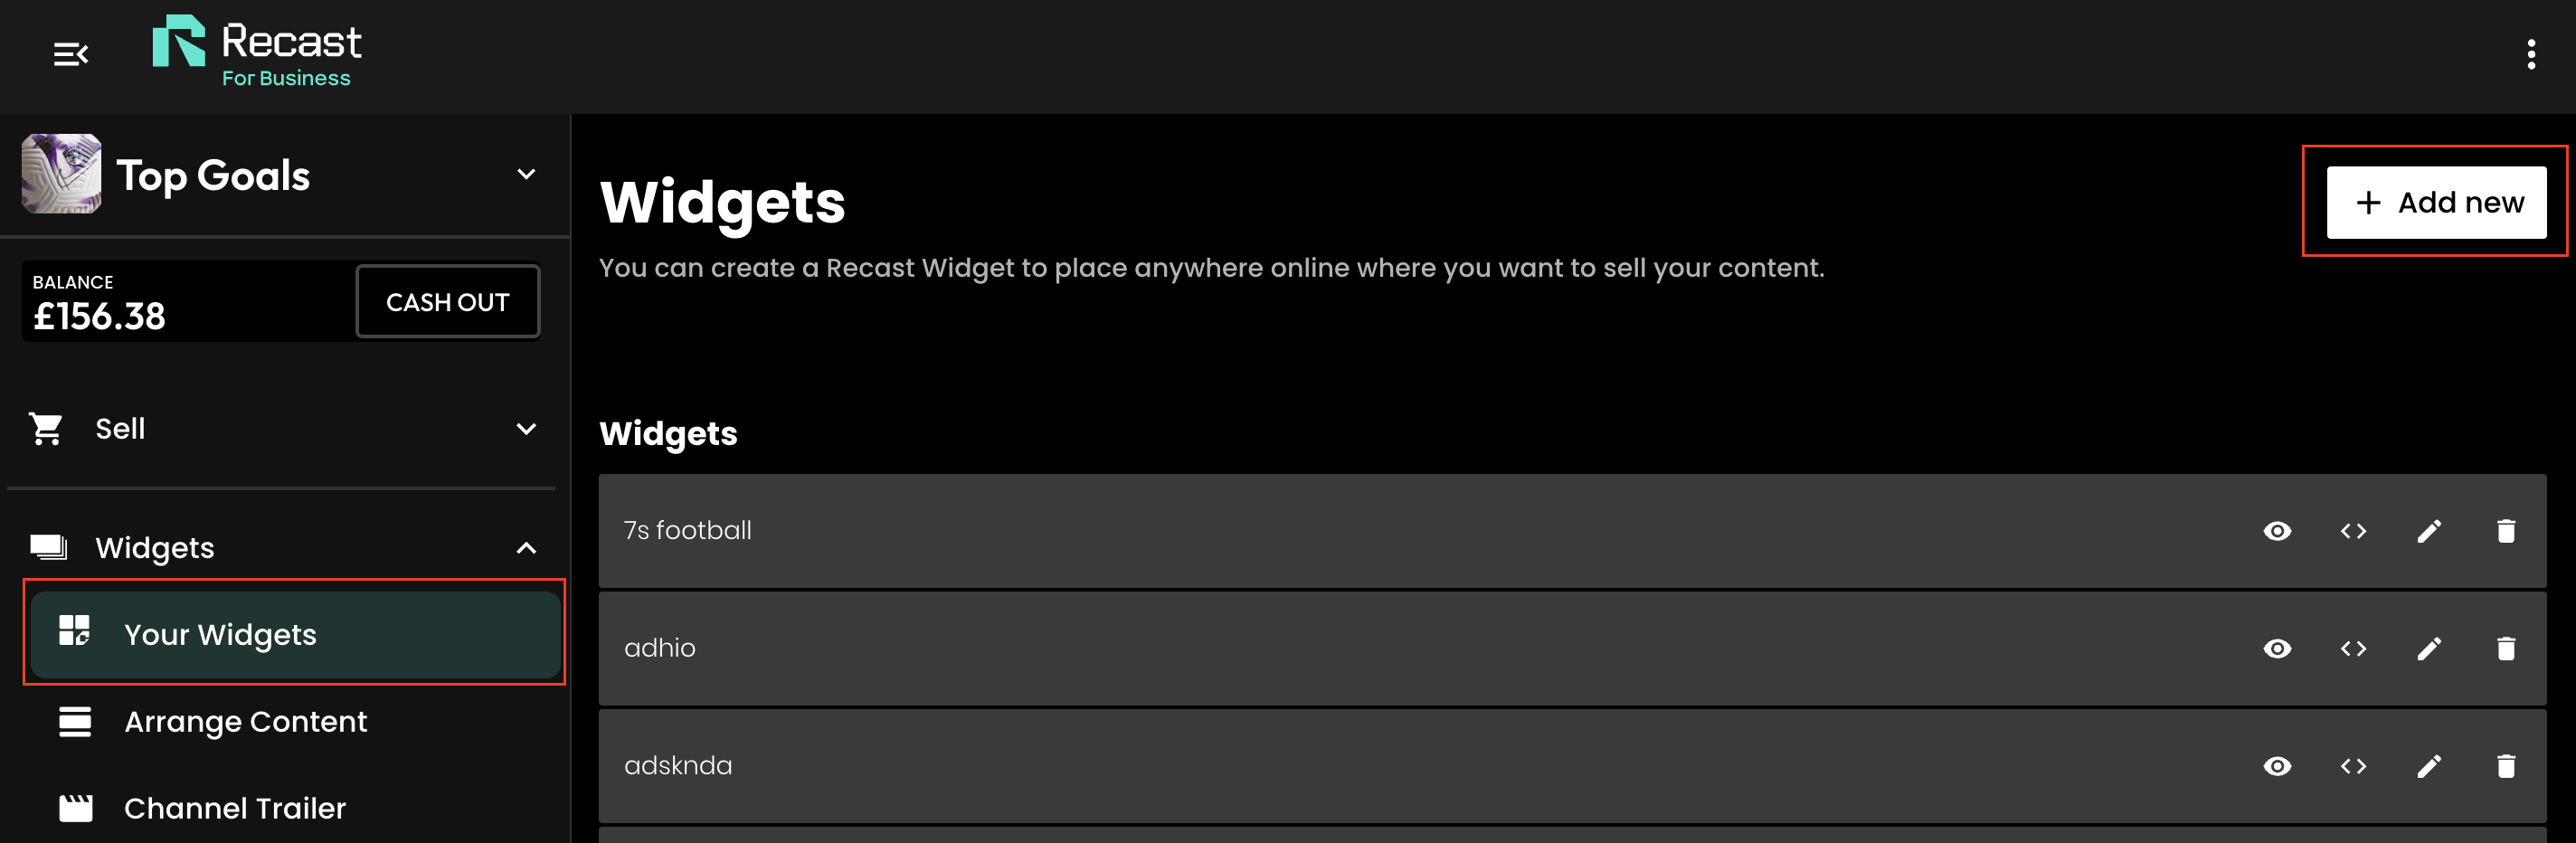
To create a new Recast widget on your website select ‘Widgets’ on the left-hand menu in your Recast for Business account.
Then press ‘Add New’ at the top right of the screen to add a new widget. Any widgets you have created previously will be listed here.
Then press ‘Next’ to continue

Then press ‘Next’ to move to the next stage.

You can apply your own custom styles to your widget. Use the colour picker or type in the hexcode of the colour you want to apply.
You can also change the font that is displayed on the widget by typing the font family name into the text fields. For this to work correctly:
Then press ‘Next’ to move to the next stage.
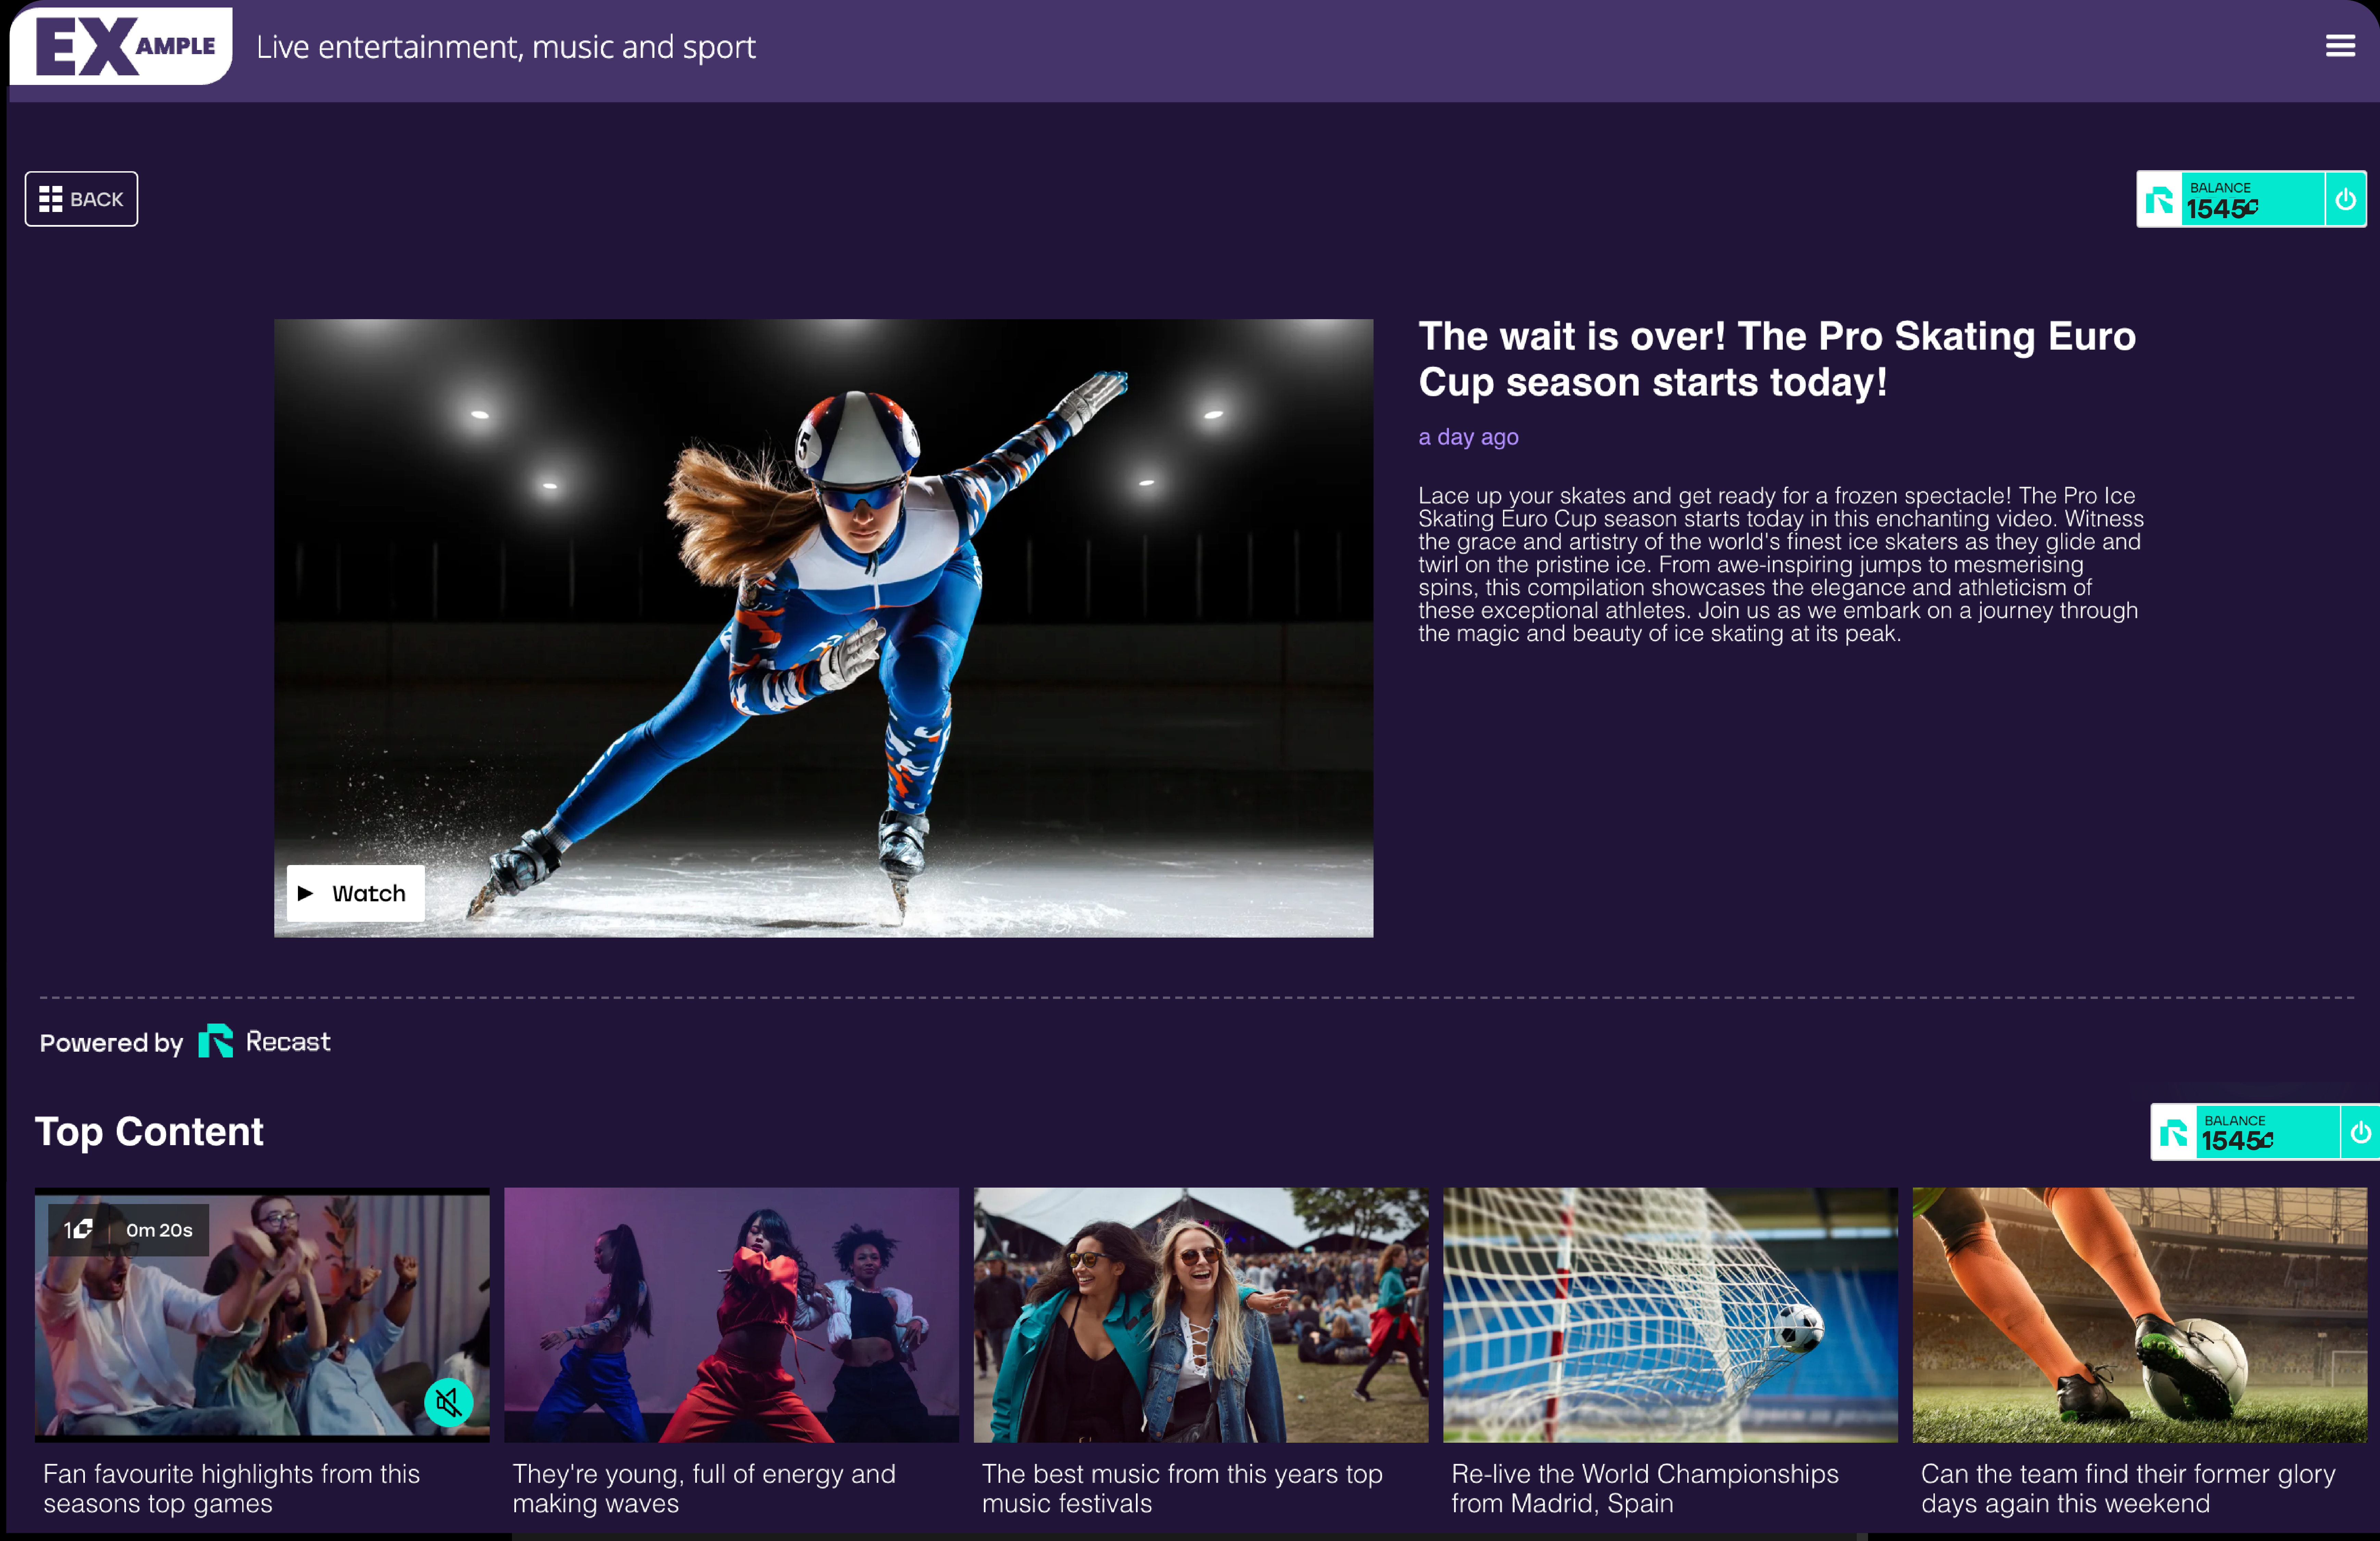
As shown below, the styles selected will apply to the widget when it’s added on your website.
You will now be provided with the code that needs to be embedded onto your website. Press ‘Copy to clipboard’ to copy the code.
Then press ‘Finish’ to save the widget.


Your Brand is your public-facing part of your Vendor account. Give it a name, description, profile image, and cover image that makes you easily recognisable. You'll take this brand across the web as you (and affiliates) embed and share your content.
You are now signed up and are logged in to Recast for Business.
IMPORTANT: If you intend to use Recast's streaming tools please now get in touch with your Recast partnership manager or email partnersupport@recast.tv to request access to Recast Stream. We'll activate these on your account and they will then appear on as menu items in your Recast for Business account.
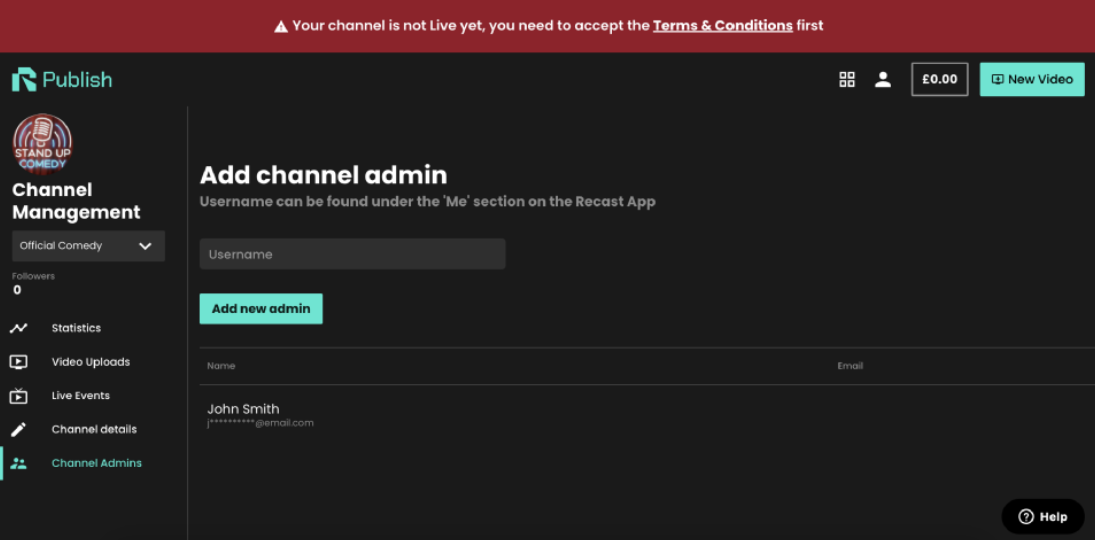
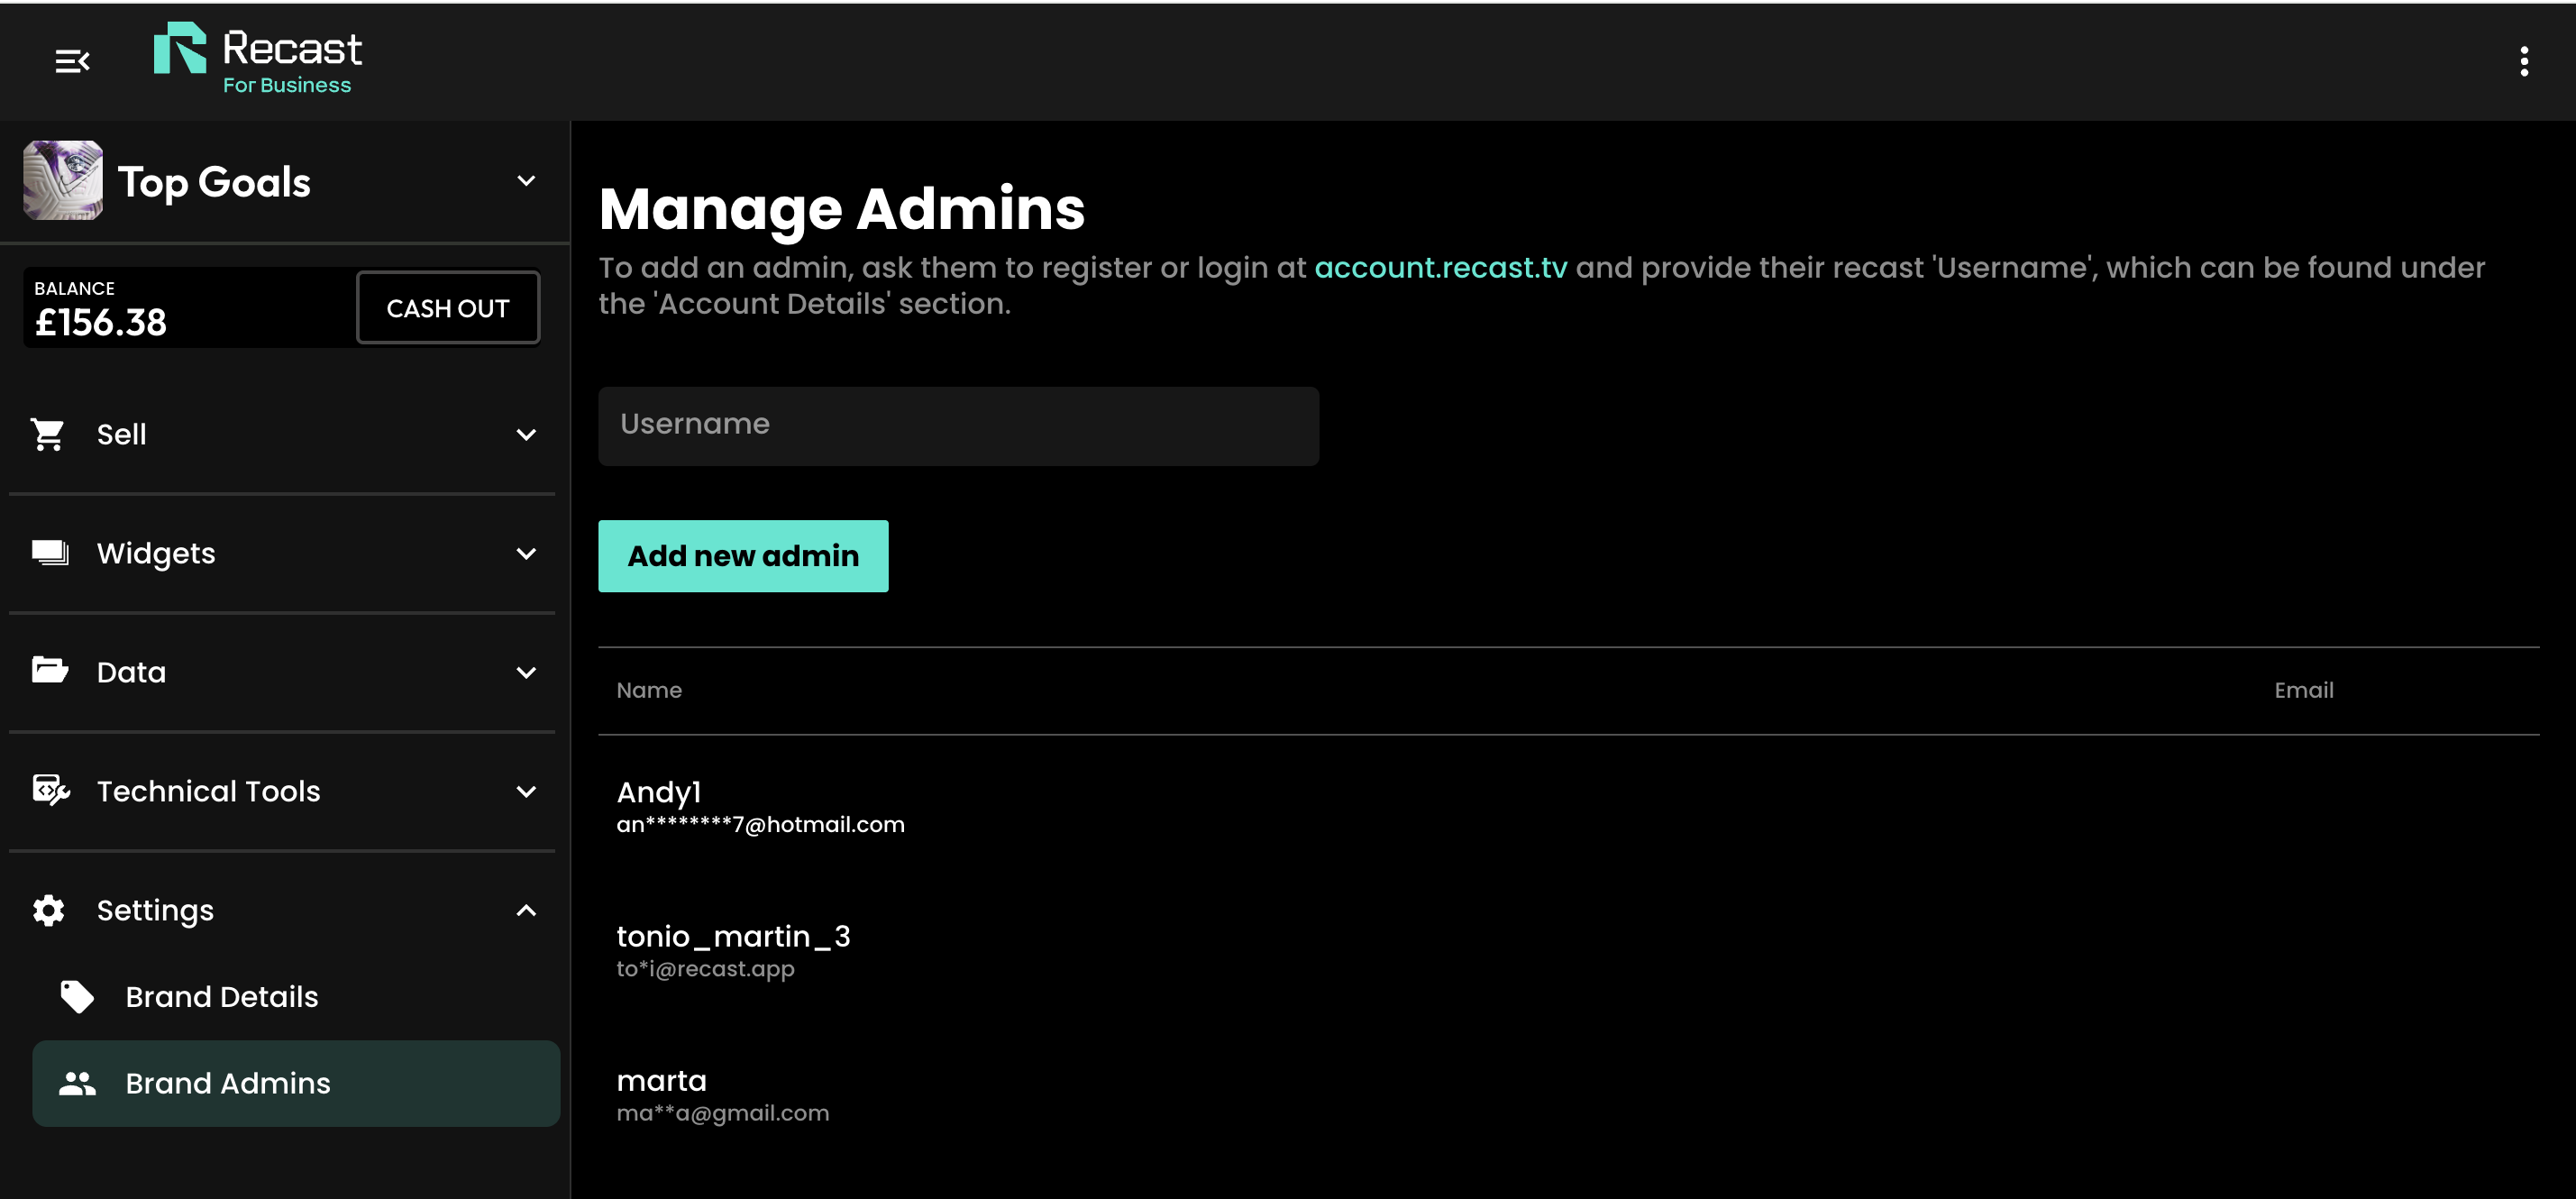
To add additional admins for your channel, first make sure they have signed up for a Recast user account and ask them to share their account User Name
You can upload or schedule your first piece of content by clicking the ‘New Video’ button and selecting the content type or try adding an Access Pass. For more information, please follow these links:
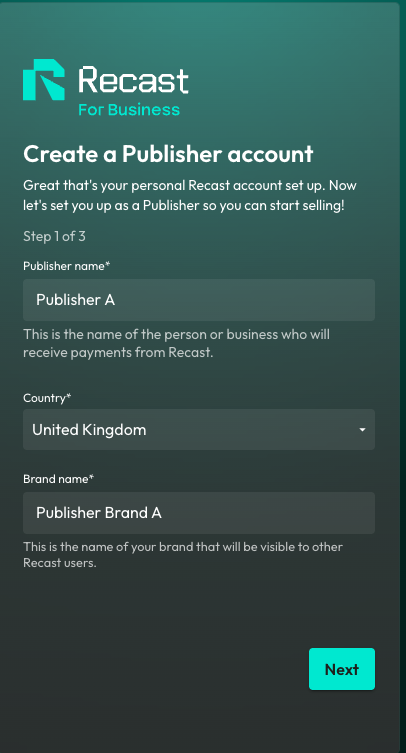
Head to business.recast.tv/api-register. Before you set up your vendor account, you'll be asked to first create a Recast user account, or if you already have one, you can sign-in with your existing user account details.
Now you can set up your Vendor account. This is the person or business that will be paid out any earnings from your sales via Recast. You'll need to provide some details such as the primary contact for the vendor and once you've done that you can start setting up your Brand.
Your Brand is your public-facing part of your Vendor account. Give it a name, description, profile image, and cover image that makes you easily recognisable. You'll take this brand across the web as you (and affiliates) embed and share your content.
You are now signed up and are logged in to Recast for Business.
To add additional admins for your channel, first make sure they have signed up for a Recast fan account and ask them to share their account User Name
Congratulations, you're now all set up and ready to monetise your media. You can find out how to create inventory items and API keys:
Using Recast’s Affiliate & Syndication engine, Media Owners are incentivising Affiliates to share their content using unique ‘Share & Earn’ links in return for a pre-agreed revenue share.
.png)
.png)
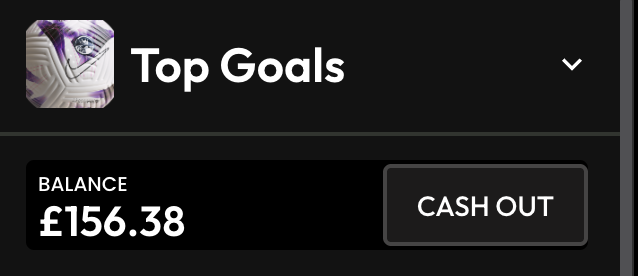
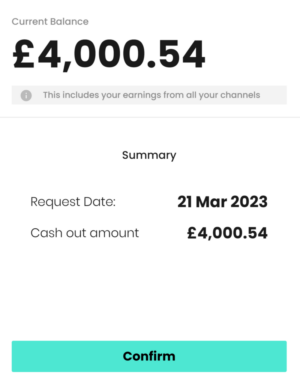
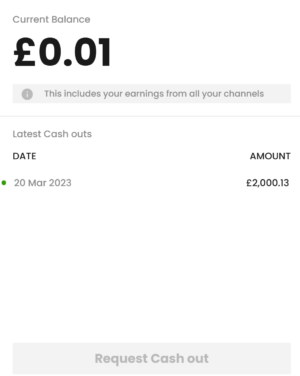
Earnings are instantly distributed. Cash out at any time once you’ve surpassed £100 GBP.
Your Brand is your public-facing part of your Vendor account. Add your logo and cover image that makes you easily recognisable to content owners on Recast's distribution marketplace.

You are now signed up and are logged in to Recast for Business.
IMPORTANT: In order to get whitelisted to publish third-party content, you must now contact partnersupport@recastpay.com, confirming the content you would like to publish.
Once whitelisted, a member of the Recast team will let you know, and you'll then be able to start publishing content. For more information on how to Publish content using a Publisher Embed Widget, click here.
And that’s it! You’ll earn from every purchase of content from the widget on your website in line with the revenue split you’ve agreed with the Content Owner.
To add additional admins for your account, first make sure they have signed up for a Recast user account and ask them to share their account User Name
Recast enables you to upload and sell access to video content. This guide will explain exactly how to start selling your vertical video content.
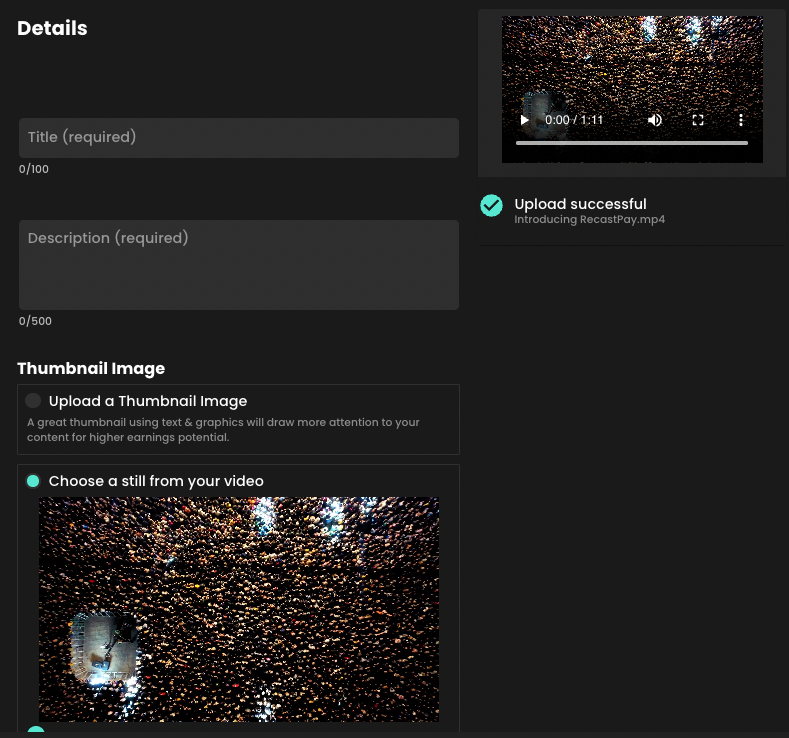
Give your video a title and a description. Catchy titles will help users find your content and encourage them to purchase it when they do.

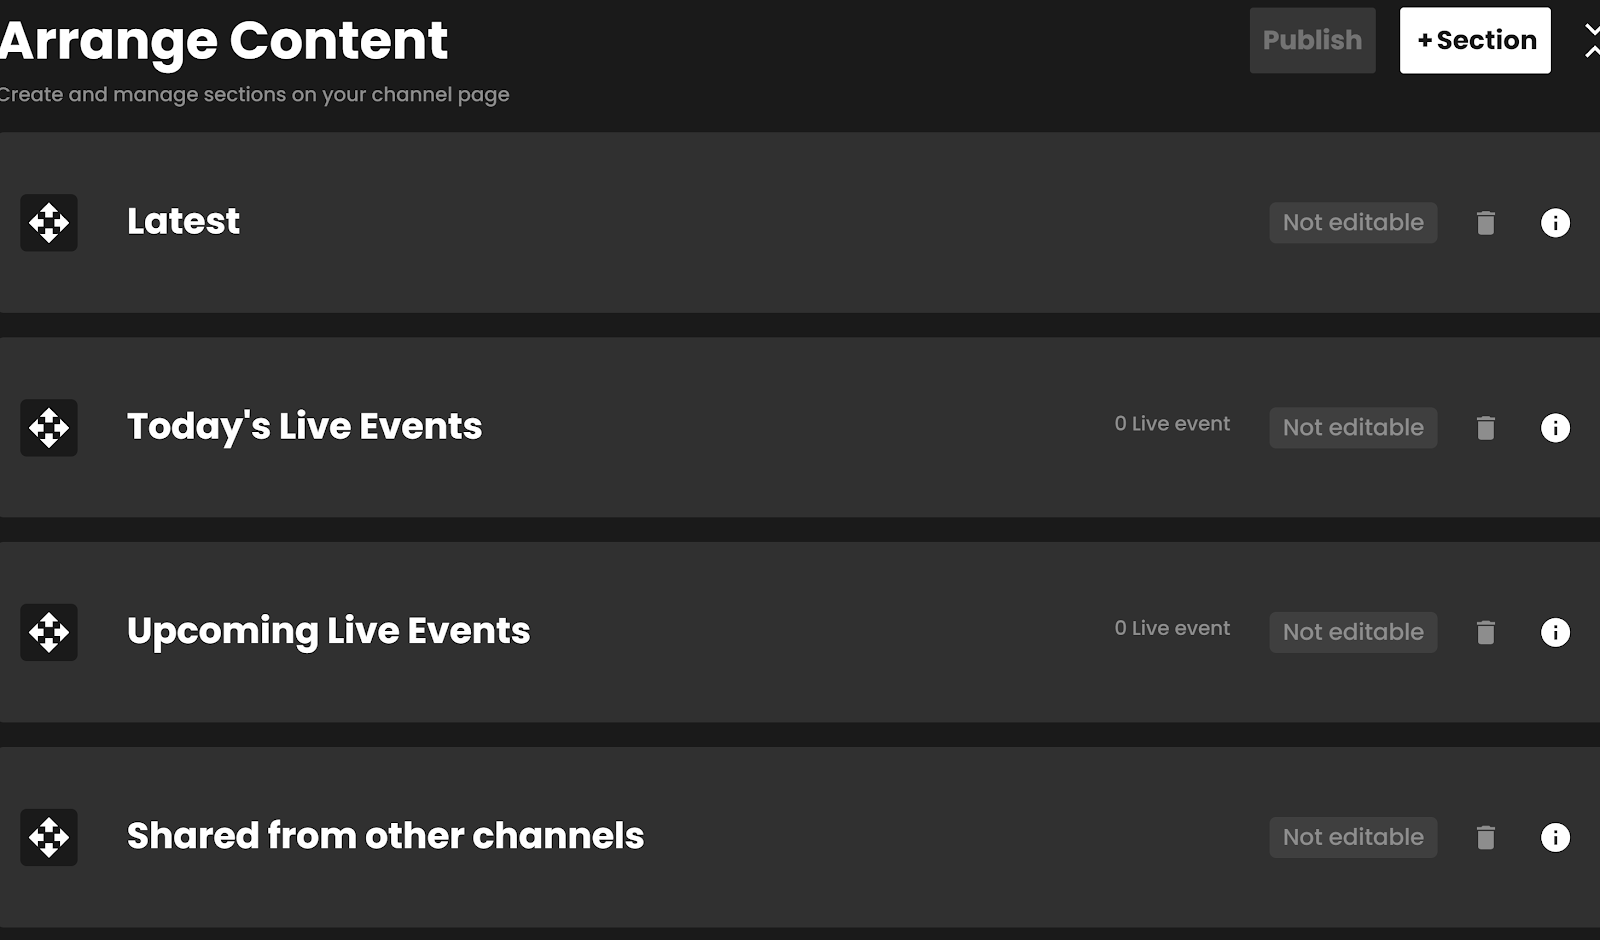
Once your content is published, you’re ready to arrange the content on your widget.
Recast widgets consist of two different types of sections:
For more information on arranging content on your widget, click here.
If you have both portrait and landscape format content to sell in your Recast Embed Widget, we recommend organising the different sizes into their own custom sections on your widget. Learn more about adding a custom section to your widget here.
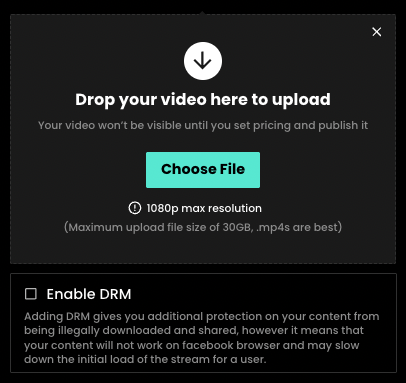
The time it will take to upload your video depends on how large the file size is and your internet upload speed. Make sure not to close the platform when you are uploading, as this will interrupt the upload, and you will have to repeat it.
Once uploaded, the video will show as processing. Please note it can take a while to process, depending on your upload speed. This is so we can create HD, high, medium, and low-quality versions.
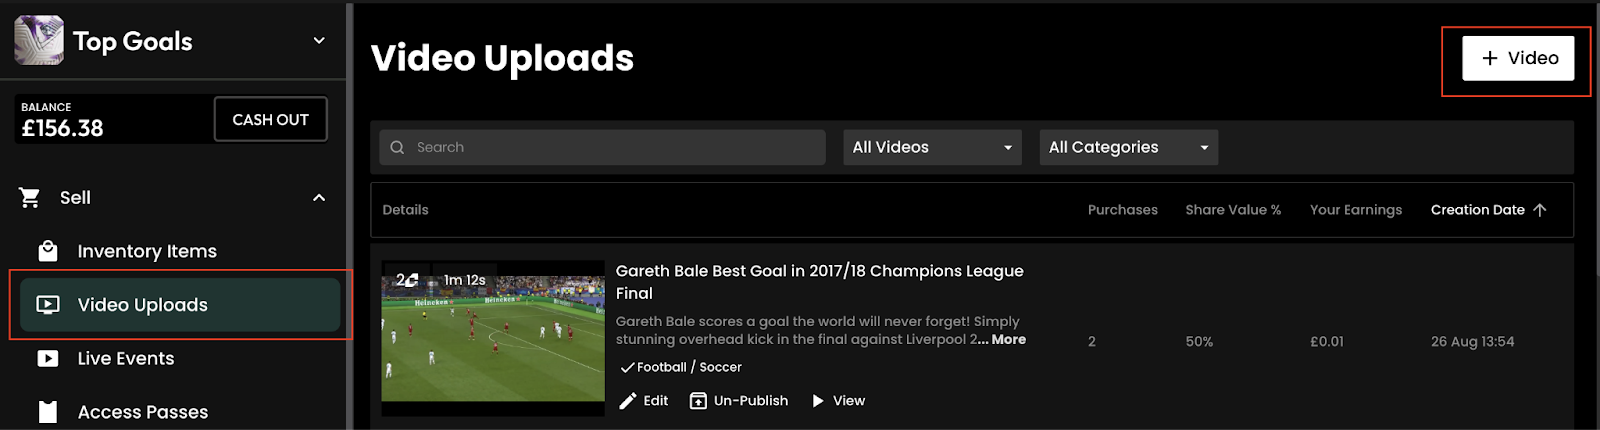
Once you have finalised your video upload, it can be accessed via the ‘Video Uploads’ button, where you can edit & view your video.
Please note: If you try to close the Upload a Video form before the setup has completed, you will be asked to discard or save the Video Upload Draft.
If you choose to save the draft, it will be available on the Unpublished Video Uploads list, which is found in the ‘Video Uploads’ section. If you choose to discard, the draft will be permanently deleted.
File Type
.mp4 (recommended).mov (recommended)
Video Codec
h.264 (recommended)h.265/HEVC
Audio Codec
AAC
Resolution
We support resolutions up to 1080p 16:9. We suggest these standard resolutions:
1920×10801280×720960×540640×360
Aspect Ratio
We support both 16:9 landscape and 9:16 portrait resolutions. If your video doesn’t match one of the above aspects ratios, we will pad the video with black bars.
Frame Rate
We support constant frame rates up to 60fps. Here are some standard frame rates we would suggest using:
242530485060
Note: You may encounter difficulties when uploading content with a variable frame rate. If you receive a “processing failed” error when uploading variable frame rate content, we suggest converting this to constant frame rate and try the upload again.
Many iOS devices have variable frame rate enabled on their camera by default, we suggest disabling this if you encounter issues uploading video shot on iOS devices.
Video Bitrate
ResolutionLow frame rate (24-30 fps)High frame rate (48-60 fps)1920×10808 Mbps12 Mbps1280×7205 Mbps8 Mbps960×5402 Mbps4 Mbps640×3601 Mbps2 Mbps
Audio Bitrate
128 kbps
Audio Channels
Stereo
Colour
We currently only support SDR videos. For these please use the standard BT.709 colourspace
Scan Type
We currently only support progressive scan video. You can upload interlaced videos but we are unable to deinterlace these.
Video Length
Up to 6 hours. If you need to upload longer duration videos, please reach out to techsupport@recast.tv and we can discuss solutions.
File Size
Up to 30 GB
Subtitles
Not currently supported. If you require subtitles on your video, we suggest burning these into the video itself.
Recast’s Embed Widgets are customisable, allowing you to create custom sections with specific content and organise the order of both your custom sections and default sections, such as your “Access Passes”, “Latest Videos” and “Live & Upcoming” sections.
If you have uploaded vertical (portrait) content, we recommend you place this in it’s own custom section, as we explain in the “Adding a new Custom Section”, below.


The Data Download feature is now available to all Recast Vendors, which allows you to download opted-in data about your users.
Firstly, as a reminder, users are incentivised to opt-in to sharing their information. They can simply share their email address, or if they complete their Data Profile you’ll have access to the following info:
If this feature is not immediately available to you, you may not have provided us with your privacy policy. To get set up, please contact us on partnersupport@recast.tv to have this feature added to your Recast for Business account. Please provide:
We will ask you to read and agree to our Data Sharing Agreement
.png)
This will download a protected zip folder, which will need to be unlocked with a password. The password is available below the download option. Paste the password into your unzip software to gain access to a .csv file. This file contains the information shared from each of your opted-in fans.
When downloading a new version, it will replace the version below and you commit to updating the data you hold as a result. This should be completed at least once every 14 days to keep the user data you hold up to date and adhere to all opt-ins and outs of your fans as per the Data Sharing Agreement.

After you have created your Recast for Business account, you can become a Publisher of other Recast Vendors. Please contact us at publishersupport@recast.tv if you’d like to get whitelisted. Once whitelisted, here's how to create an Embed Widget.
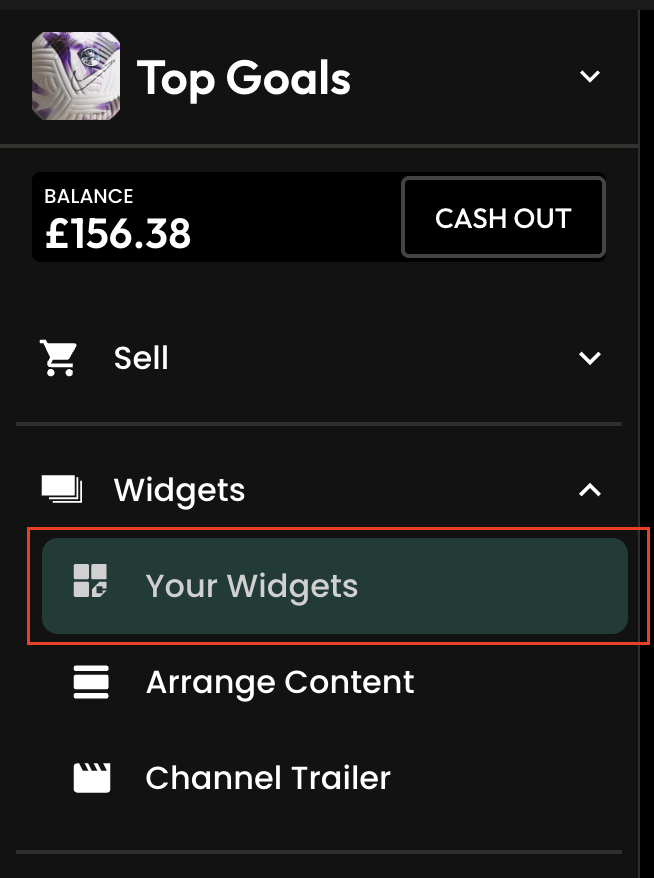
1. As a Publisher, you can create widgets containing content from Recast Vendors. First, head to the Your Widgets page in Recast for Business and select ‘Add New’.
2. Give the widget a name and select the option ‘Content from other channels’. You can also give the widget some header text which will be visible on the created widget.
.png)
At this point you have two options:
3. Select one (or multiple) channels whose content you’d like to include on your widget.
4. If you selected "Create with Selected videos and events, you'll now be asked to choose to create the widget from either on-demand or live content from the selected channel(s). And if you want to be more precise in the content you are selecting you can specify certain videos or categories of videos.
.png)
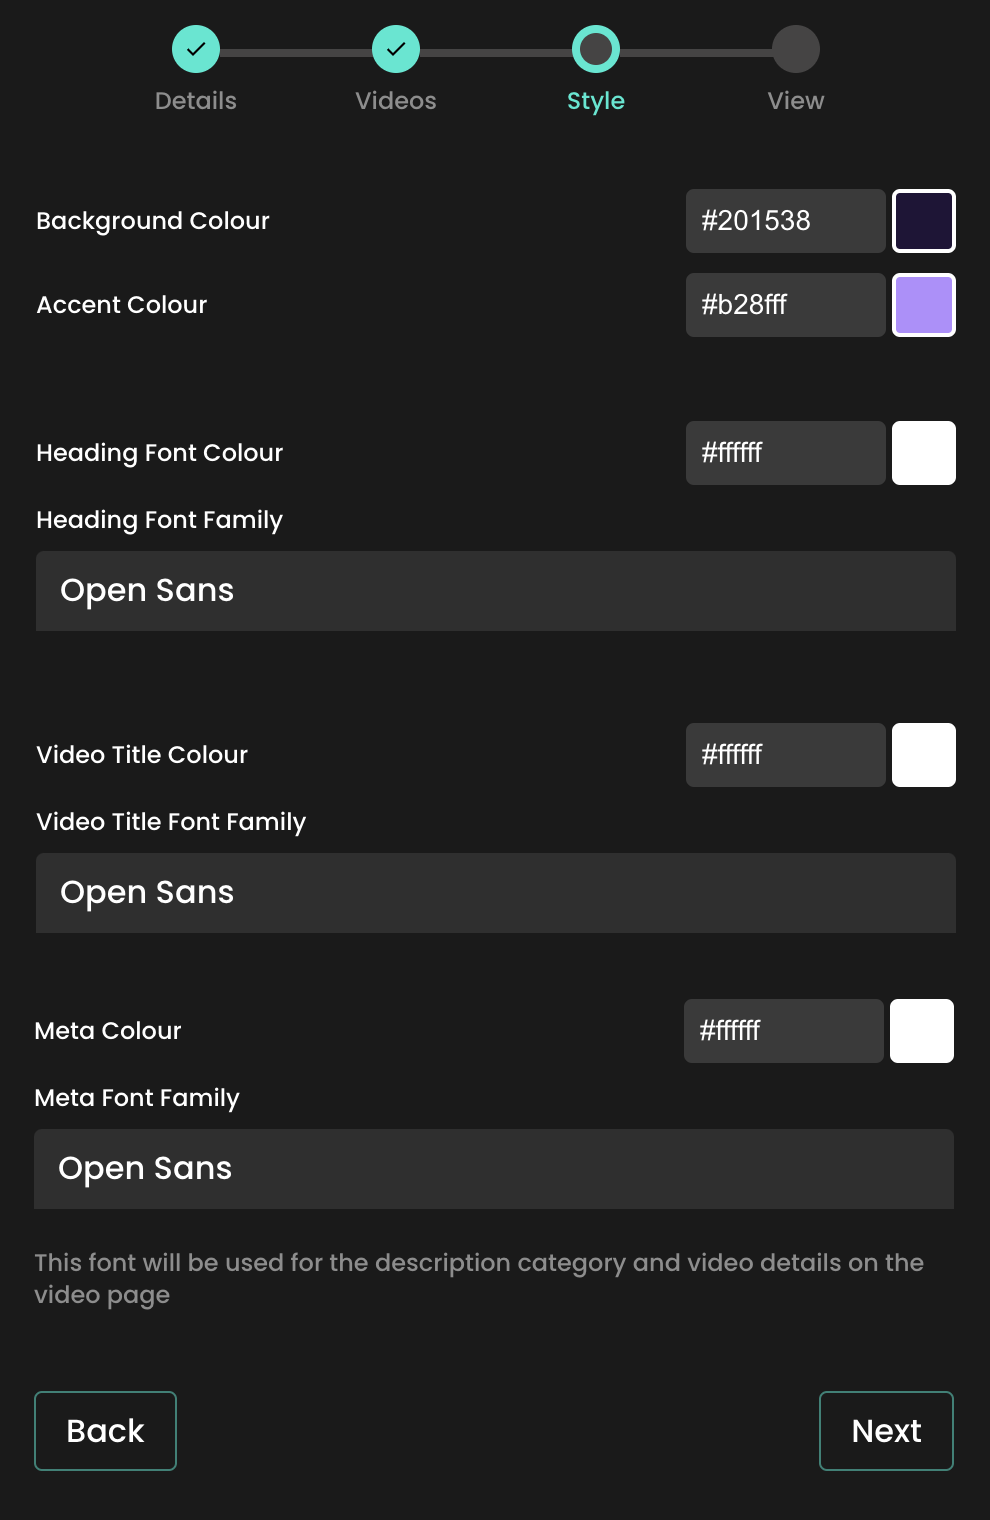
5. You can now style the widget to suit the colours and content of your brand's website. Use the colour picker or type in the hex ode of the colour you want to apply.
You can also change the font that is displayed on the widget by typing the font family name into the text fields. For this to work correctly:
Be sure to check that the transparency slider (see red box in the below image) is set to the right hand side, otherwise if may not be visible:

Then press ‘Next’ to move to the next stage.
6. Preview your widget and copy the iFrame code, ready for use on your website.

Once you've copied your widget code, go to the web page on your website where you want it to live. How you add the code will depend on the website CMS software you use, but typically website's will allow you to toggle between a "visual" view and a "code" or "text" view in the text editor section. If you go to the latter, you'll be able to drop the embed code straight into the text editor.
Other website CMS's may have a component called " Code embed" or similar, that you can just add to your page before pasting in your Recast Embed widget code. Remember to save and publish the page.
When a user purchases third-party content via a widget you have created, you will earn a percentage of the purchase. This percentage is determined by the content owner when they price their content and set their share percentage.
If you do not want to embed content on your site, you can still earn a revenue share of content you promote, by using Share & Earn links. For a full explanation of how these work, click here.


You'll be able to manage all your API keys within the API Keys item on the left hand navigation. For each key, you'll be able to:

Streaming with Recast requires you to connect your broadcasting equipment to Recast, using a stream input method. Recast supports live streaming using two different streaming protocols: RTMP or SRT. Those managing the stream will have a preference.
Once you've determined which streaming protocol you'd like to use, you need to set up the stream input:
Edit name- edit the name of your stream input

Regenerate - If the security key has been compromised, the RTMP Key can be regenerated, which will renew the Stream Key

Delete - If there are two or more inputs set up, the delete icon becomes active. Please note, you'll be asked to confirm this action as it cannot be undone.

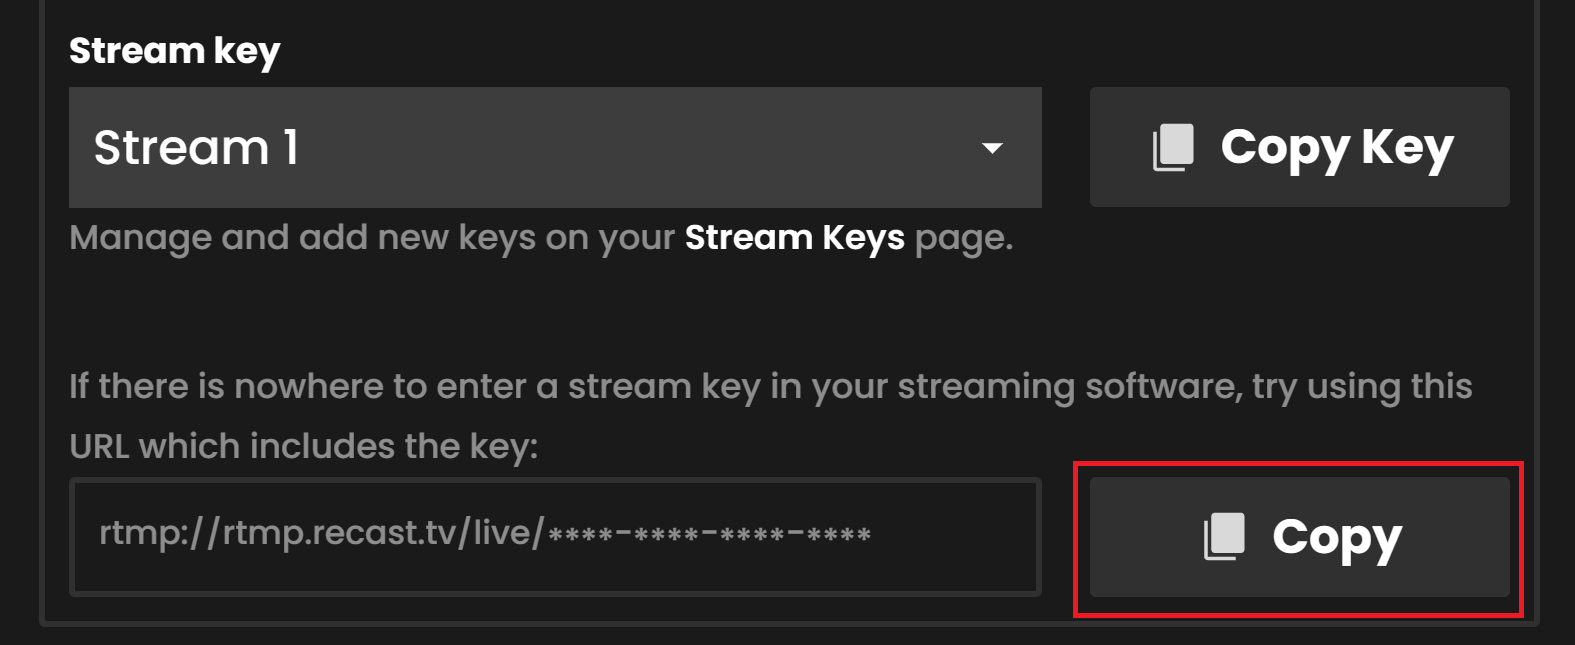
Copy: Click to copy the key if you need to paste it into your streaming software.

For security, this information is hidden by default. Click to view.

If you need help to live stream, view our guide How to live stream.
If you've integrated Recast using our API and have chosen to use Recast's user interface for managing your inventory, then this guide explains how to create and publish inventory items to make them available for to purchase.


You’ll now have the choice of how you publish your video with 2 options:

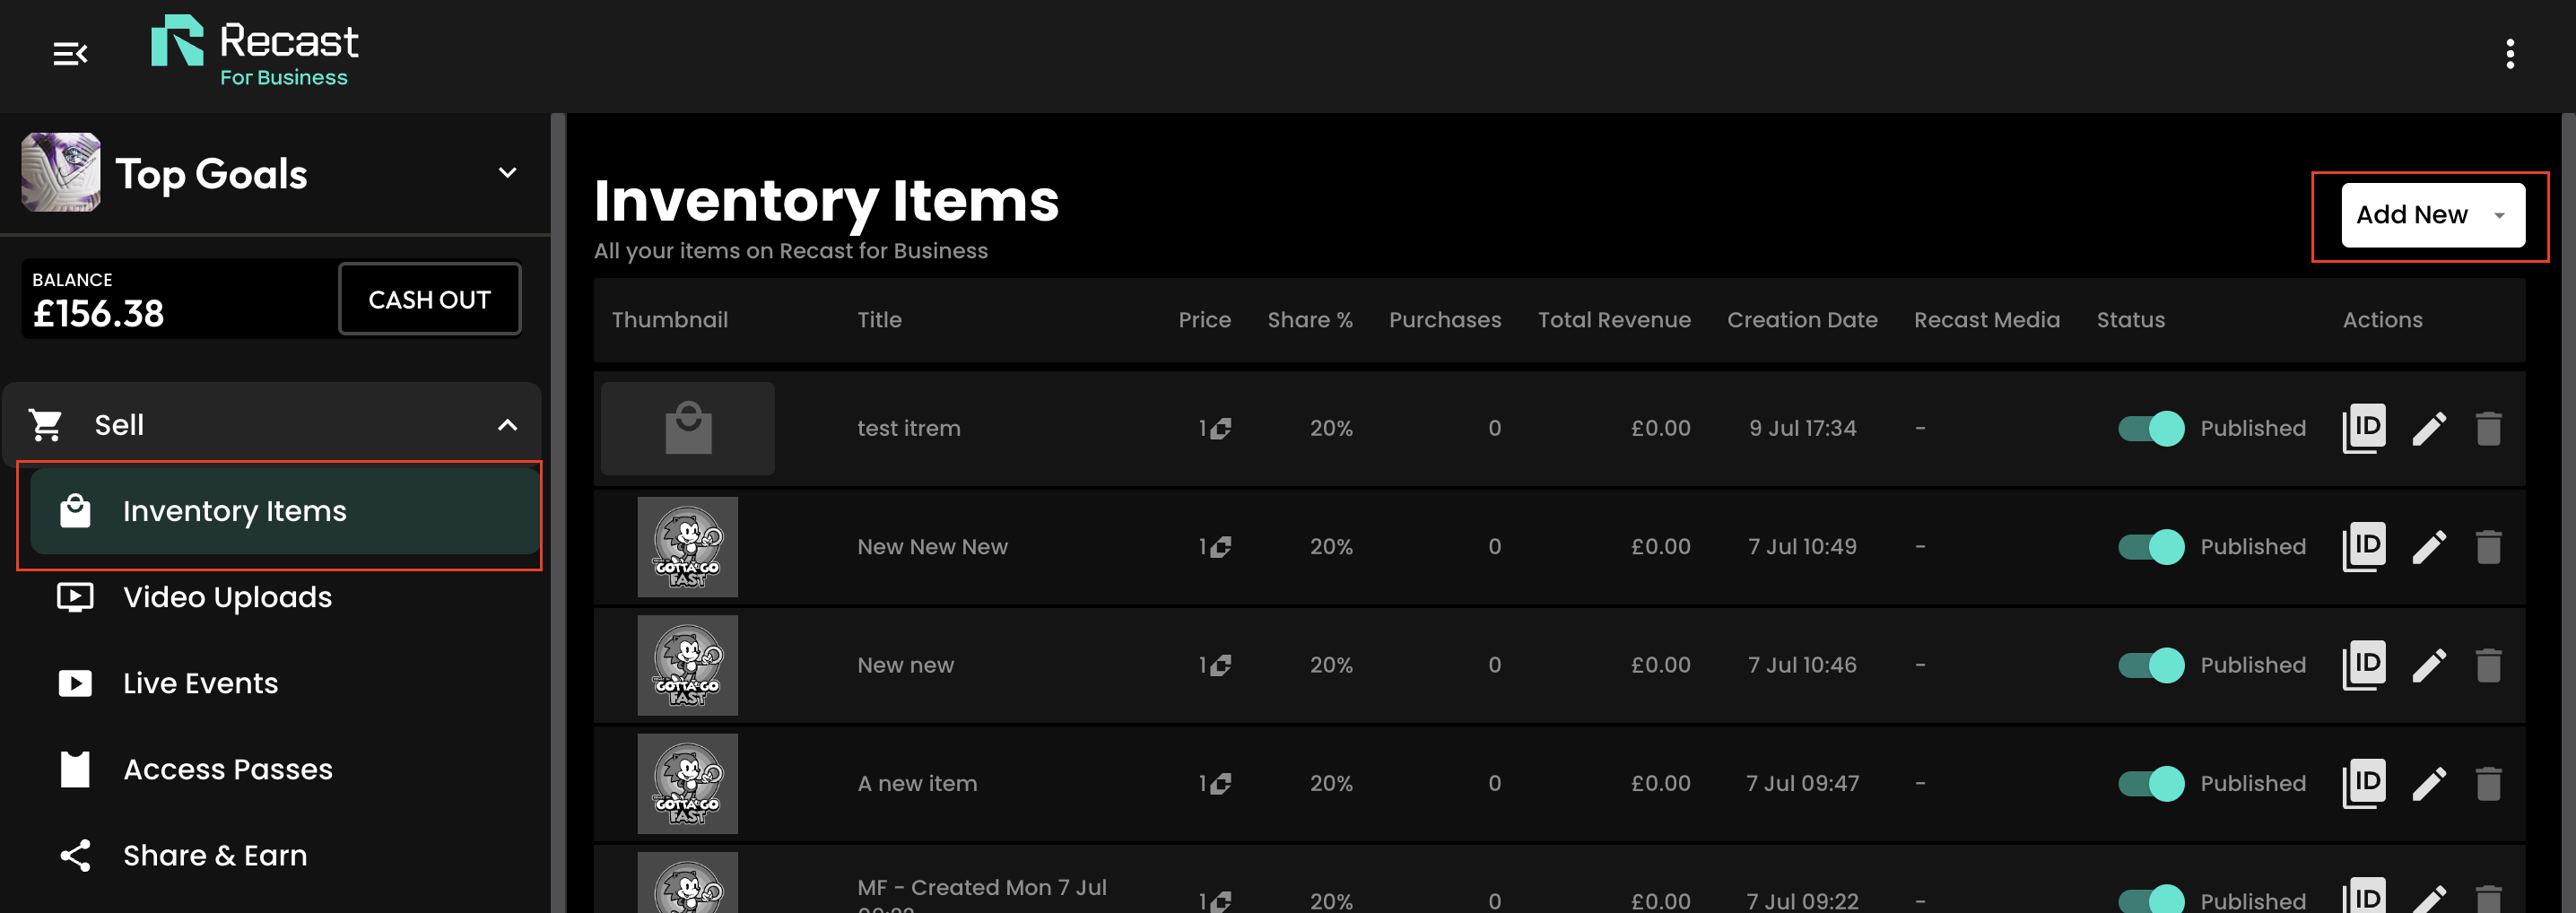
You'll be directed back to your inventory list. Here you'll see a view of your entire inventory list, with relevant information and actions including the ability to:
As an API client you may find it useful to copy your inventory item ID for use with your integration. To copy the item ID:

Recast's live streaming is delivered using Mux Live Streaming software.
As explained by Mux, these streaming settings are provided to offer a very simple recommendation of where to start, but we do recommend playing with your settings to see what works best for your content.
RTMP or SRT
H.264 (Main Profile)
AAC
We support resolutions up to 1080p. We suggest streaming at one of these standard resolutions:
We support input frame rates up to 60fps.
As shown above, for most HD quality streams, we suggest between 3 and 6 Mbps for the video Bitrate. Here is some more detail:

CBR (Constant bitrate)
25% is generally a safe starting value
Set to the percentage of overhead you have available in your internet connection for bursts of retransmission. For example, if you have a 5Mbps internet connection, and you set your encoder's target bitrate to 4Mbps, a value of 25% would be appropriate, as it would allow the encoder to burst to 5Mbps for retransmission purposes.
We suggest using the main or high profile based on your output resolution and frame rate:

128 kbps
Stereo
We only support progressive scans on streams. You can stream using an interlaced feed, but we are unable to deinterlace a stream input, so artefacting will appear.
You can stream for up to 6 hours continuously. If you need to stream for a longer duration, please contact techsupport@recastpay.com, and we can discuss your requirements.
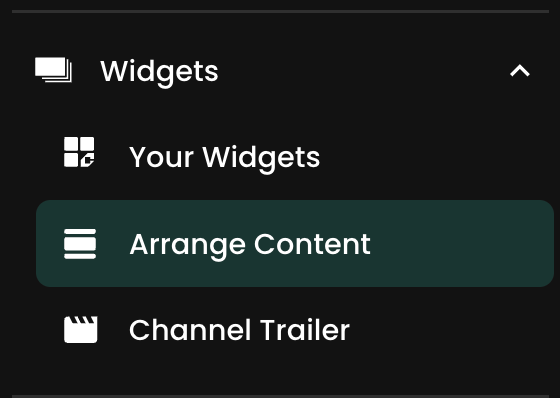
Recast’s ‘Arrange Content’ feature enables you to curate any live or on-demand videos into a ‘Custom Section’ within your Recast Embed Widget, and order this content as you see fit. This is perfect for episodic or related content, i.e. highlights videos from a competition, all episodes from one series of a drama or simply any related content you think your audience would be interested in.
For a complete guide on how to create a Custom Section, click here.
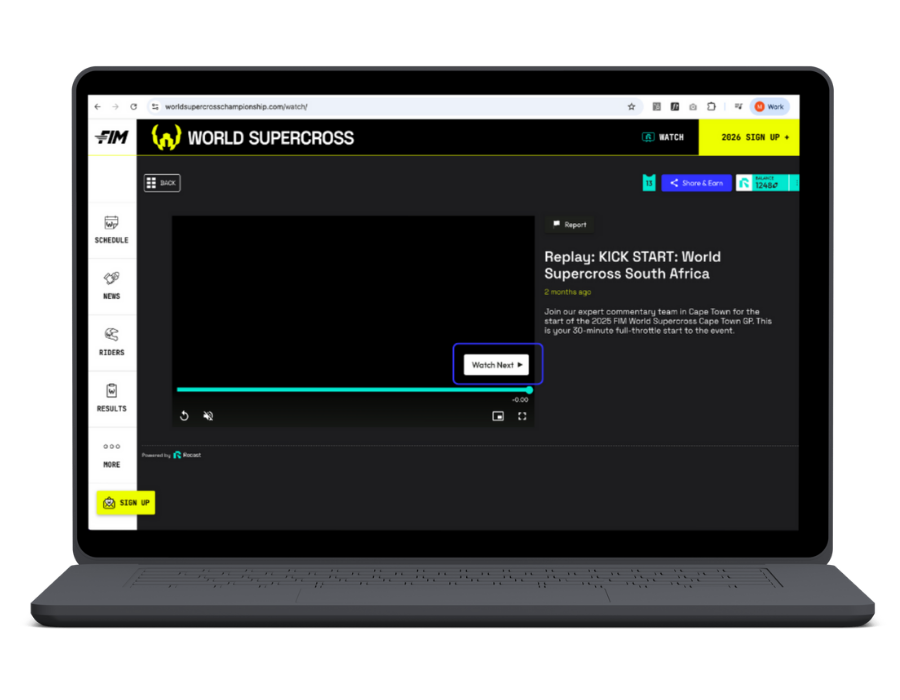
Once you have created your Custom Section within your widget, enabling the “Watch Next” prompt for users couldn’t be easier.


Now, every time a user finishes watching a video in this section of your widget, they be prompted to watch the next video, in the order that you have arranged your content.
1. Go to Sell > Live Events and click the ‘+ Live Event’ button from the toolbar within Recast for Business

Please note: If this option is not available you can contact partnersupport@recast.tv to enable it on your account.
2. You will need to add a title, description and thumbnail image for your event.
Thumbnail specifications:

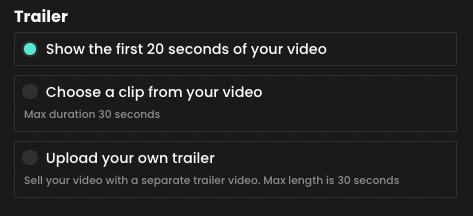
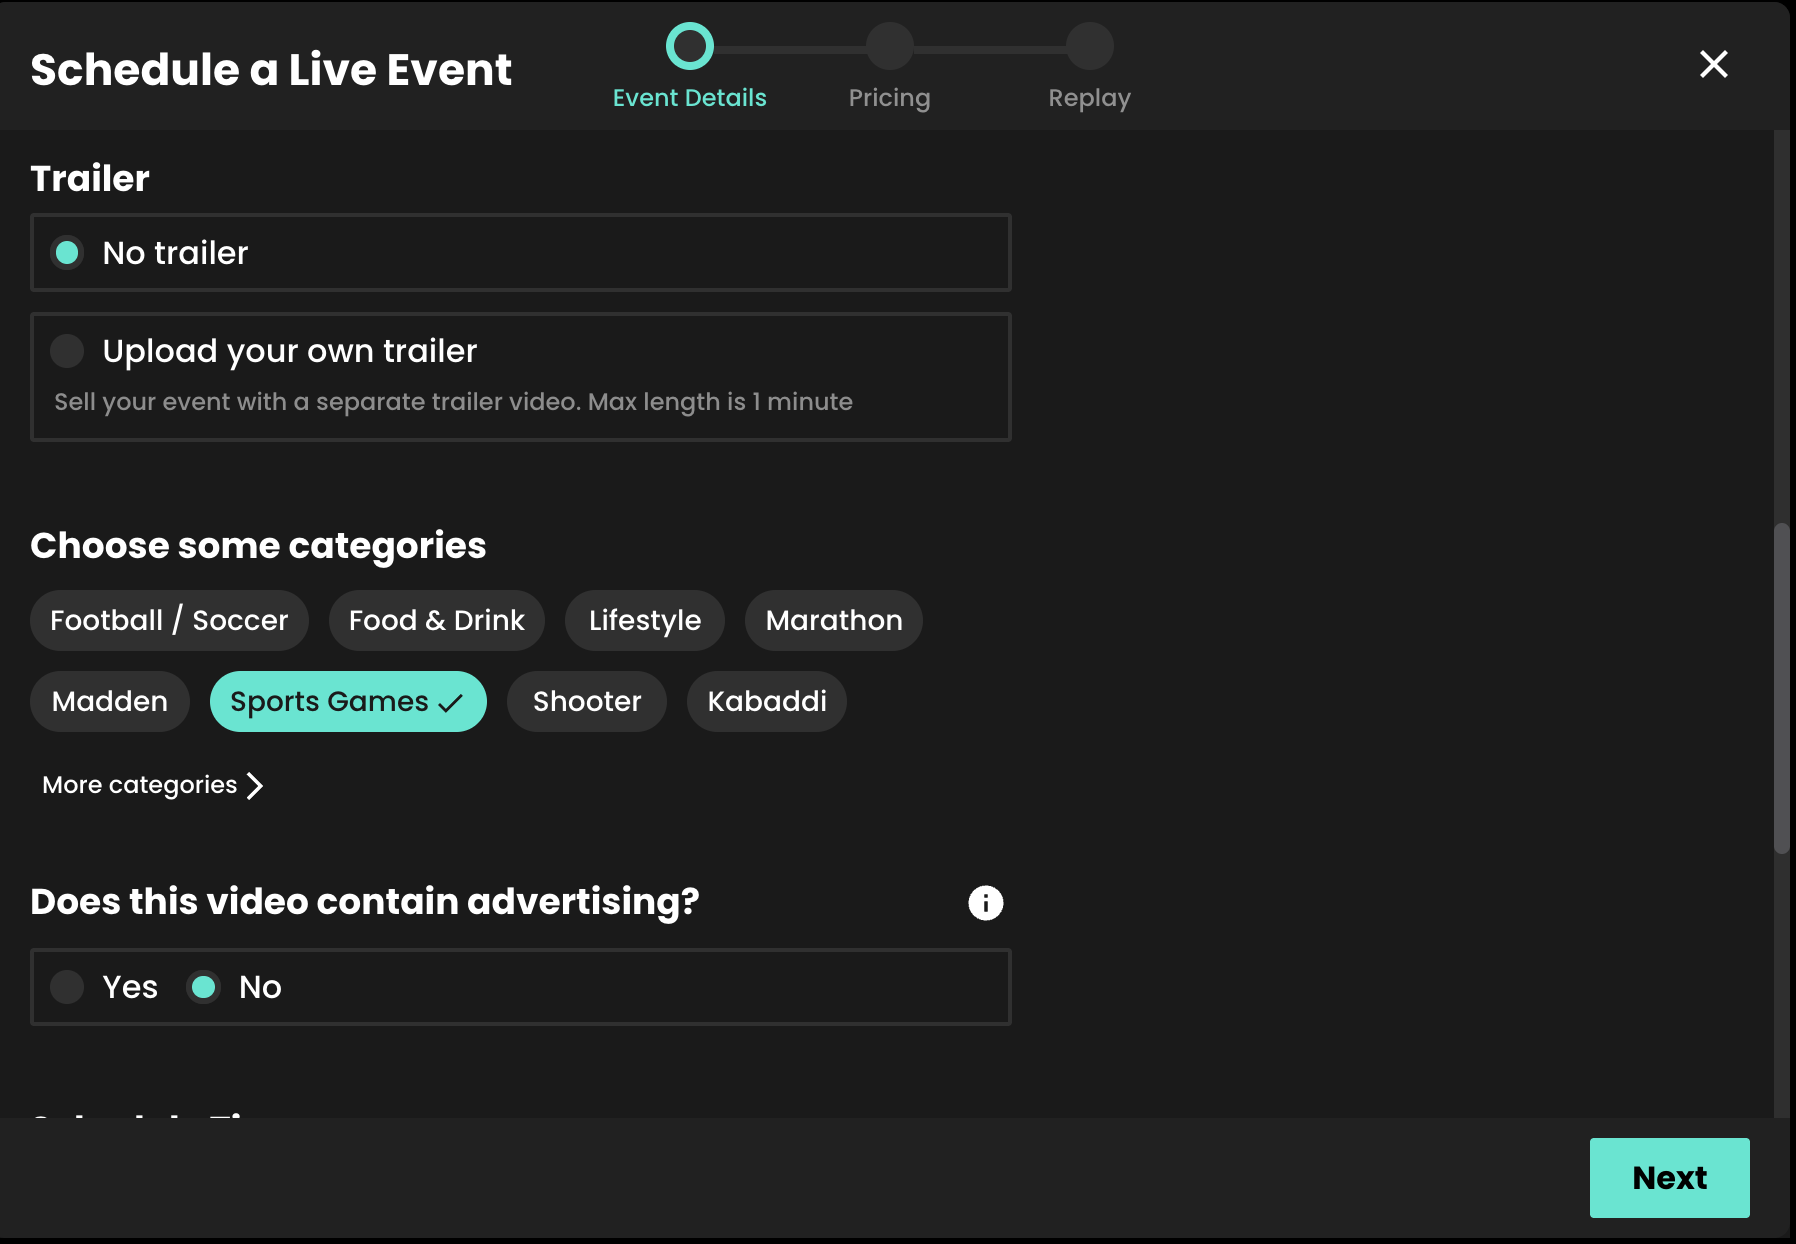
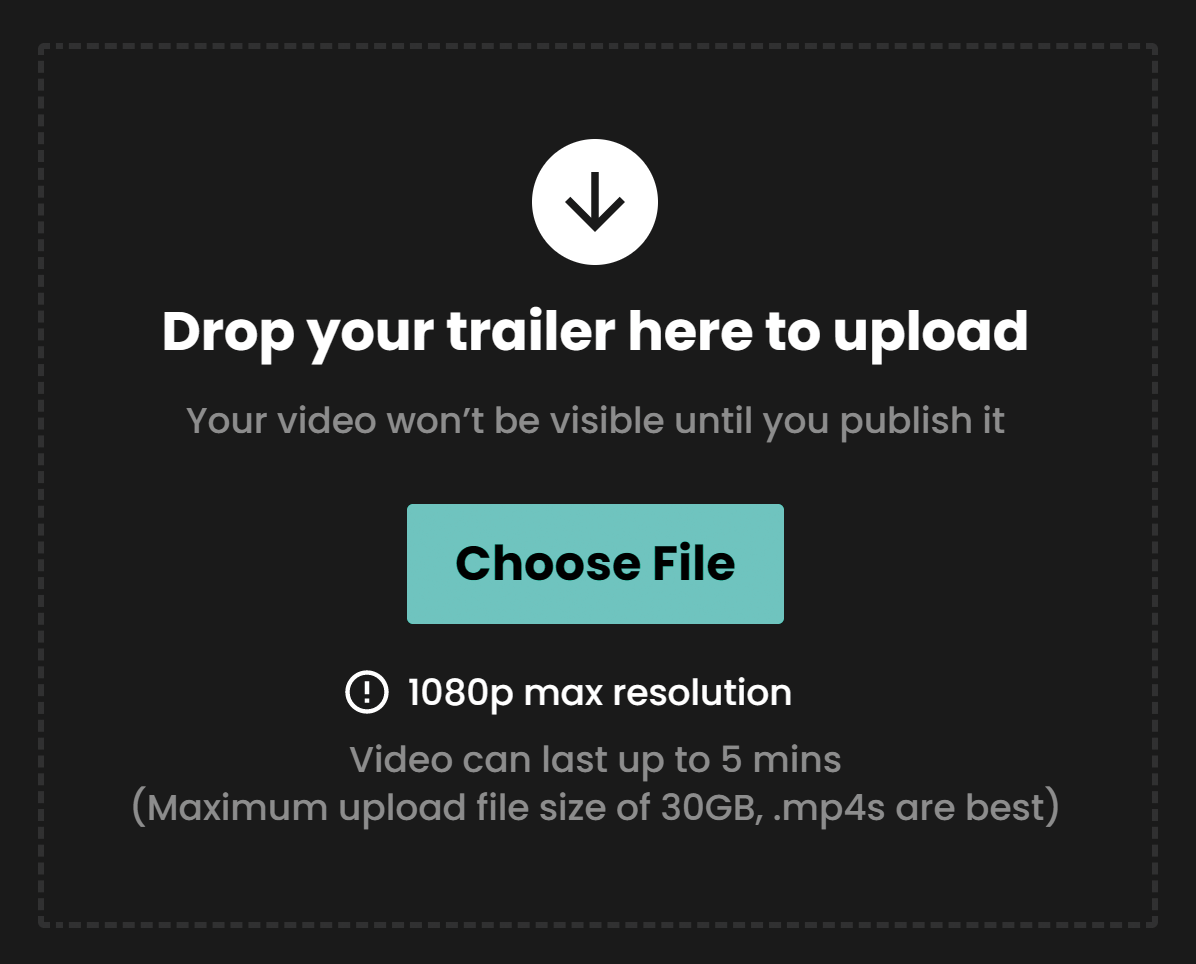
3. Select whether or not you wish to upload your own promo trailer for the event. This will appear on your Widget.
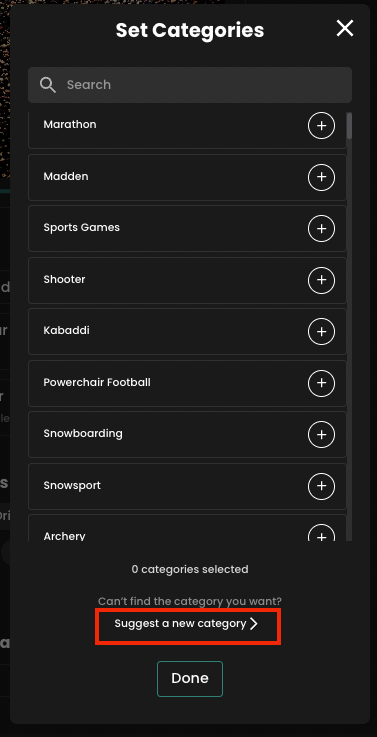
4. Select the appropriate categories. Categories appear on your widget to allow your users to find your content easily. You can automatically request new categories to be added if required.
5. Select whether or not your stream contains advertising.
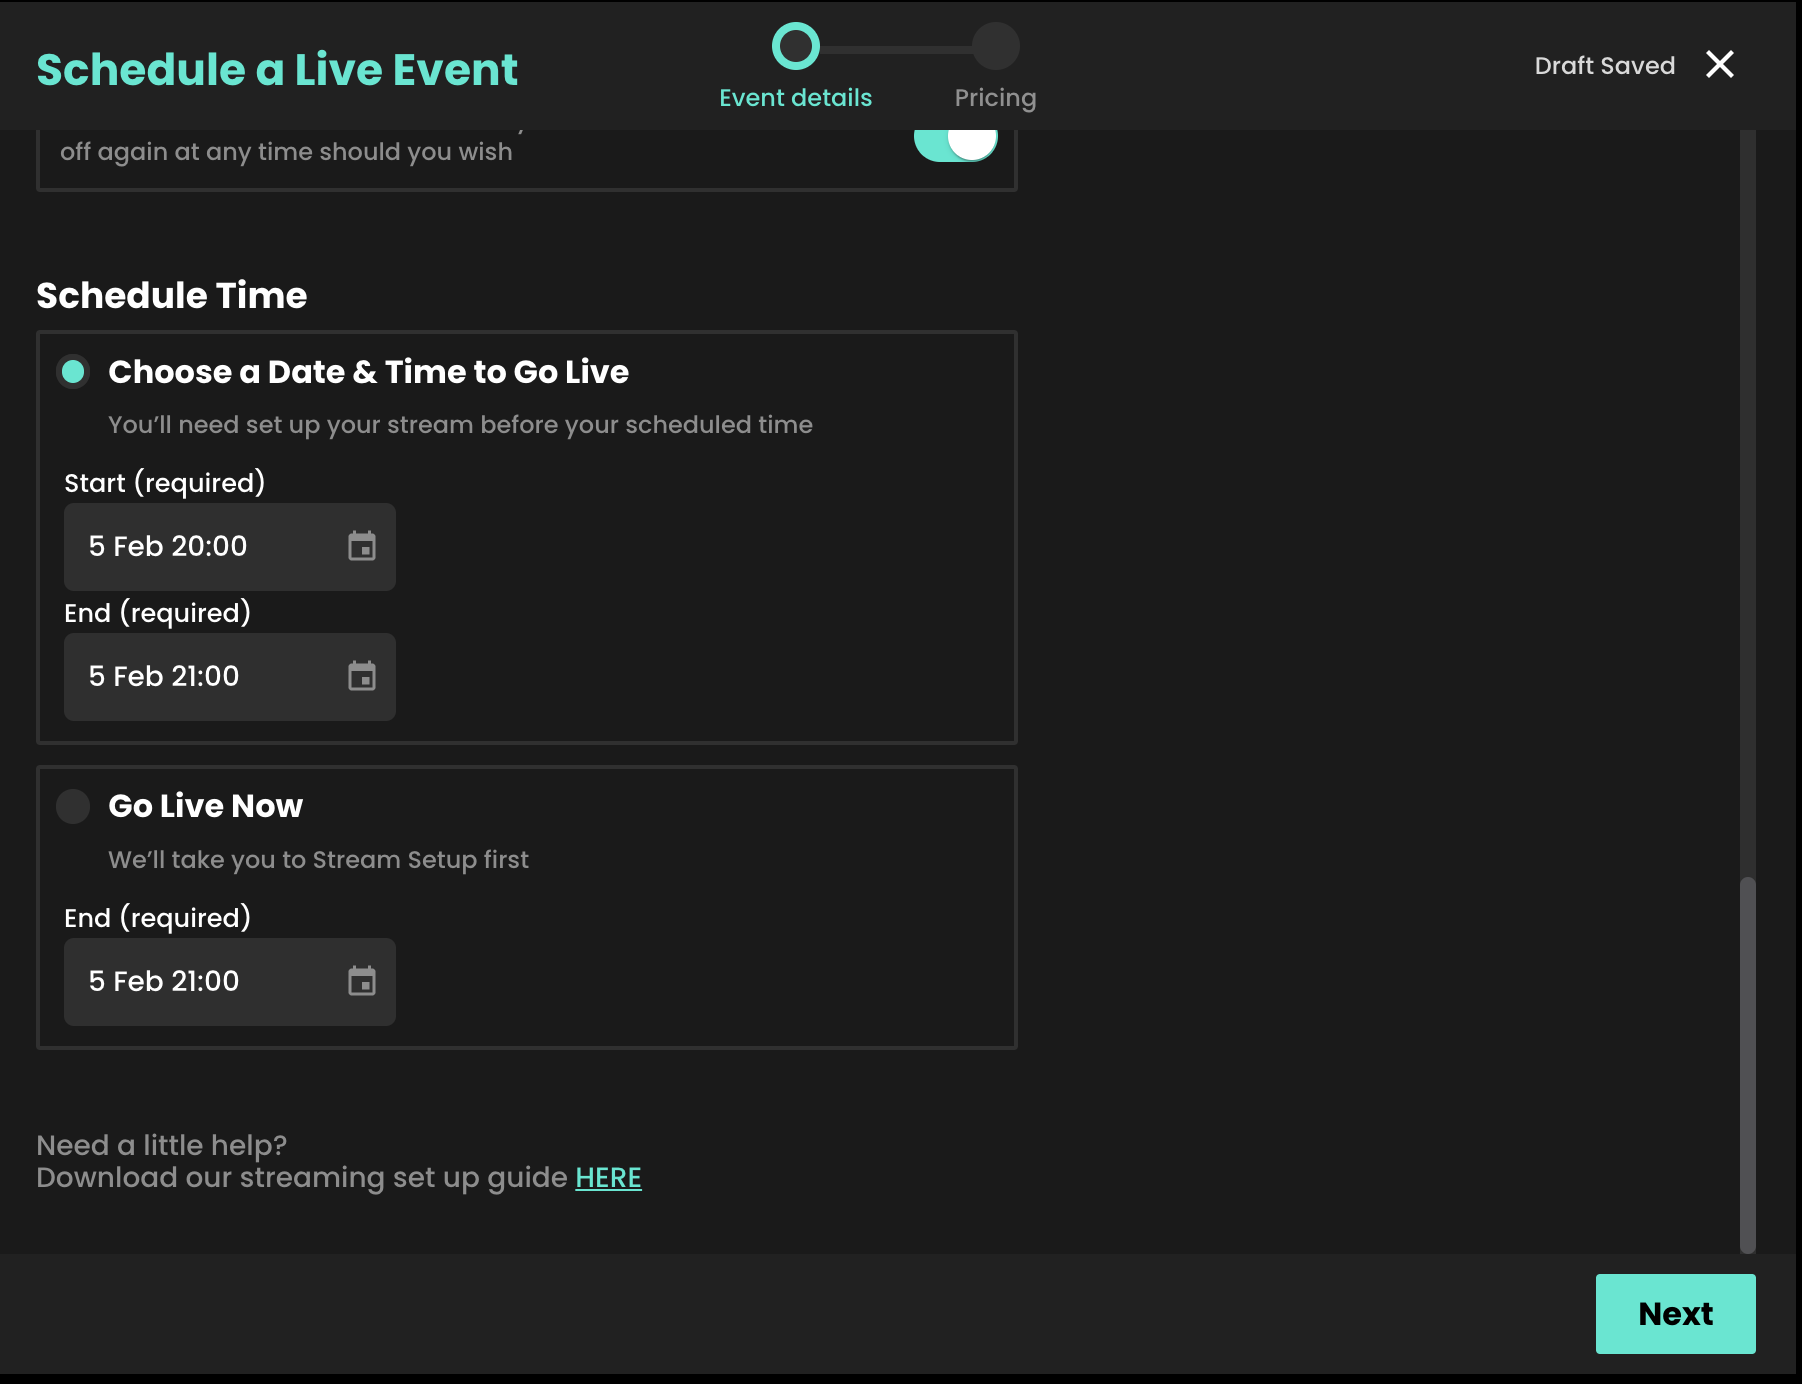
6. When setting up an event, you can either choose to go live immediately or schedule your event for a later date.
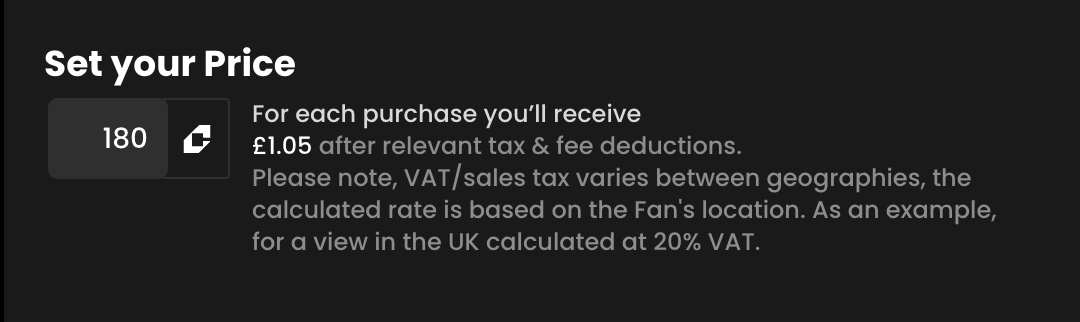
7. Select your price. Our recommended pricing guidance takes into consideration the length of your stream and what other Vendors would typically charge for a live event.
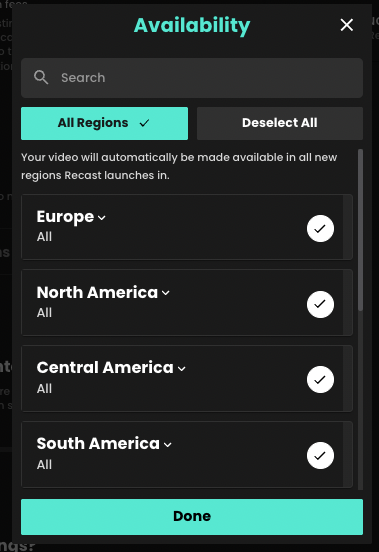
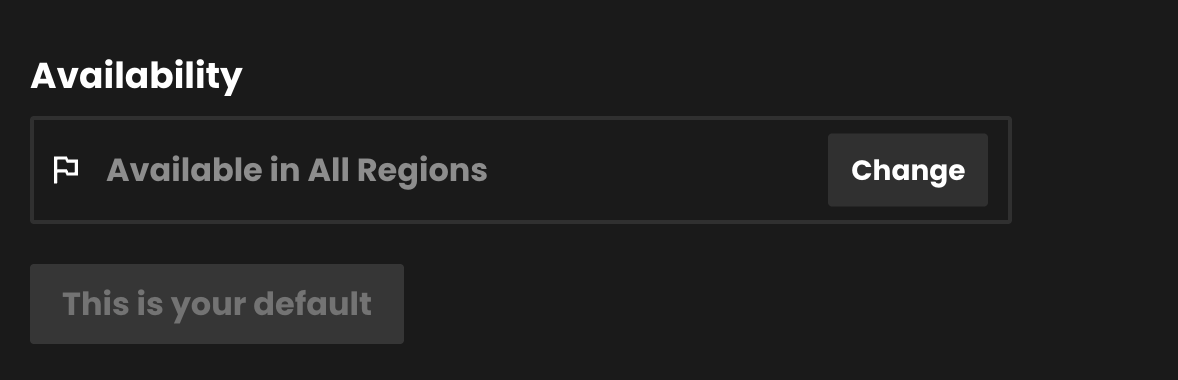
8. You can select which countries you want your content to be available in when scheduling an event. This can then be edited at any time, e.g. if you require temporary geo-blocking for broadcast deals already in place.

You can find an up-to-date list of the countries Recast is currently available here. You can also create a default list of countries you want your content to be available in, so you don’t have to select countries every time you set up an event.
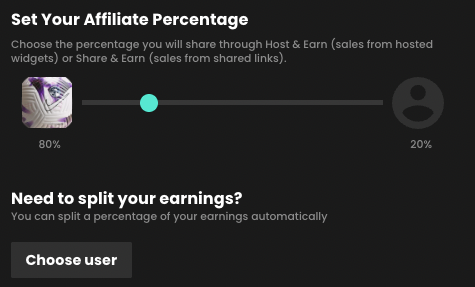
9. The share value is the amount any third party will earn when either Sharing your content using Share & Earn links, or hosting your content using Host & Earn Embed Widgets.

10. Adding DRM (Digital Rights Management) gives you additional protection on your content from being illegally downloaded and shared. To do so, click "Enable DRM:

11. Click Schedule Event to complete the set up of your live stream.
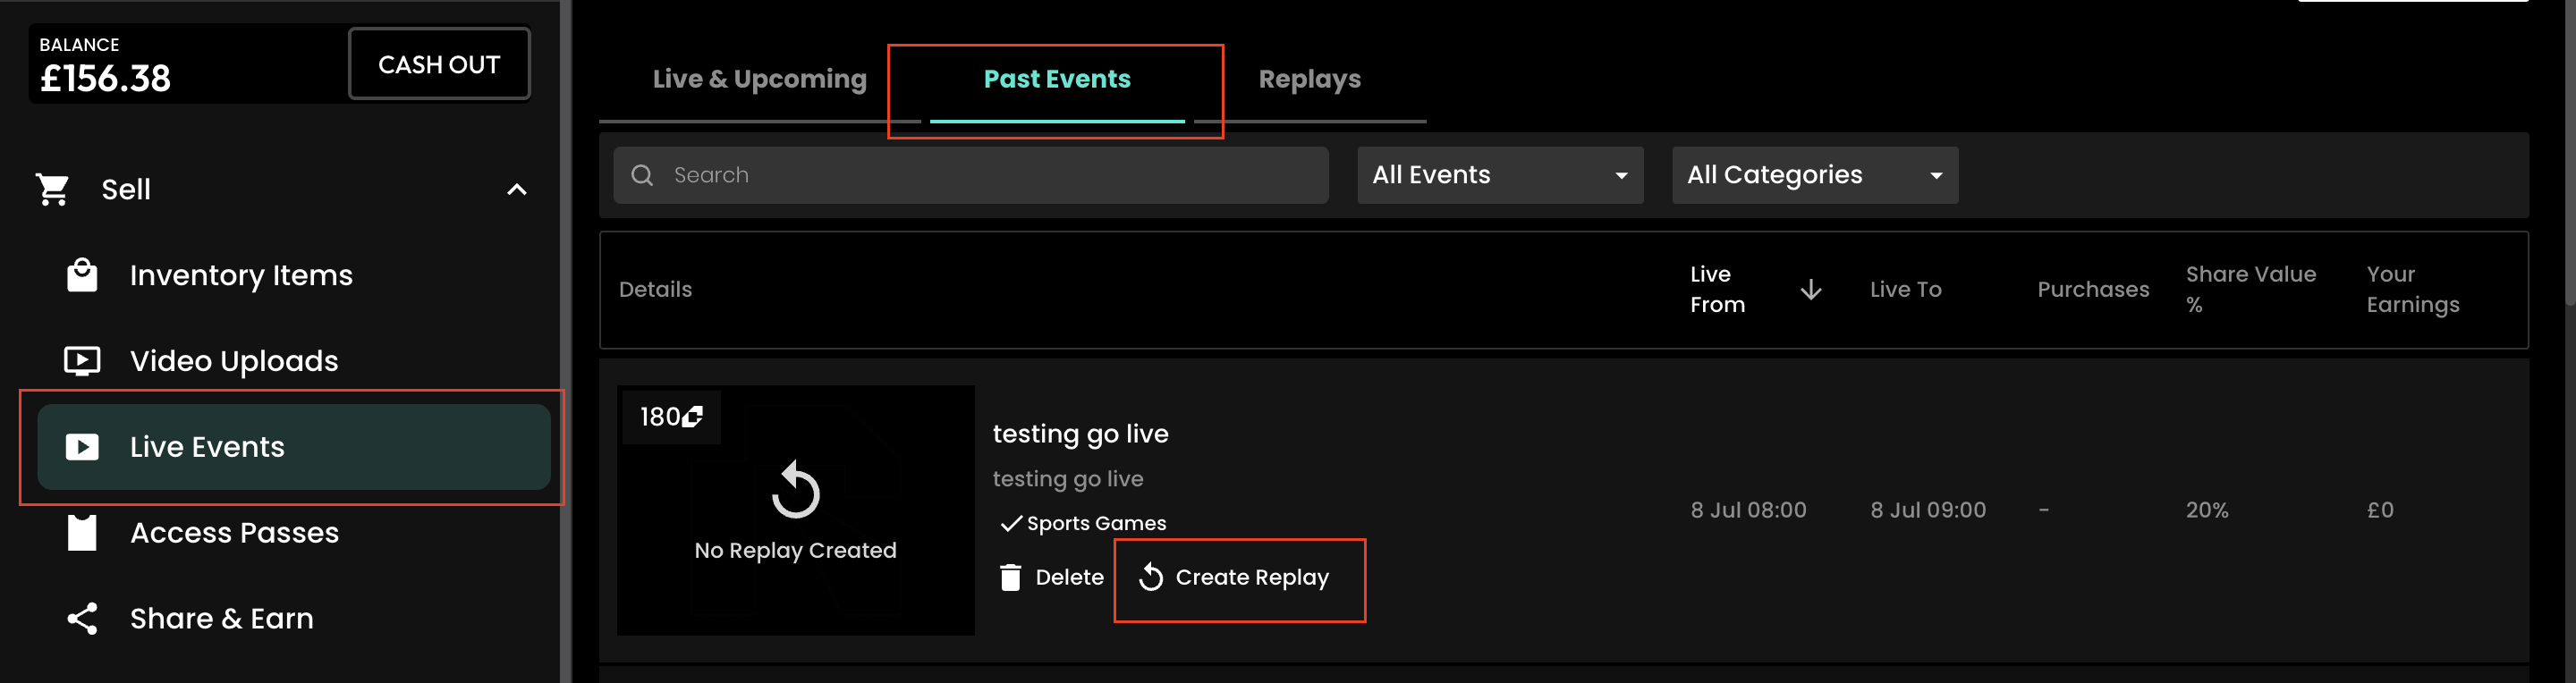
For more information on generating Replays, either manually or automatically, click here.
Access Passes are an alternative way for your users to enjoy your content. Passes give fans access to all your content for a specific time period (currently you can activate a 1 day, 3 day, 7 day 14 day and 28 day pass for your widget) and you set the price.
You can activate up to 4 different durations at a time, they will be available for fans to purchase when you make them available.
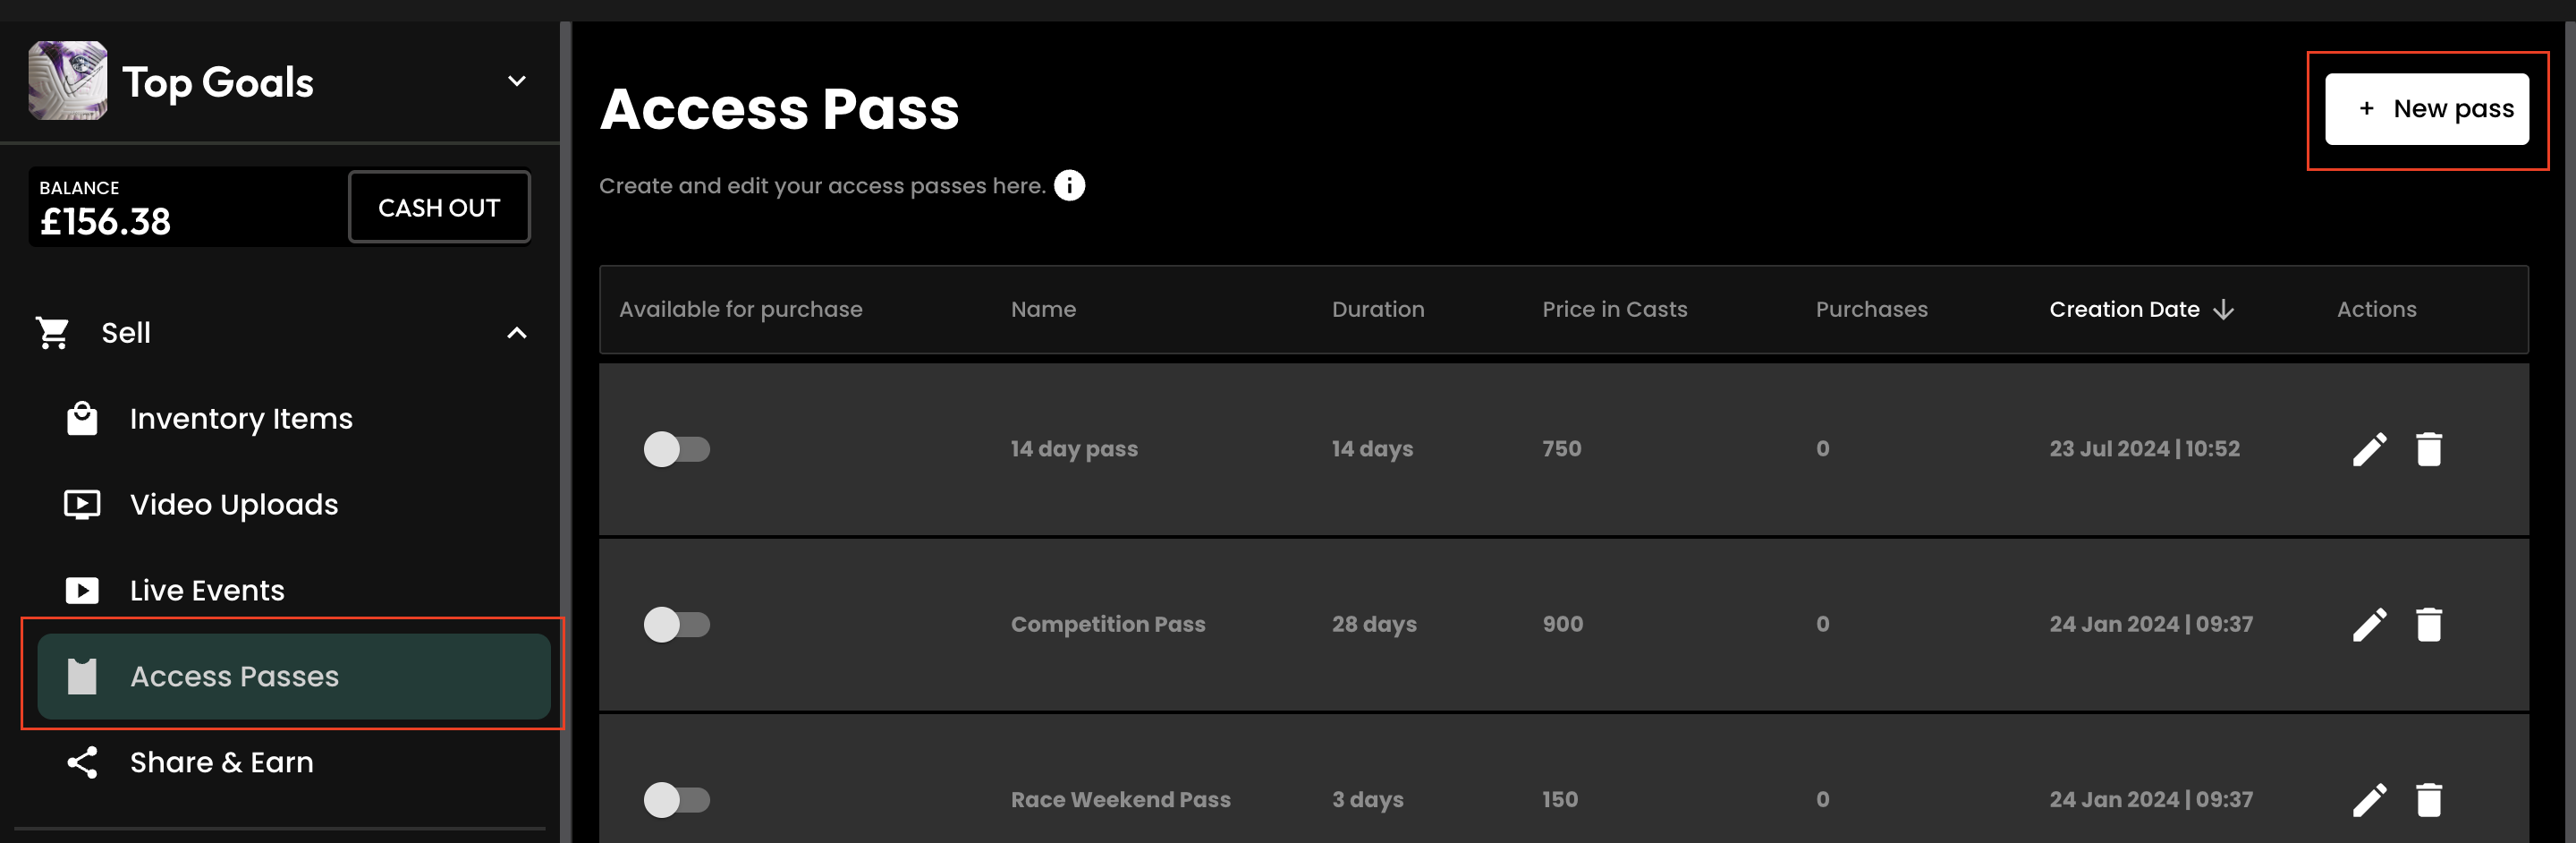
You can create, view and edit your Access Passes by selecting ‘Access Pass’ under "Sell' on the left-hand menu of your Recast for Business account.
When you first land on the Access Pass section you will see our initial screen with a button which allows you to ‘Create your first Access Pass’. Simply tap this button to get started.
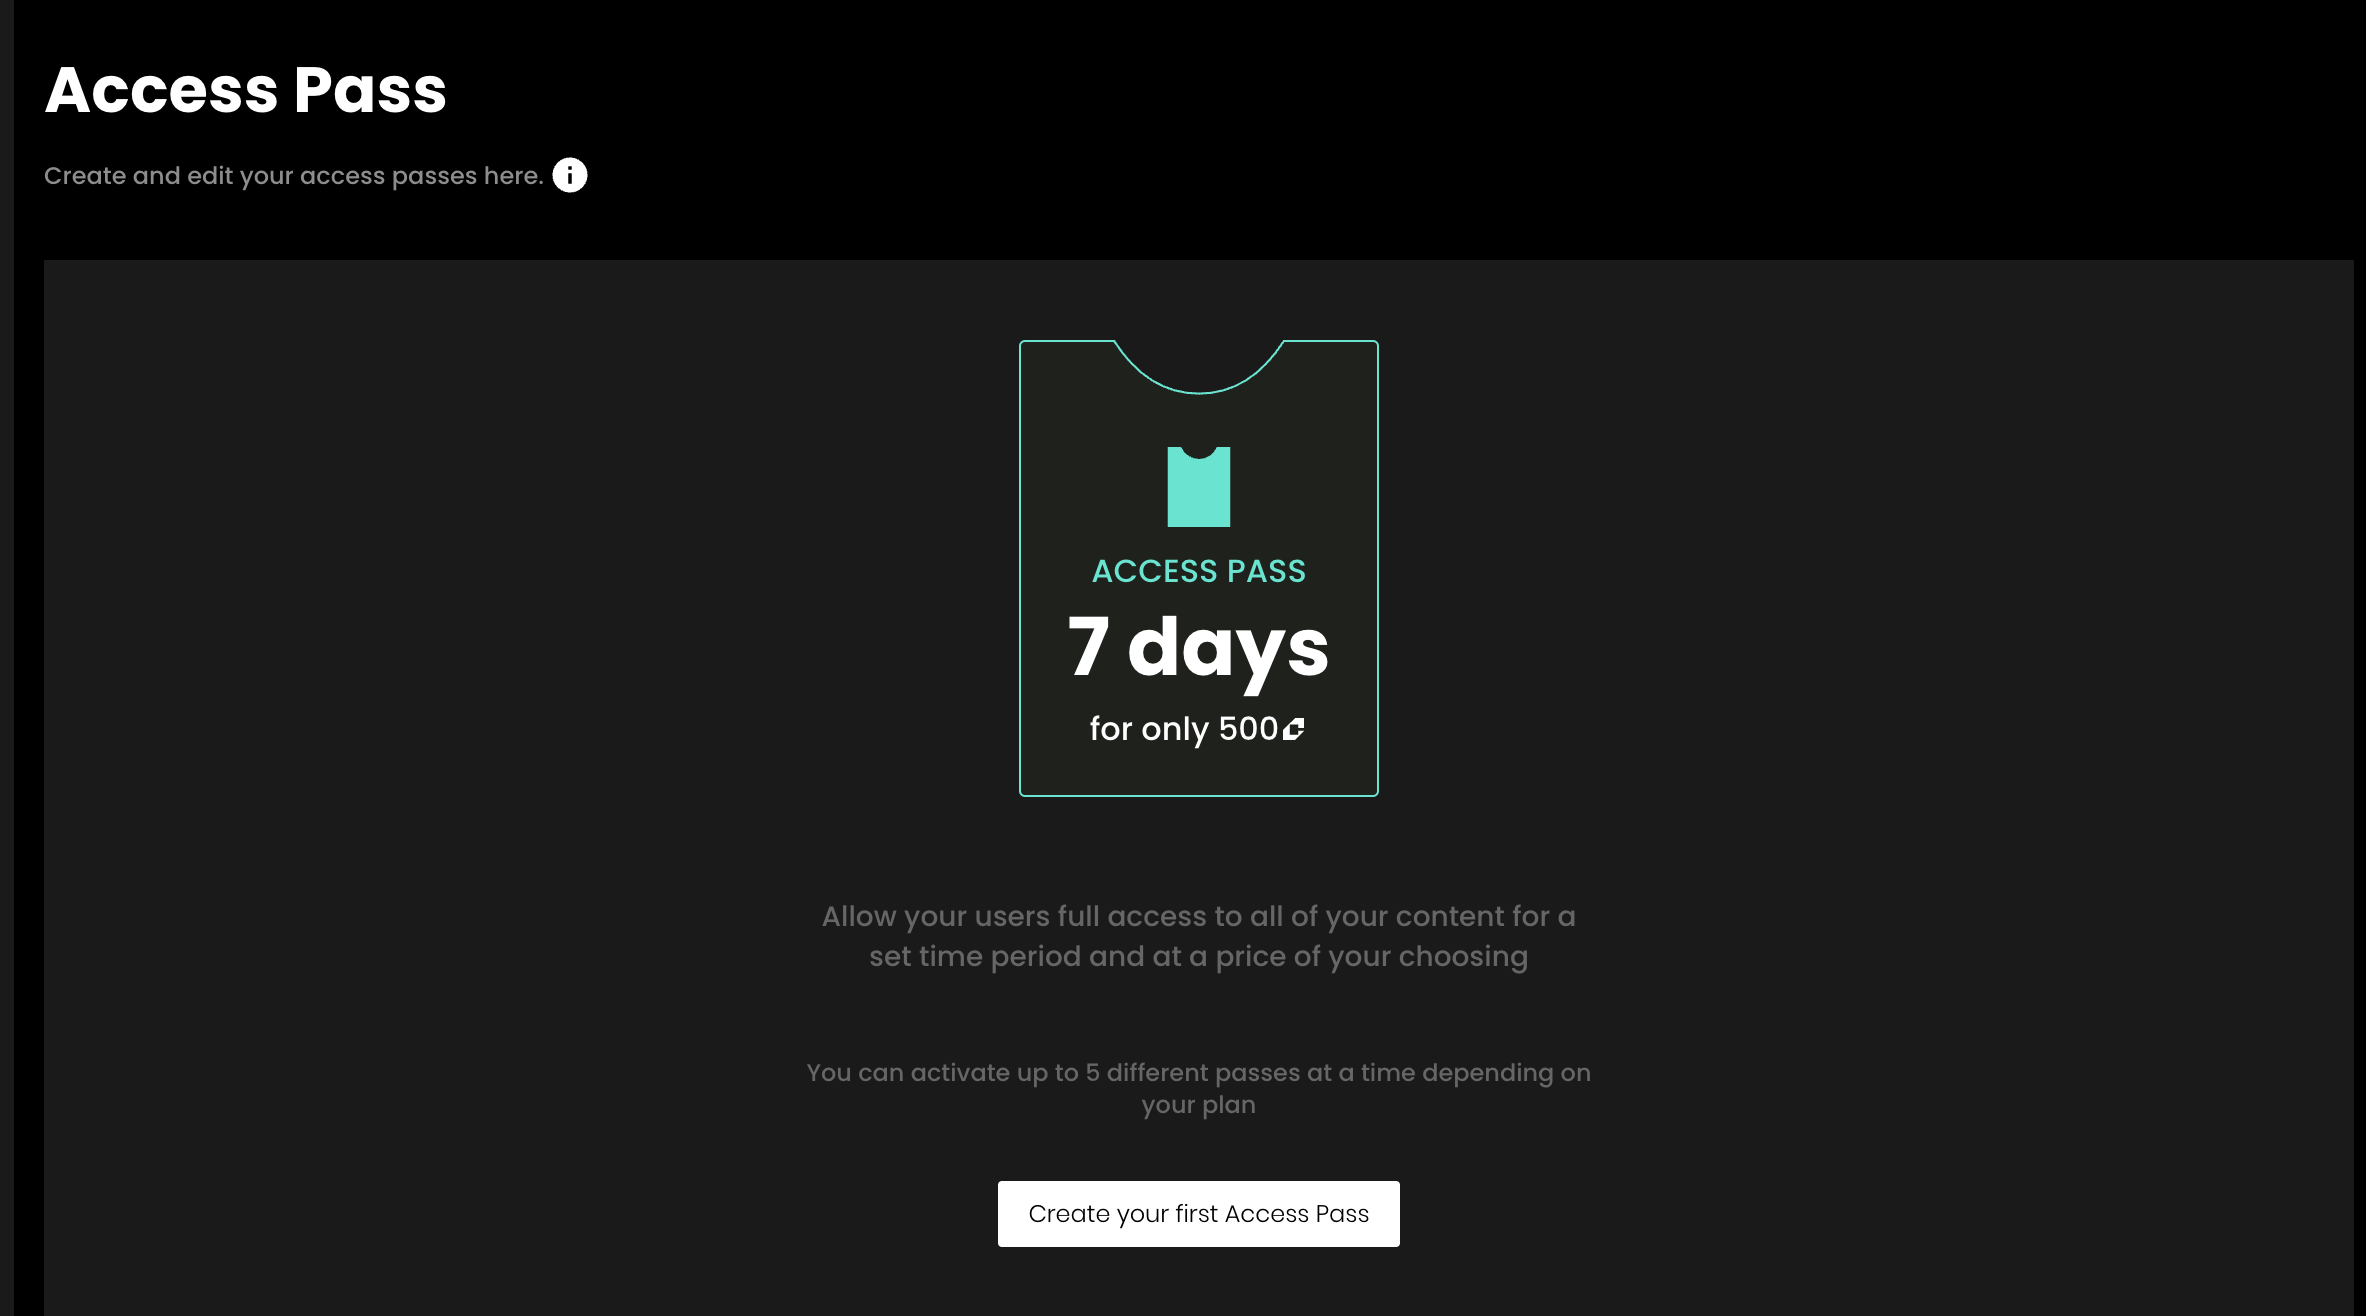
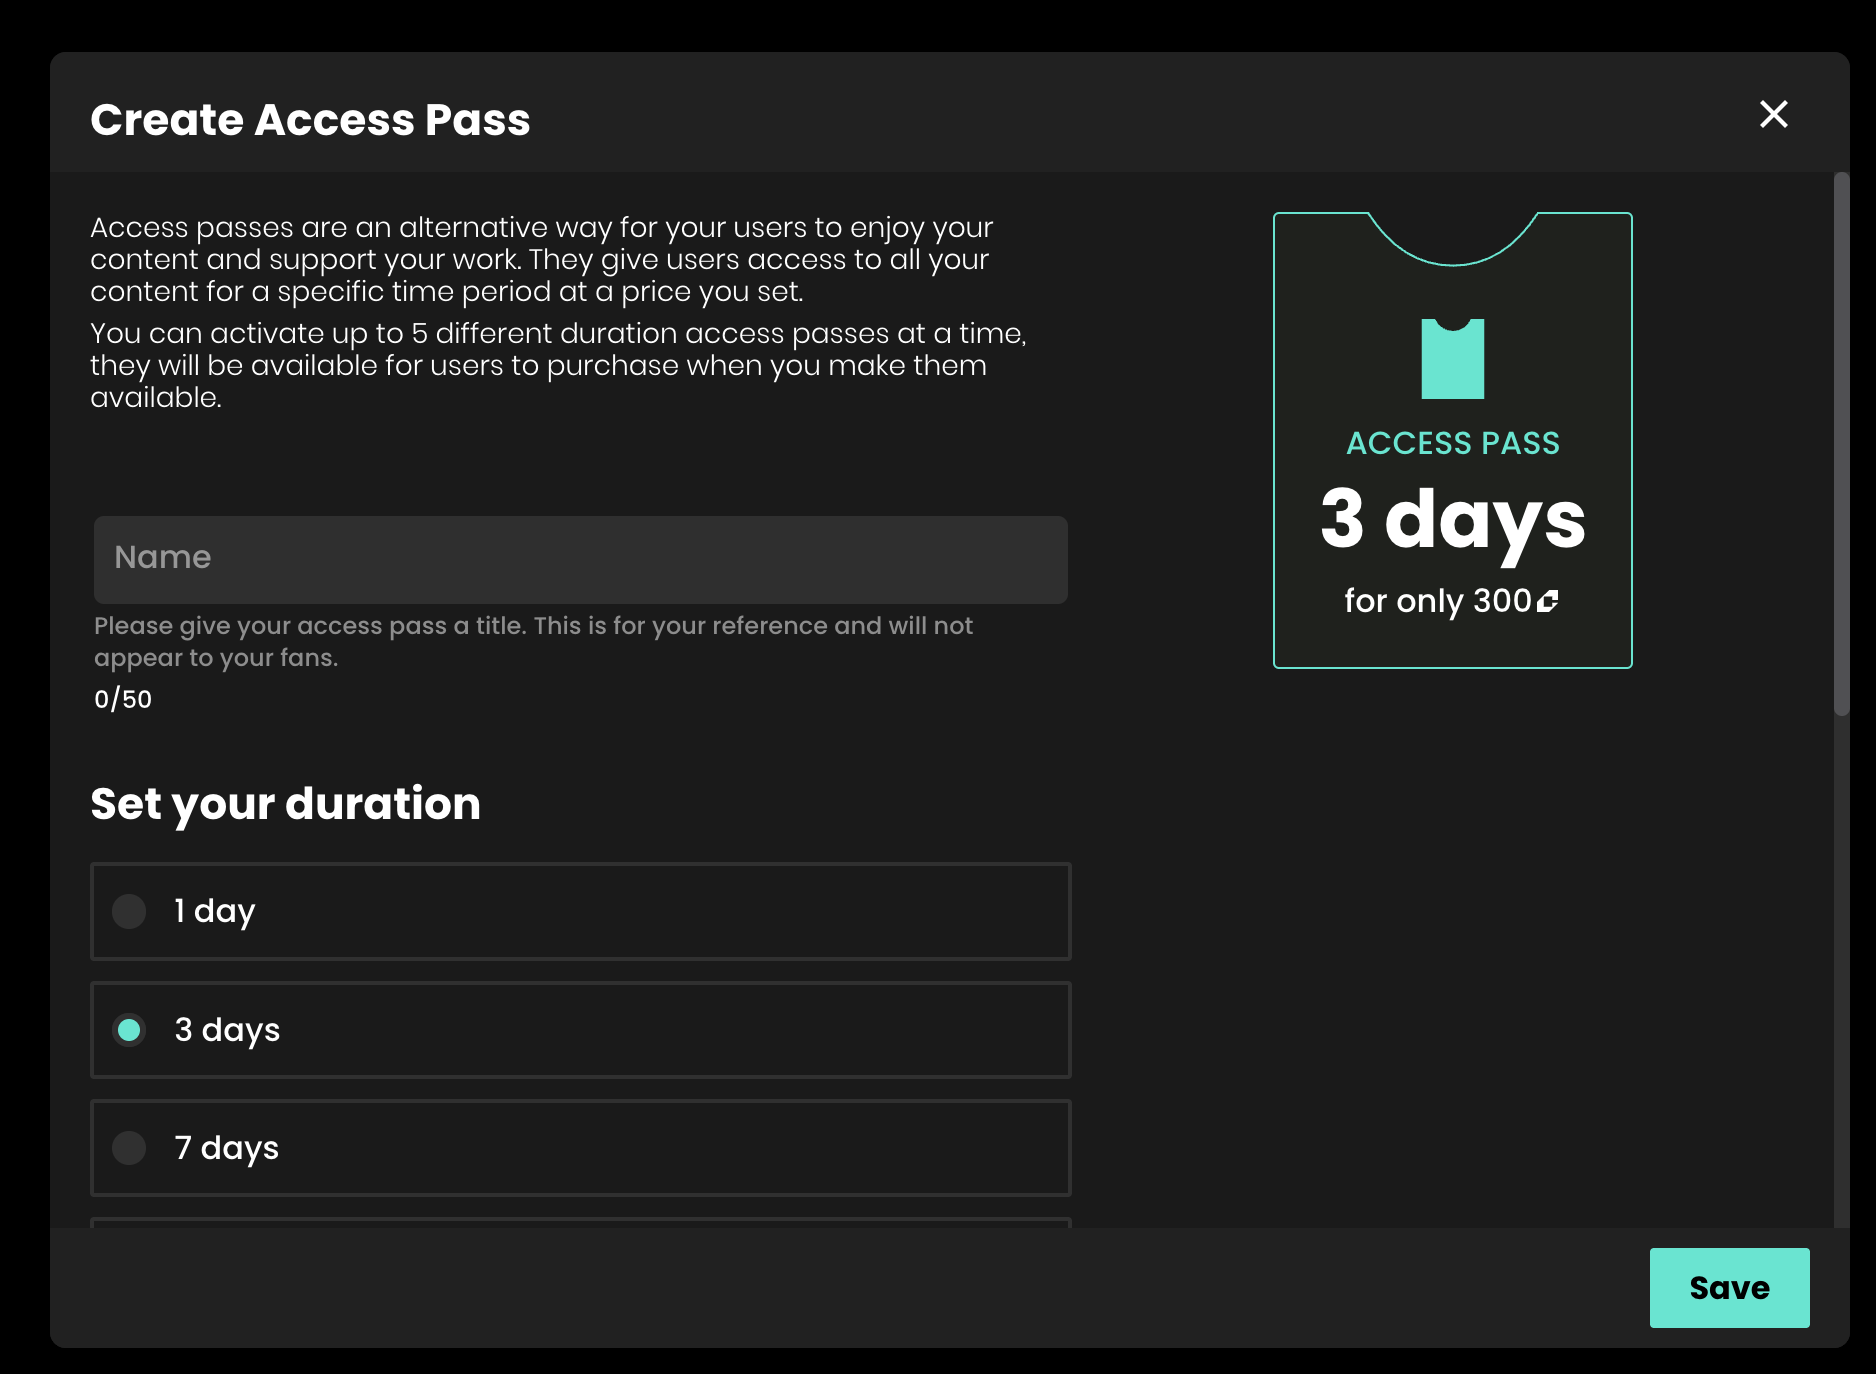
You will now see the ‘Create Access Pass’ screen.
Firstly from here, give your Access Pass a name. This will not be visible to any of your fans, but acts as an internal reference for you to track the success of different channel passes you may have active at certain times.
Secondly, set the duration for your Access Pass. This can be either 1 day, 3 days, 7 days or 28 days. nb. you can only have a maximum of 1 pass of each type (1, 3, 7, 14 or 28 days) available for purchase on your widget at any time.
Finally choose a price for your Access Pass. Remember for this price, users can access all of your videos and live events whilst the pass is active so make sure your pass reflects the value of this access.
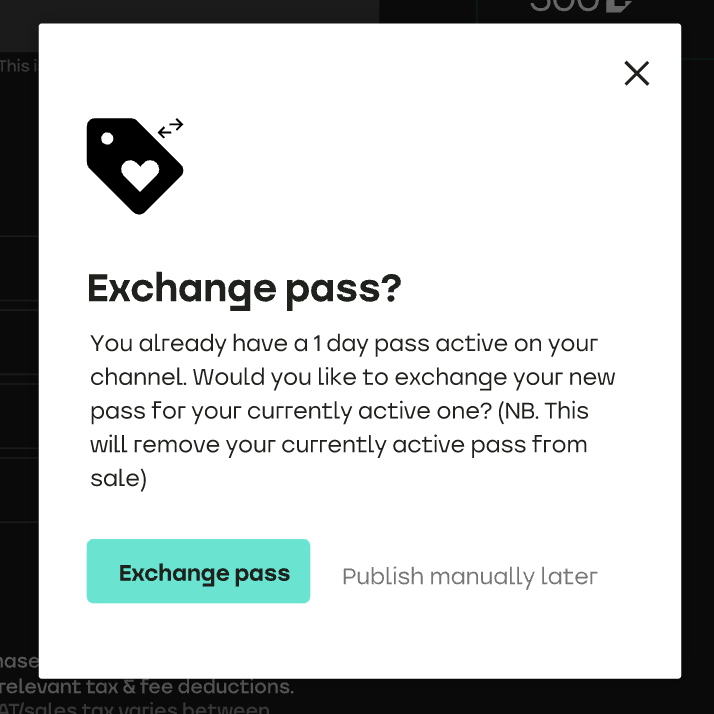
You can then choose to save and publish the pass immediately (which will enable the pass for sale straight away) or choose to ‘Publish manually later’.
Then when you are happy with your selection, simply tap the ‘Save’ button in the bottom right corner.
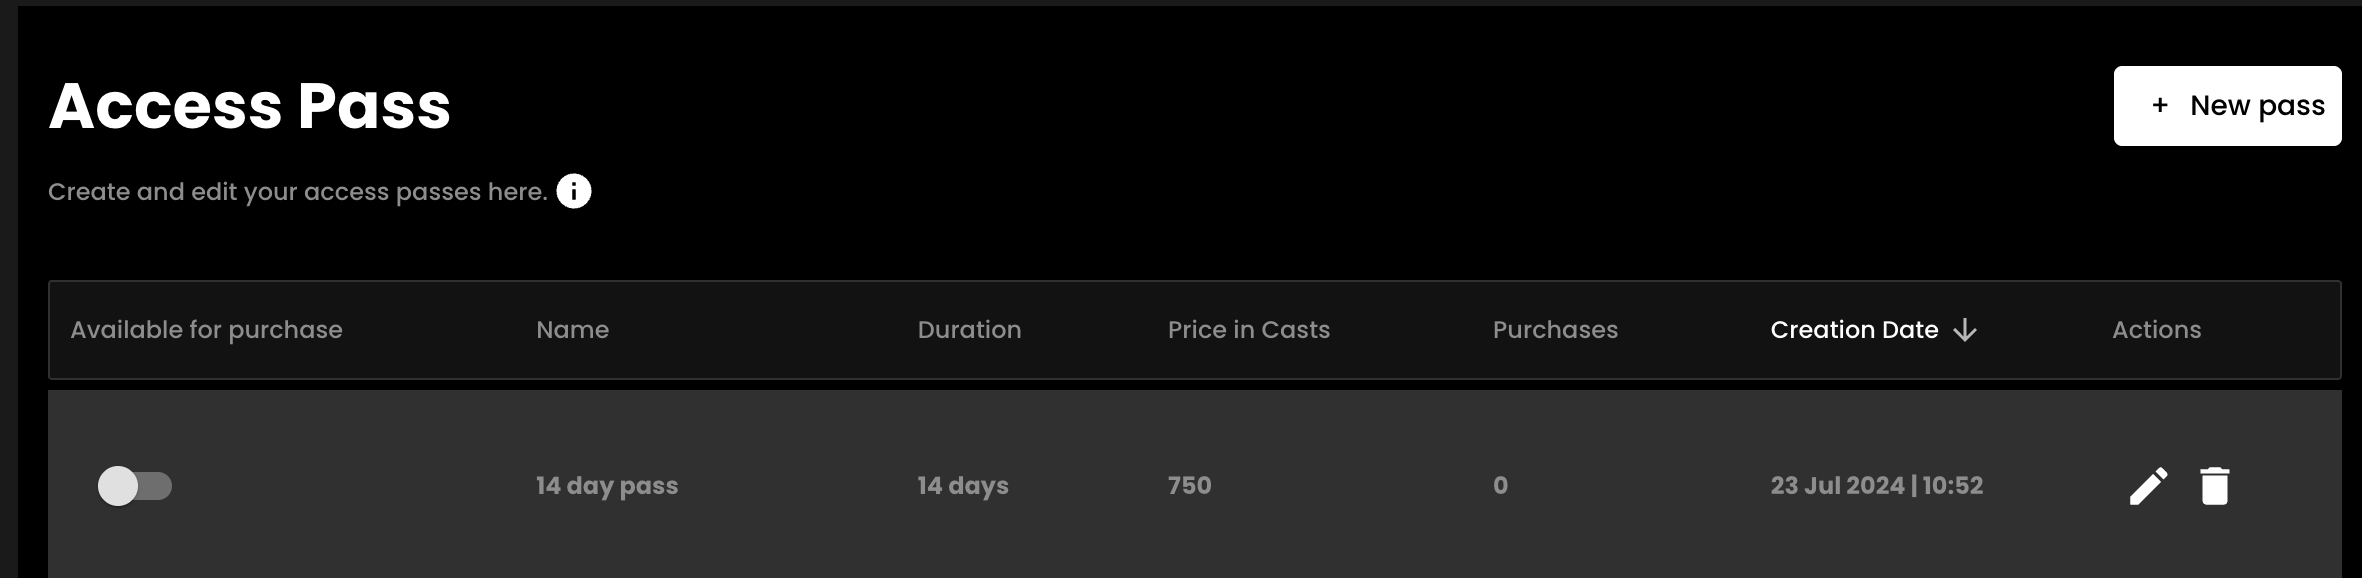
Once you have created your first pass, you will then be able to see any passes you have created under the Access Passes section.
You can see:
From this section you can also edit or delete your passes using the edit and delete icons respectively.
You can easily make your passes available or unavailable for sale from this toggling ‘Available for purchase’ on / off.
Please note that setting a pass to unavailable stops it from being available for sale, but will not invalid any active passes your fans may have previously purchased. This will remain active until their expiry date (1, 3, 7 or 28 days from the purchase date as relevant).
You can edit your pass by tapping the pencil icon. You can currently only edit the title of your pass, or change whether the pass is published (available for sale) from the edit screen.
You cannot change the price or duration of the pass. This is so that you can keep track of passes of different lengths and price points easily.
If you would like to change the price of a certain pass, simply create a new pass of the same length and set it to the new price. You will receive a warning when doing this that the currently active pass of the same length will be disabled.
If you have a pass that has yet to have any purchases, your can delete this from your list by tapping the delete icon on the Access Pass list view.
It's important that you run a test stream ahead of your first live stream, or any subsequent steams in different venues or using different equipment, to ensure that your streaming set up has no issues when connecting to Recast. It's easy to run a test stream, in such a way that it does not show to the public. Here's how:
Firstly, please let us know when you are planning on running your test stream so we can arrange to be on hand to support. Email us at partnersupport@recast.tv to agree a time.
1. Log in to Recast for Business
2. Go to Sell > Live Events and click on the ‘+ Live Event’ Button
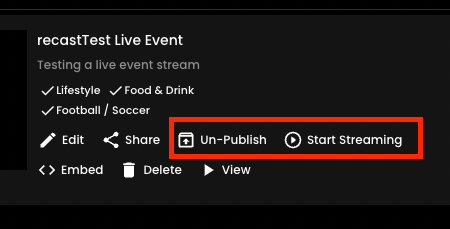
3. Add a title and description. IMPORTANT - To get this to work in such a way that the public will not see this on your widget(s), you need to make sure the Title starts with ‘recastTest’ (minus the quotes) exactly as typed here. (The capital T is important!). You can add a space at the end and add some more text if you wish.
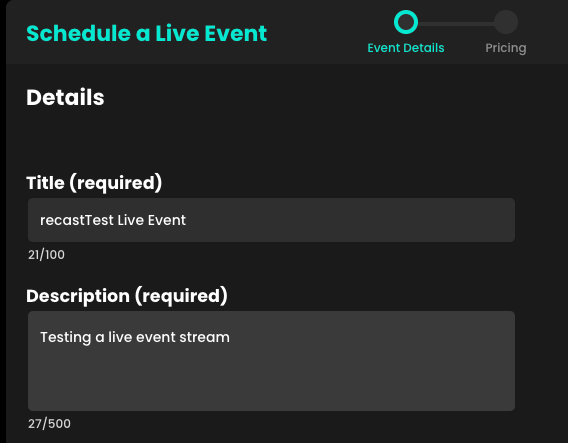
4. Just fill in the rest of the details and your test event is all set up.
5. You should “un-publish” the event as soon as you’ve created it. It’ll still be visible to allow you to continue your later on.
Streaming with Recast requires you to connect your broadcasting equipment to Recast, using a stream input method. Recast supports live streaming using two different streaming protocols: RTMP or SRT. Those managing the stream will have a preference.
One you've determined which streaming protocol you'd like to use, you need to set up the stream input:
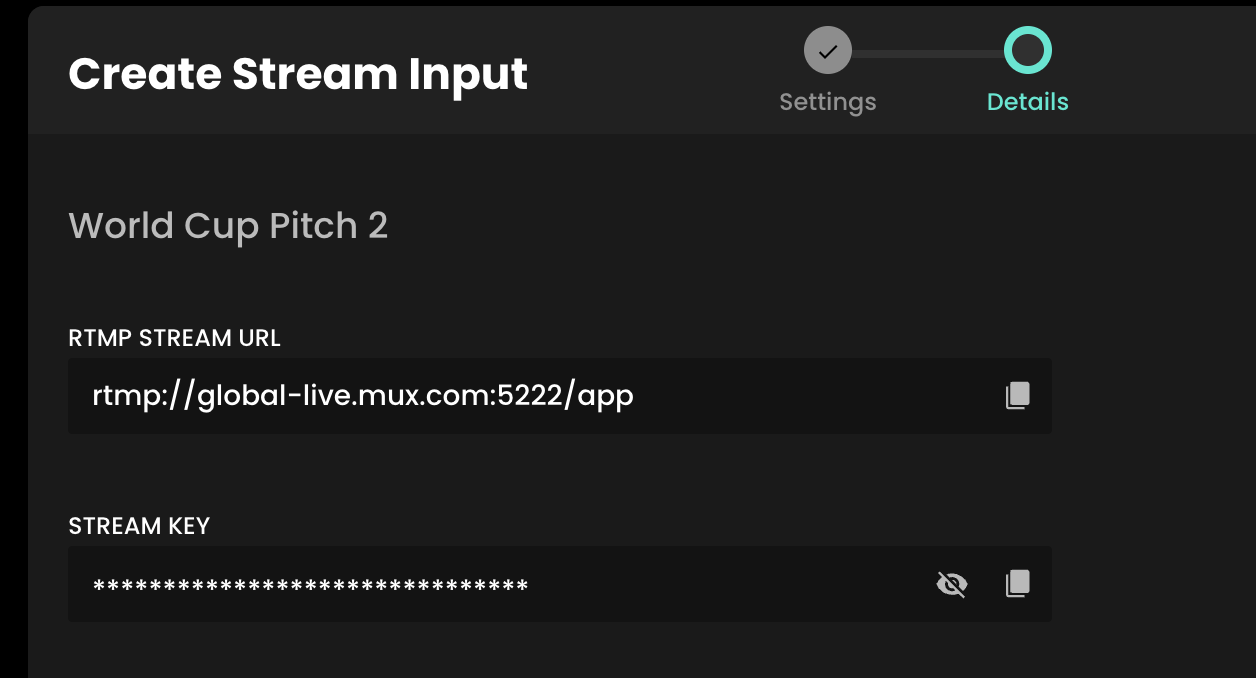
RTMP Example
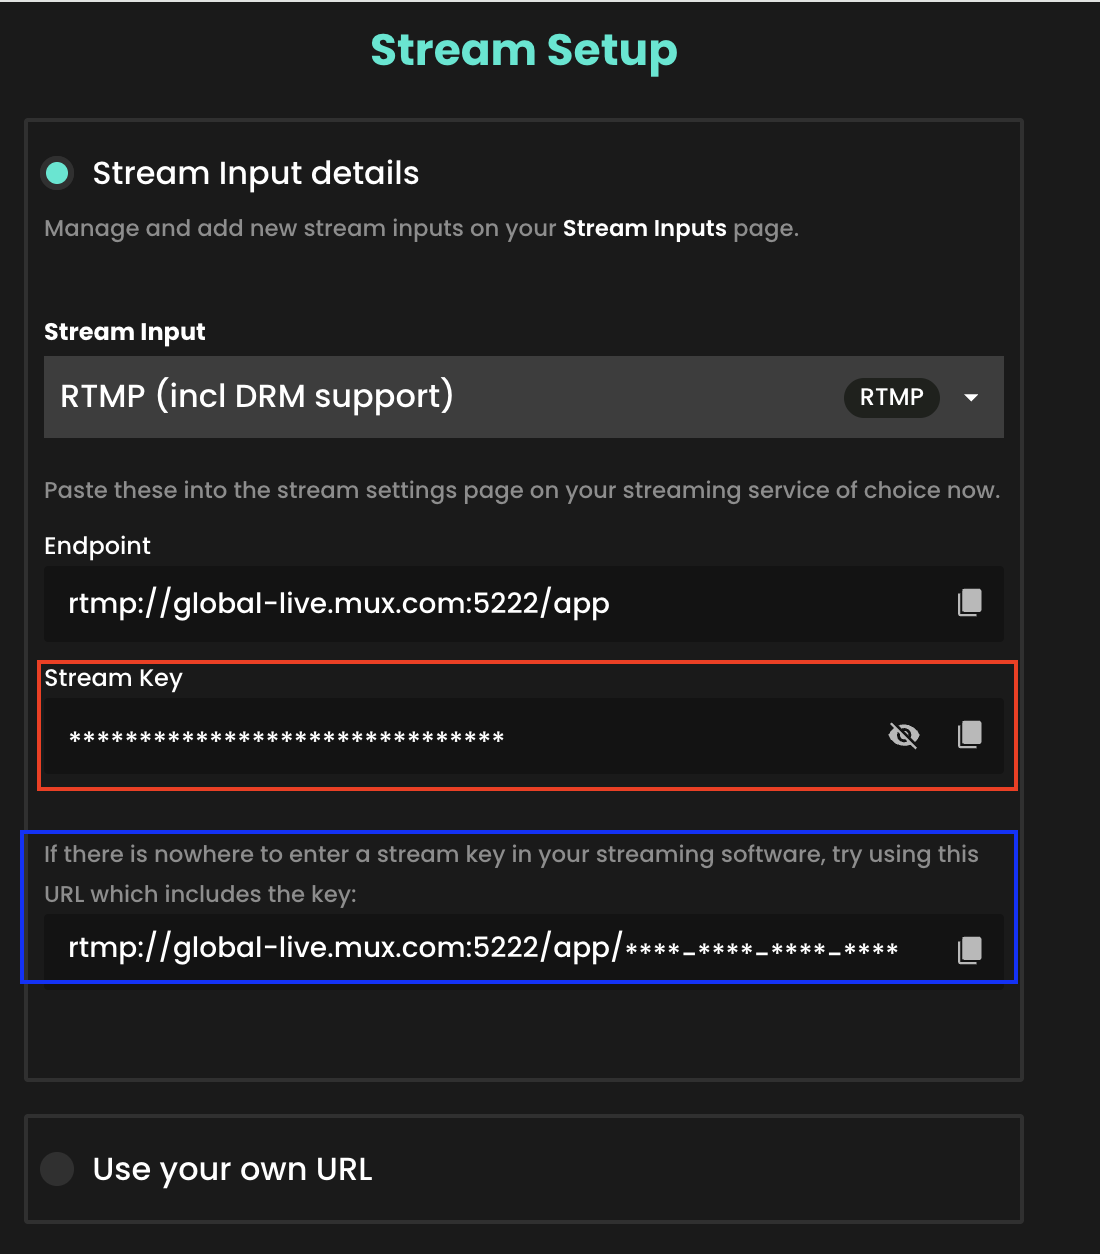
Firstly, make sure your streaming equipment is on, and that it's sending a signal to Recast via the stream input method you selected. You do this by inputing the information you copied in the step above into the relevant fields in your streaming solution.
For SRT this is typically the Endpoint, Stream ID and Passphrase.
For RTMP this either the Endpoint, the Stream Key, or a combination of both which makes up the Stream URL.
There are two ways to create replays of live streams:
Benefits:
Benefits:

Once your live event has concluded it’s easy to create a replay of your stream.
On the next page you have the option to crop your replay. Below the video player, drag the two blue markers to your required start and end time. You can also move through the video using the white playhead on the timeline.
Tip: If you need more precisely timed cuts, you can enter specific crop times using the time selection boxes either side of the timeline.
Click next once you are happy with the crop on your replay

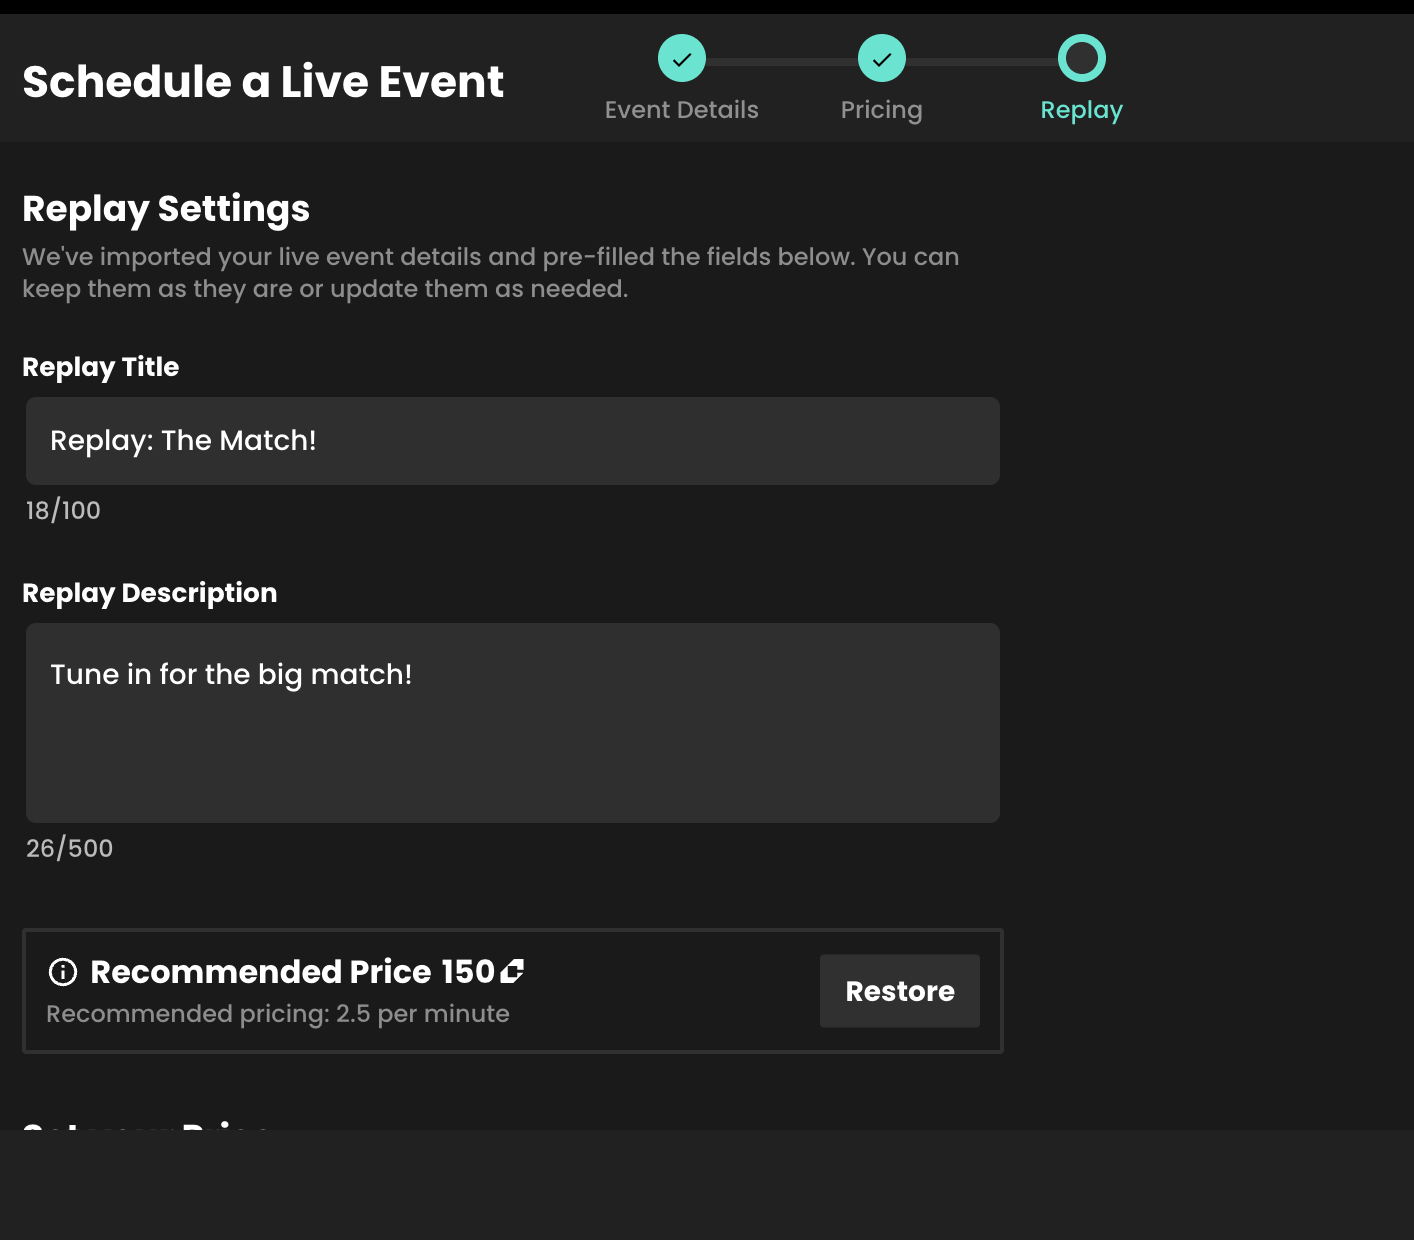
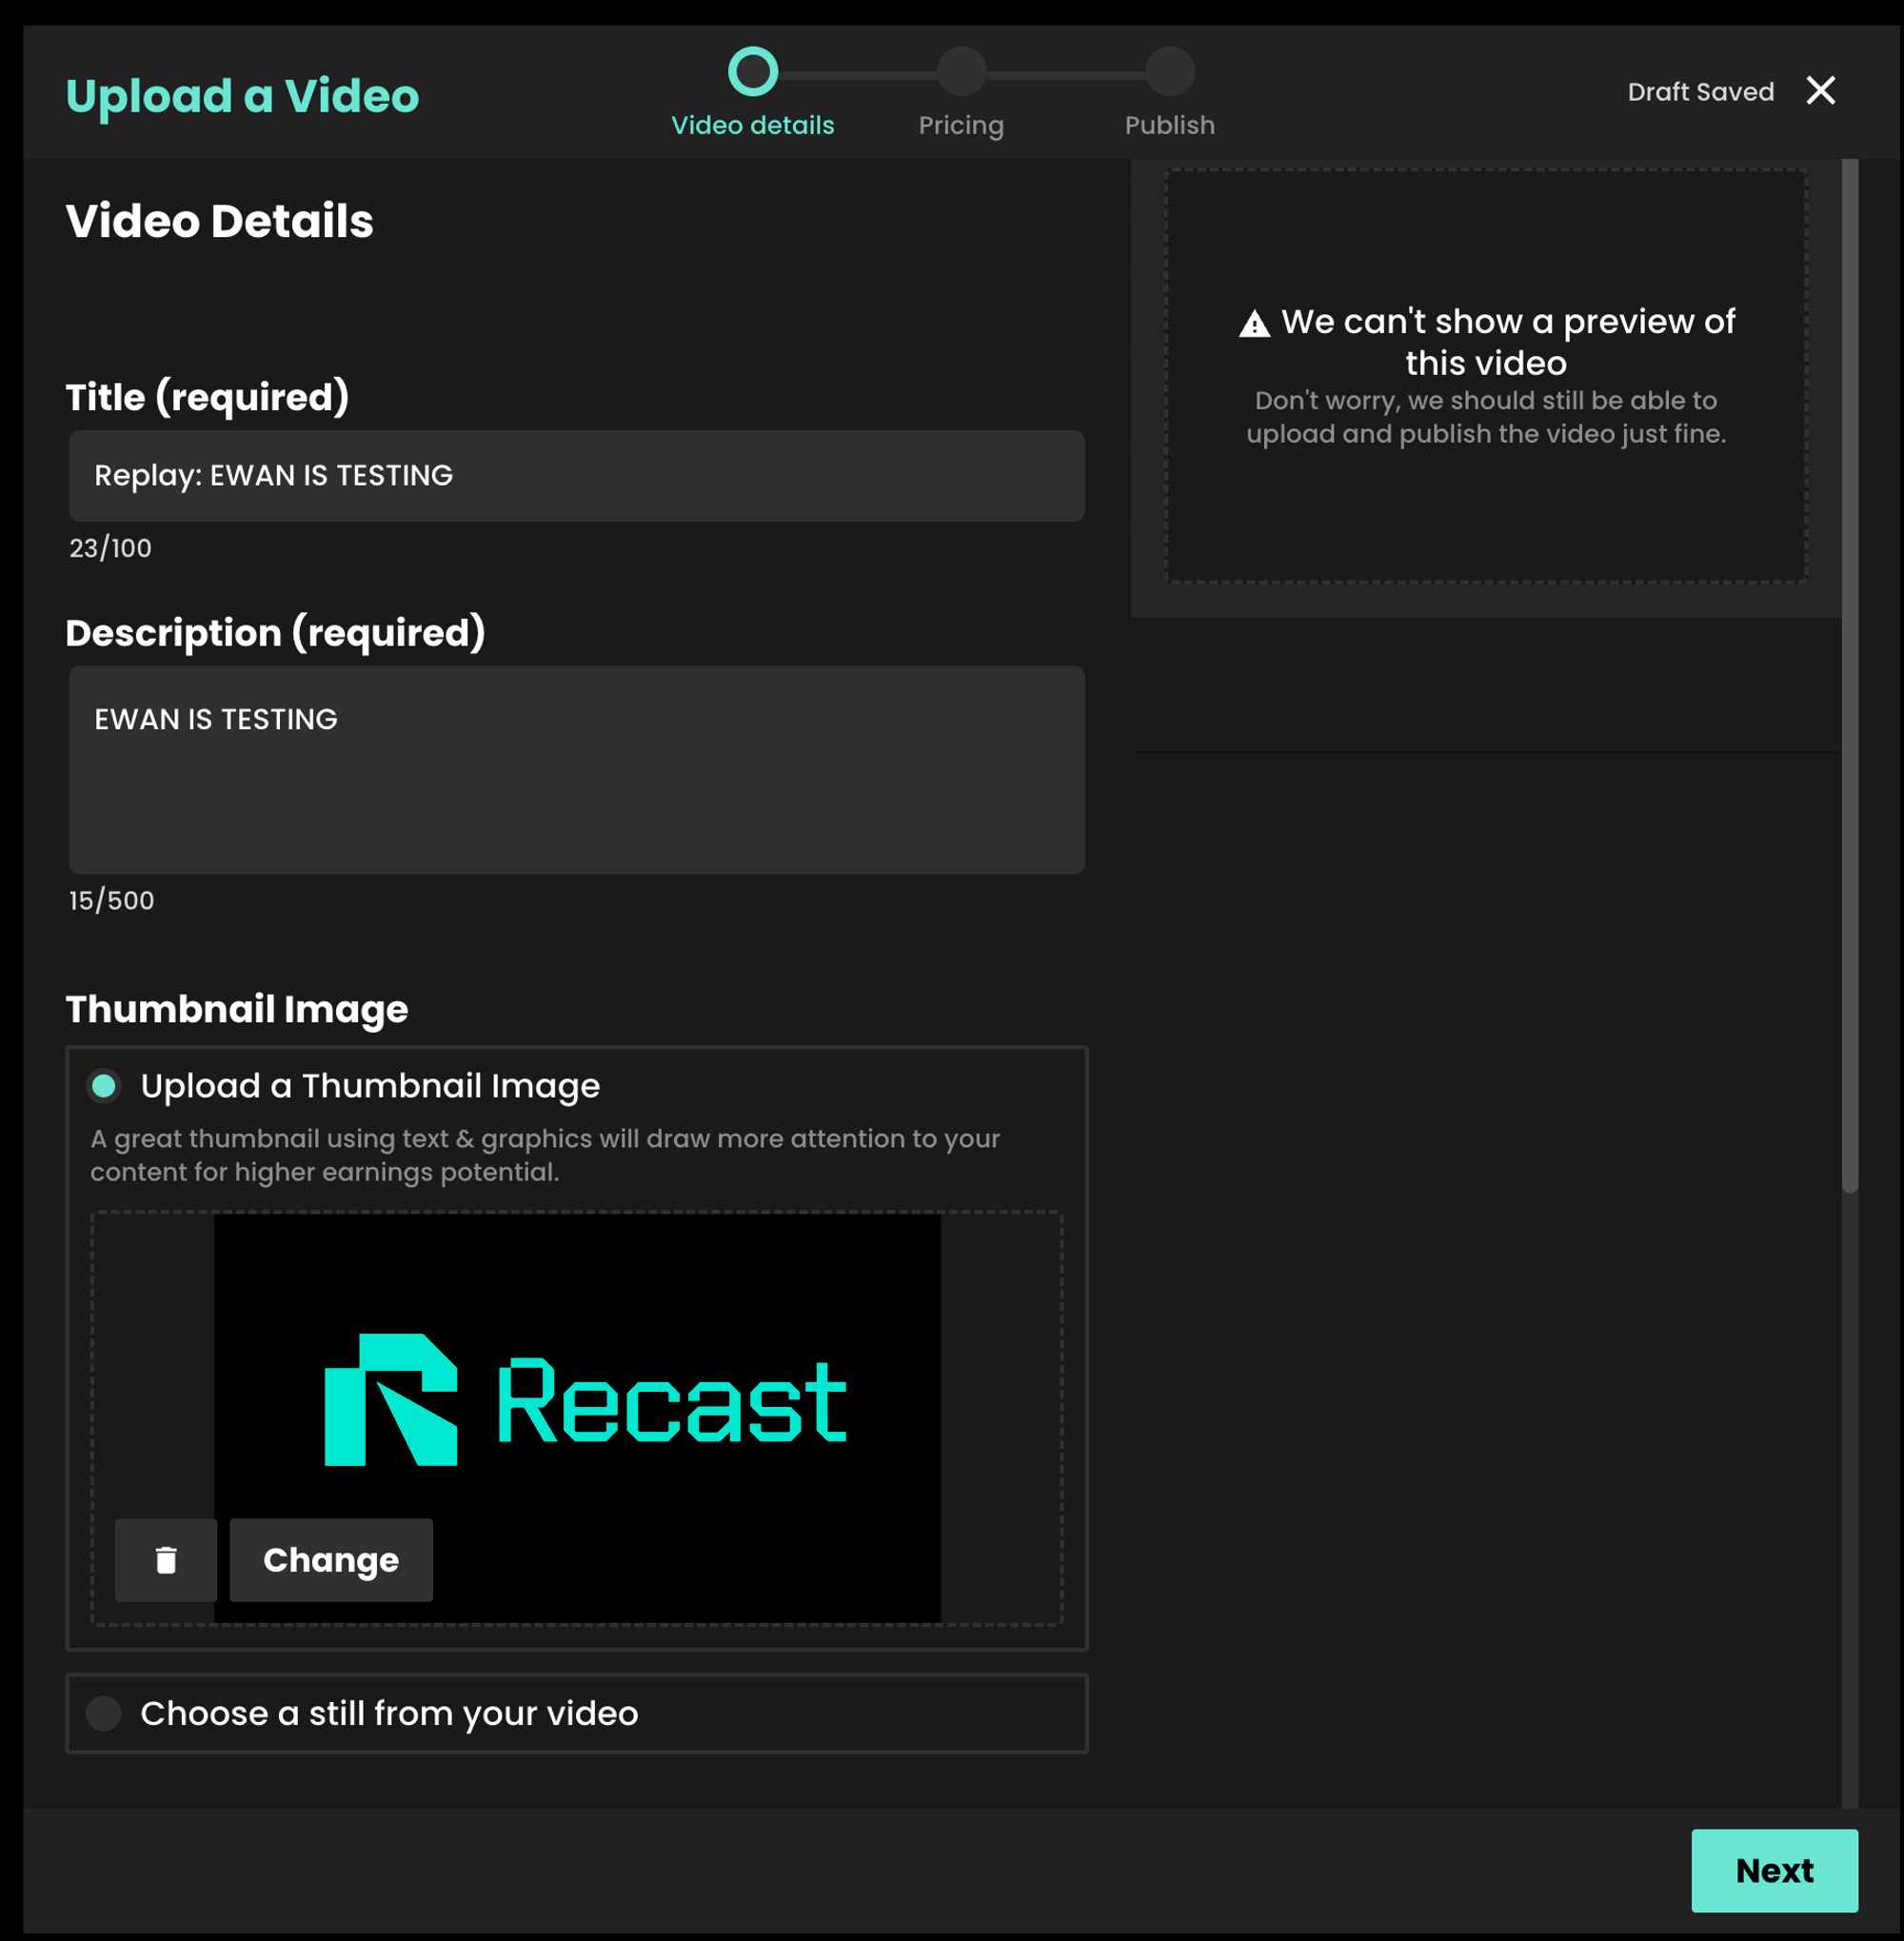
On the next screen you’ll see our regular video upload form. We automatically carry over all the information from your live stream such as the description, price and geo-blocking settings. We also carry over the title and add ‘Replay’ to the start of it. You can edit all of this information before publishing your replay.
Like video uploads, you have the same options to publish the replay as soon as it is ready, publish it manually later or at a scheduled time.
As a reminder, the widget for your live event will not automatically show your replay. To show the replay on your website, create a new Embed Widget containing this on demand content. Learn more in our "Embed Recast into your website" guide.
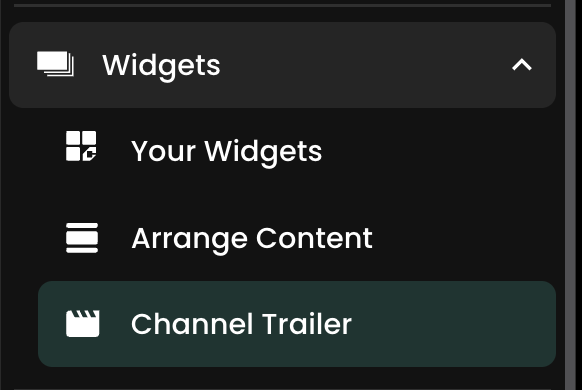

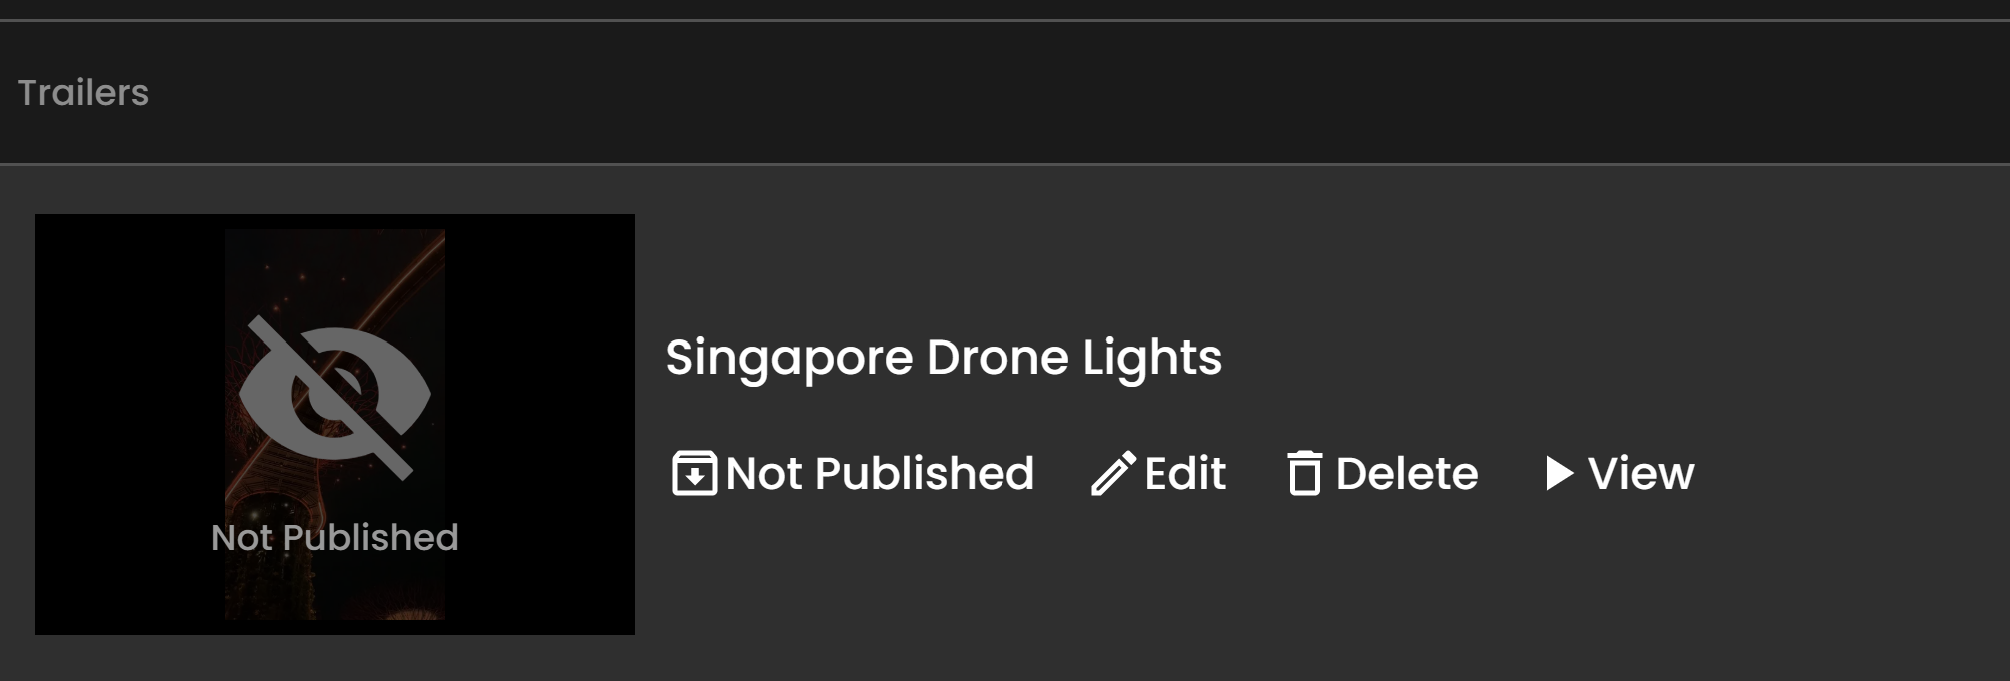
From the Channel Trailer page, you can manage the trailers you have uploaded.
To live stream from device to Recast.tv, you’ll need:
Note: Please be aware of the following details when streaming from device;
Visit the app store on your mobile device and install an app called ‘Larix Broadcaster’ (Andriod or iOS). Once installed, familiarise yourself with the app. You can find an in-depth guide here that provides more detail about the app and its various settings.
You will need to schedule your live event on Recast Publish before you use Larix Broadcaster app.
Steps to create a live stream from device on Recast.tv:
When using the supported Larix broadcaster App, you can stream from device on Recast.tv by following the steps:
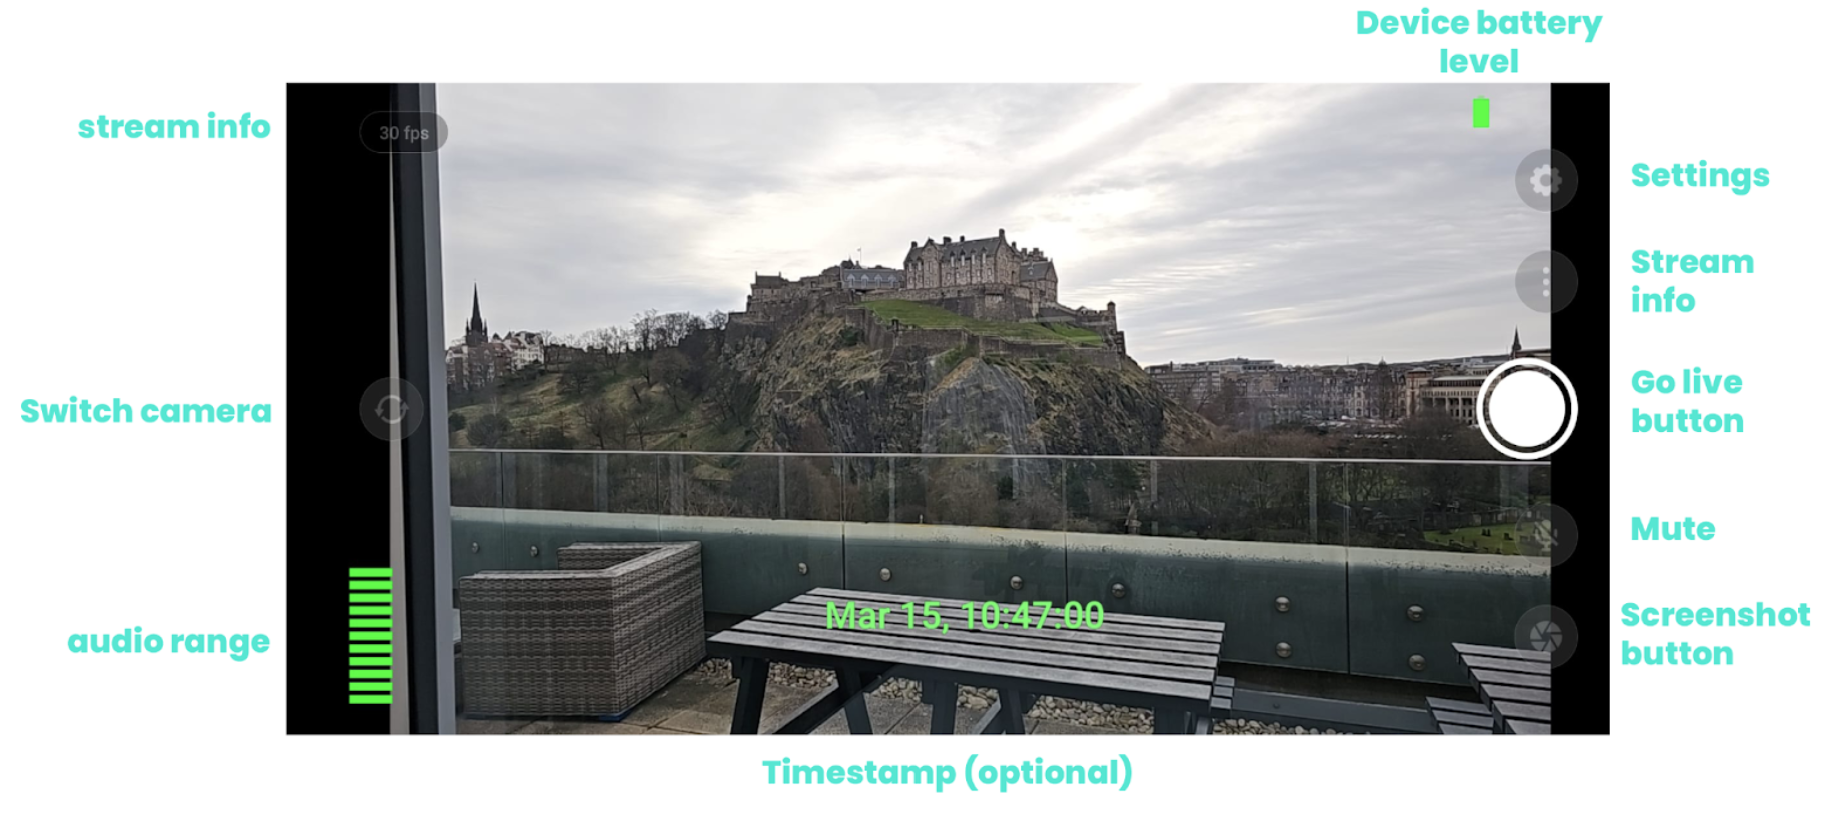
1. Open the Larix Broadcaster App
2. Set up a new connection by going to:
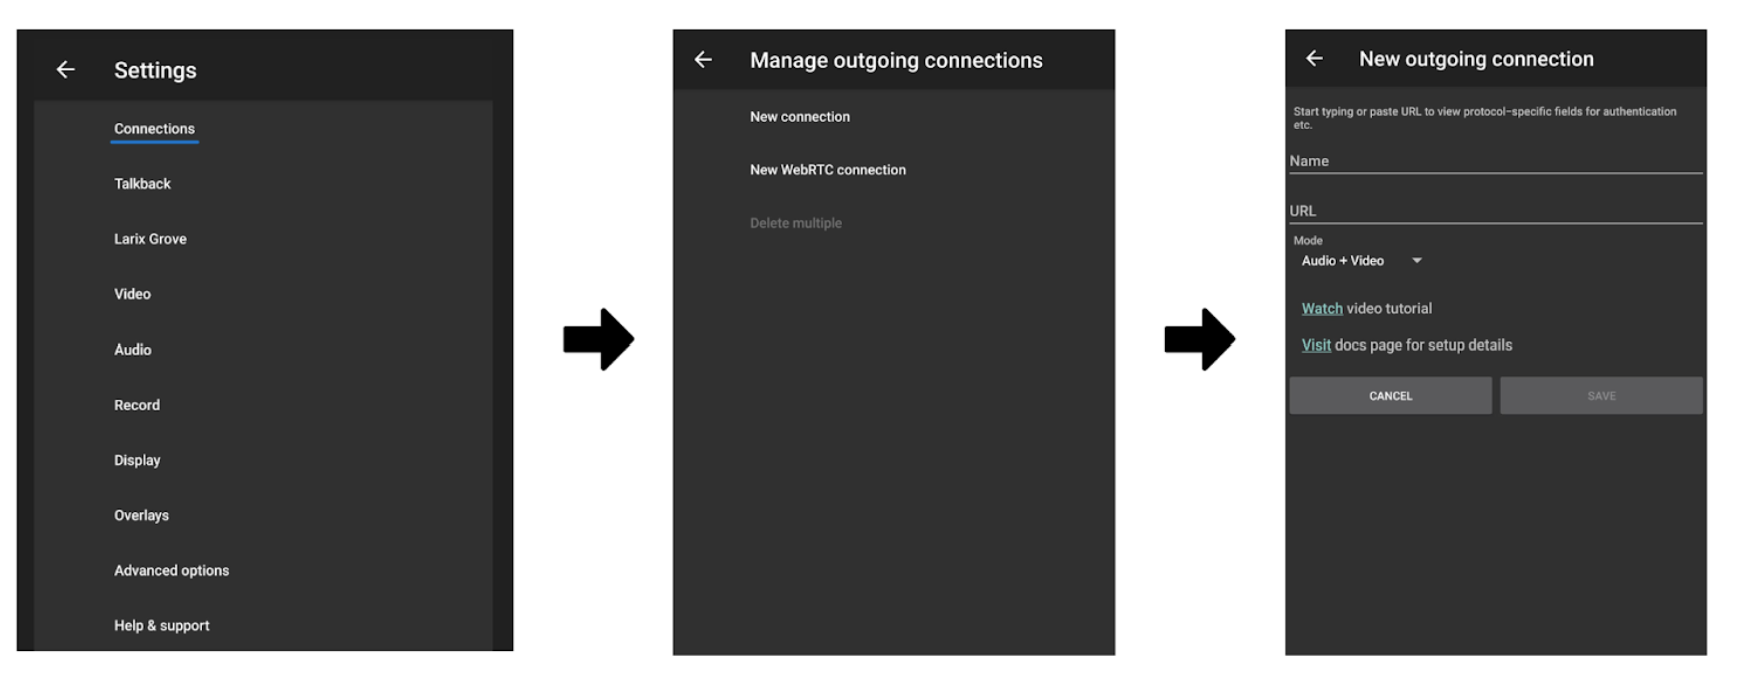
3. Fill in the following details for the new connection
4. Save your changes
5. Return to the camera view and click go live.
Please note: Your stream will not be live through your widget until you have retuned to Recast Publish and clicked on go live.
6. Return to Recast for Business to view your preview on the ‘Stream Setup’ page.

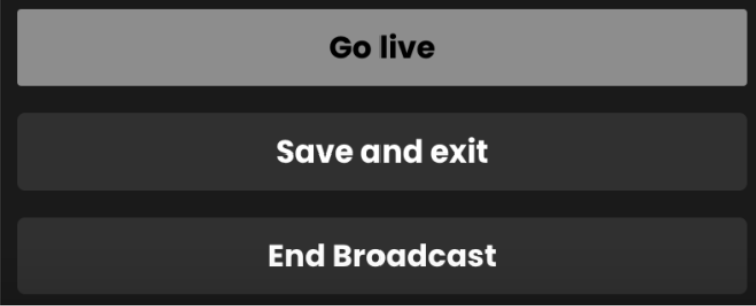
7. Click go live for the stream to be visible on your Recast channel
8. Once you are ready to end your stream remember to select ‘End Broadcast’.
9. Head back to the Larix App and end the broadcast there too.
Please Note: it takes around 1 minute to end the broadcast, please wait for the ‘stream deleted’ message to appear before closing.
This guide includes the best settings to use when streaming from OBS to Recast.
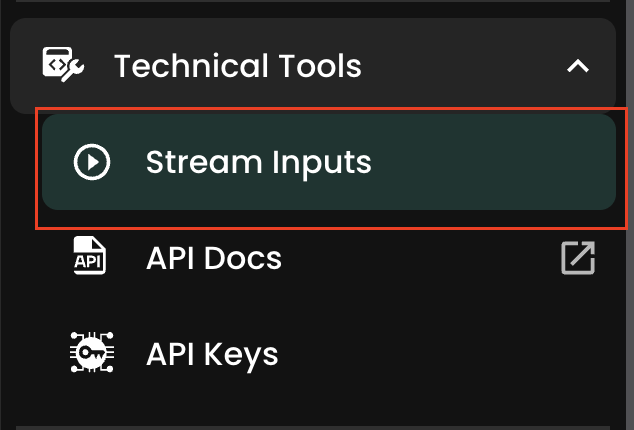
Recast can accept both RTMP and SRT Streaming Protocols from OBS. To select and set up an SRT or RTMP stream input in Recast for Business, go to Technical Tools > Stream Inputs. Learn more here.

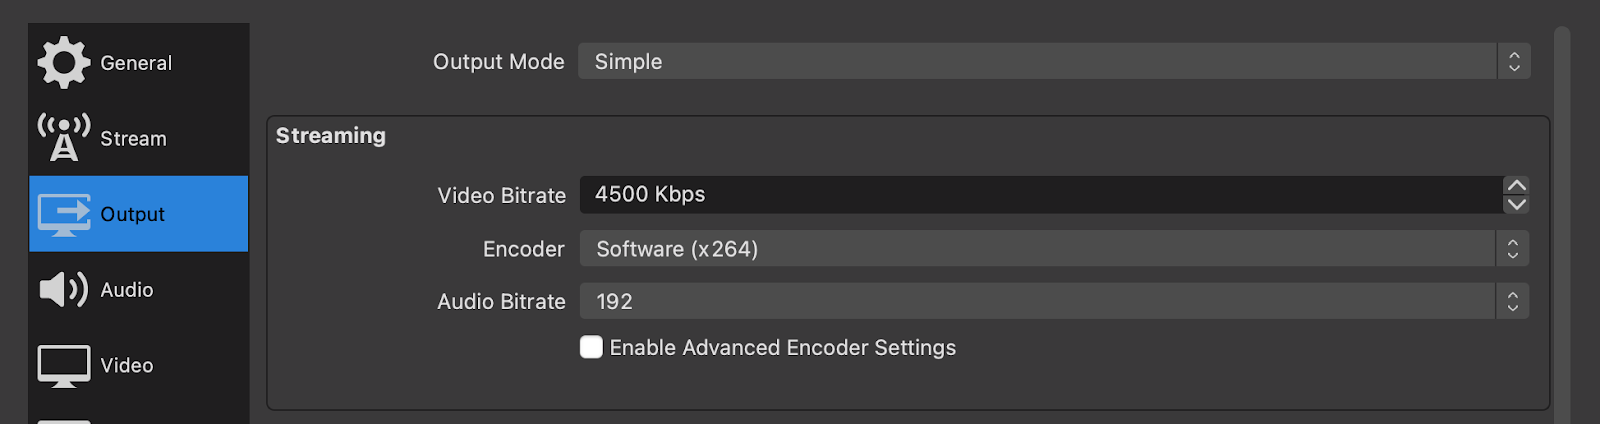
Depending on whether you are streaming using SRT or RTMP, the fields you need to copy from Recast for Business and enter into OBS will differ. We've laid out both scenarios as follows.


This guide explains how to add a simple and controllable scoreboard overlay onto your stream.
Go to overlays.uno, then select Login, or Sign up if you don’t have an account.
Once logged in, you should be taken to this page:
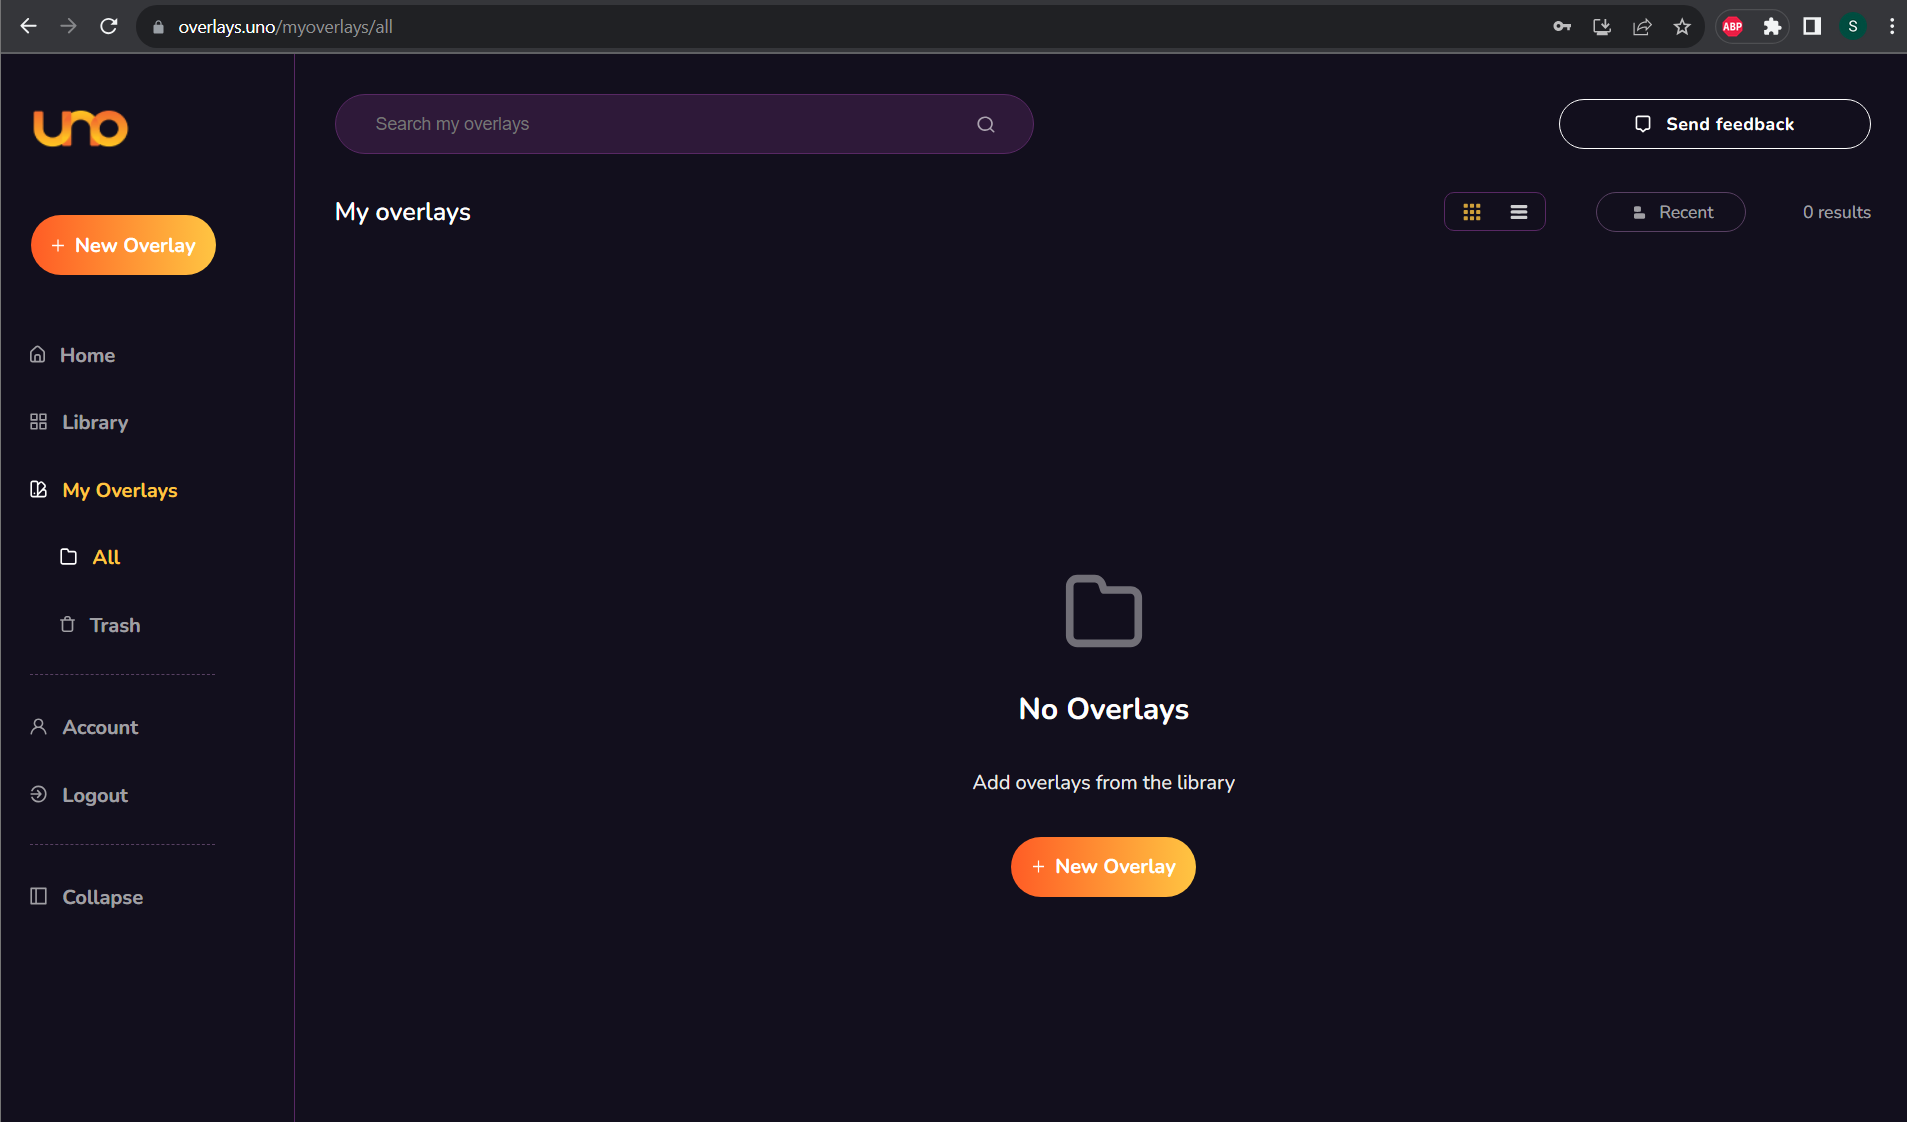
Click on the ‘+ New Overlay’ Button, which will show you different options:
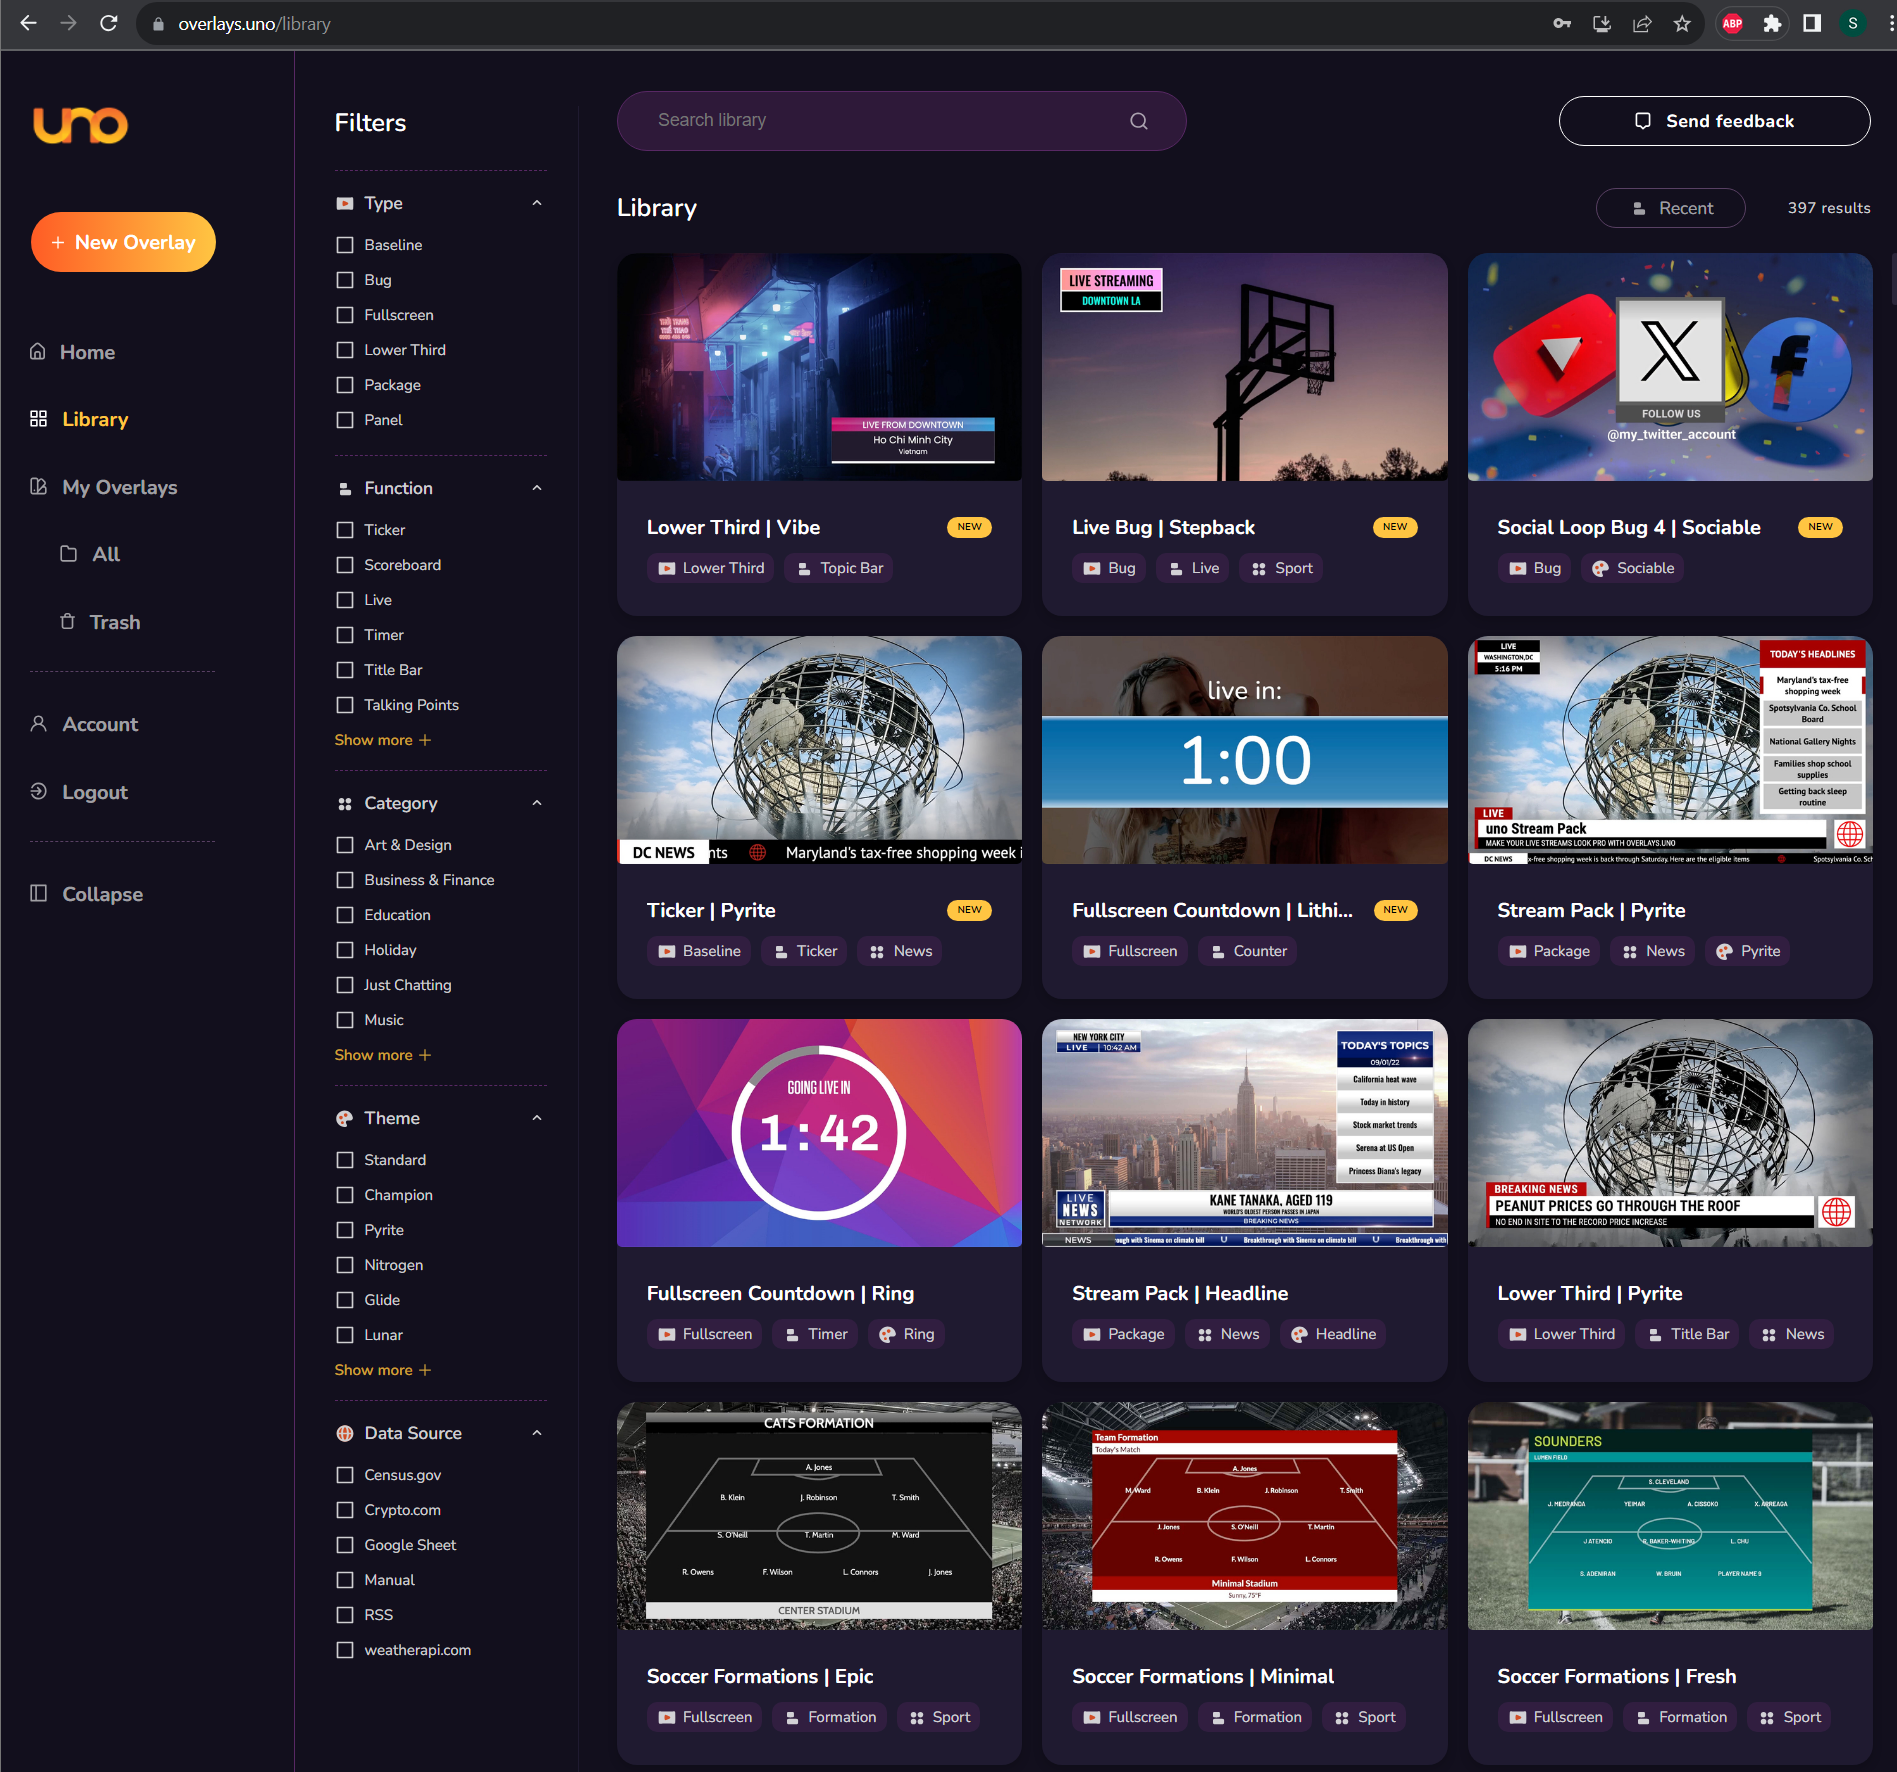
Here you can search for the type of overlay you want. For this guide, we have selected the following as an example:
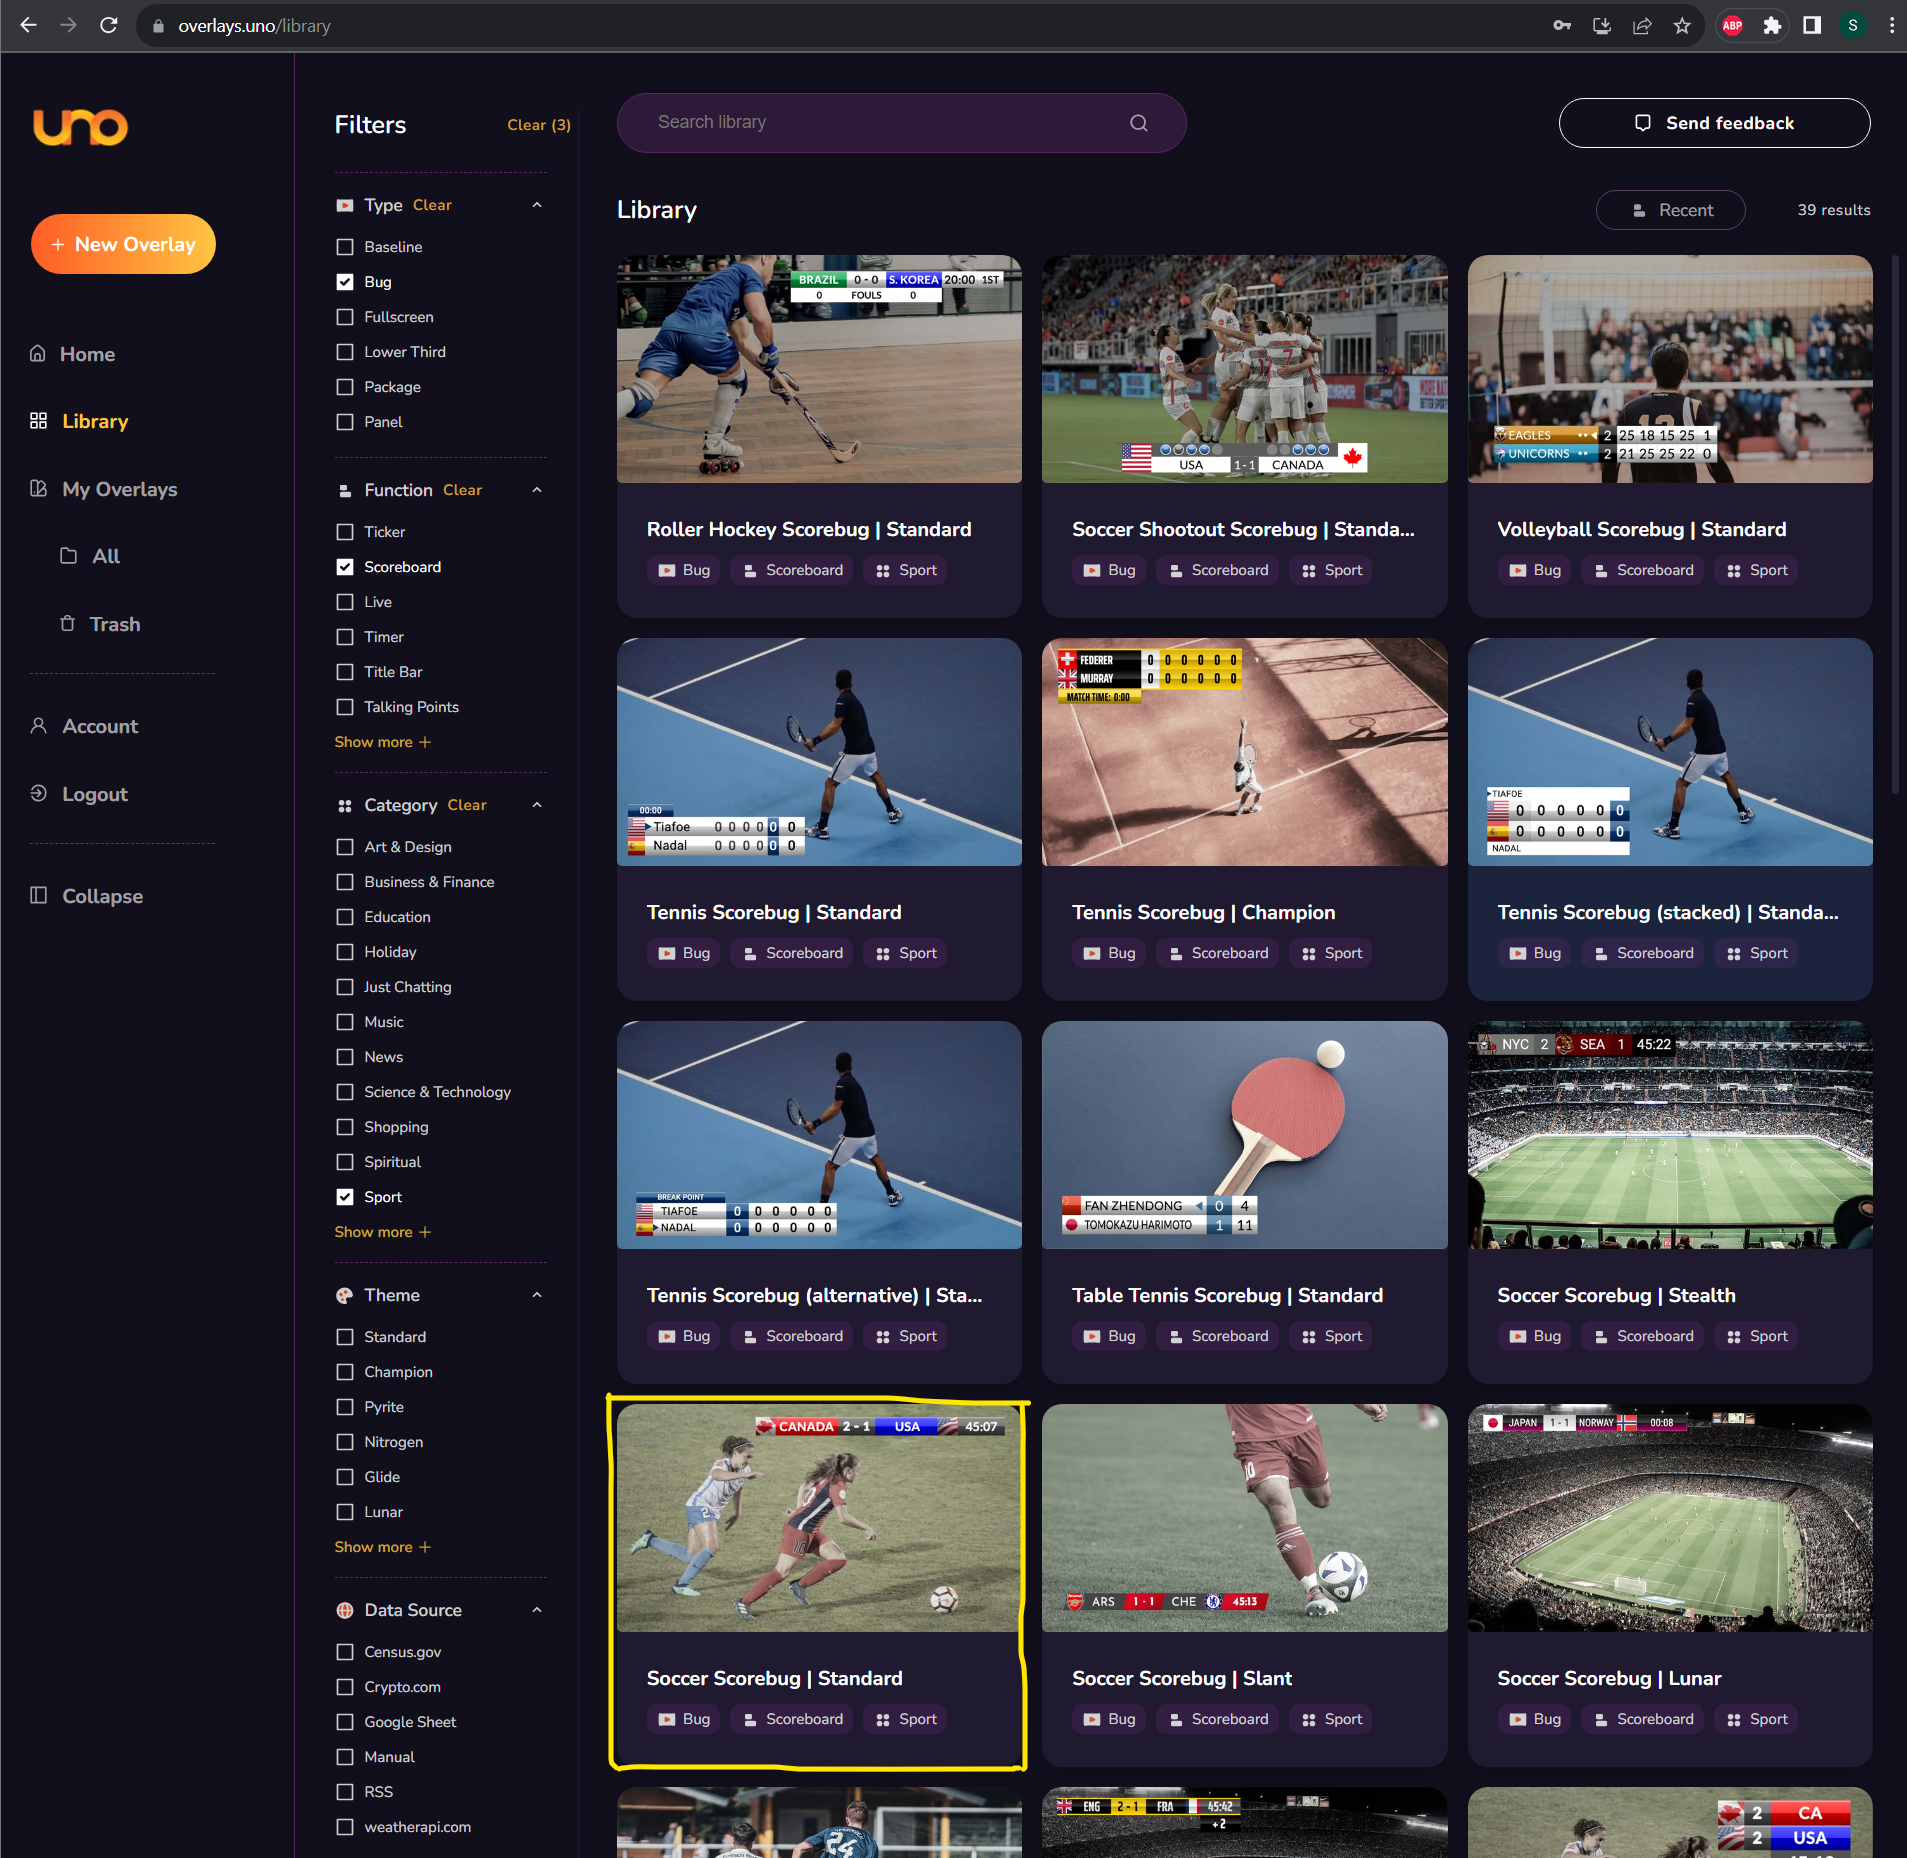
Click on the item, and you should receive the pop-up below:
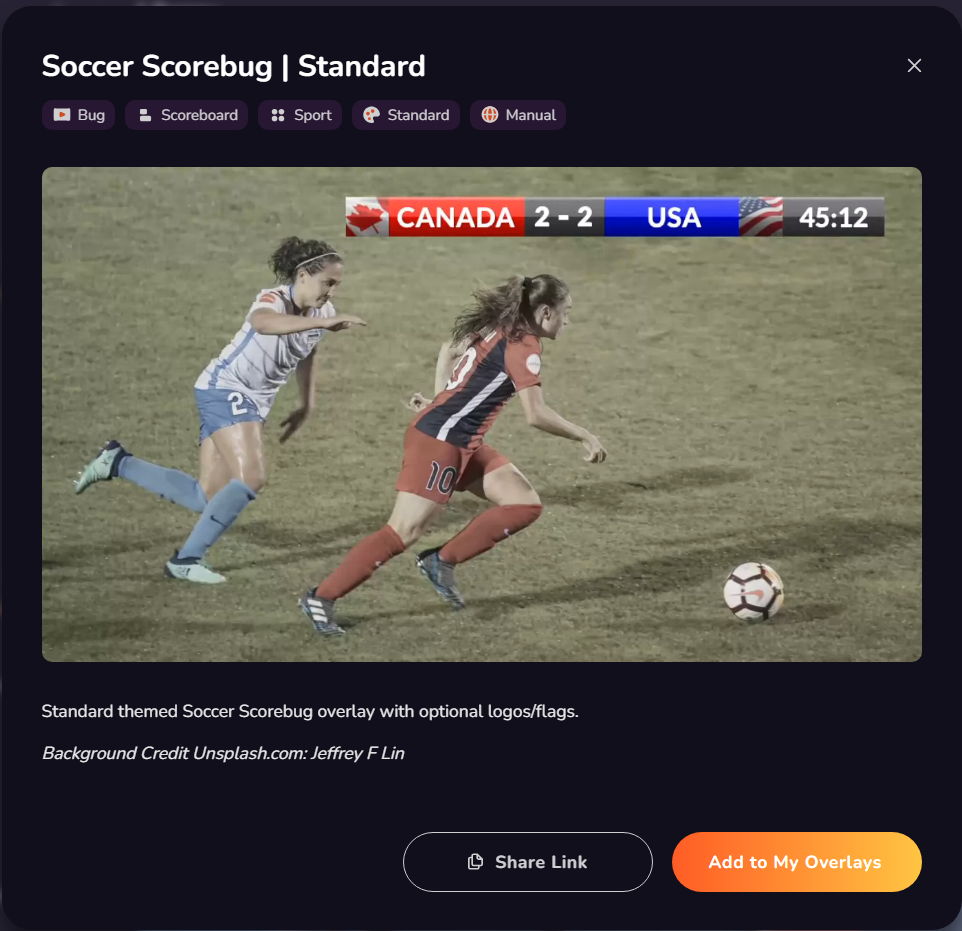
Click ‘Add to My Overlays’
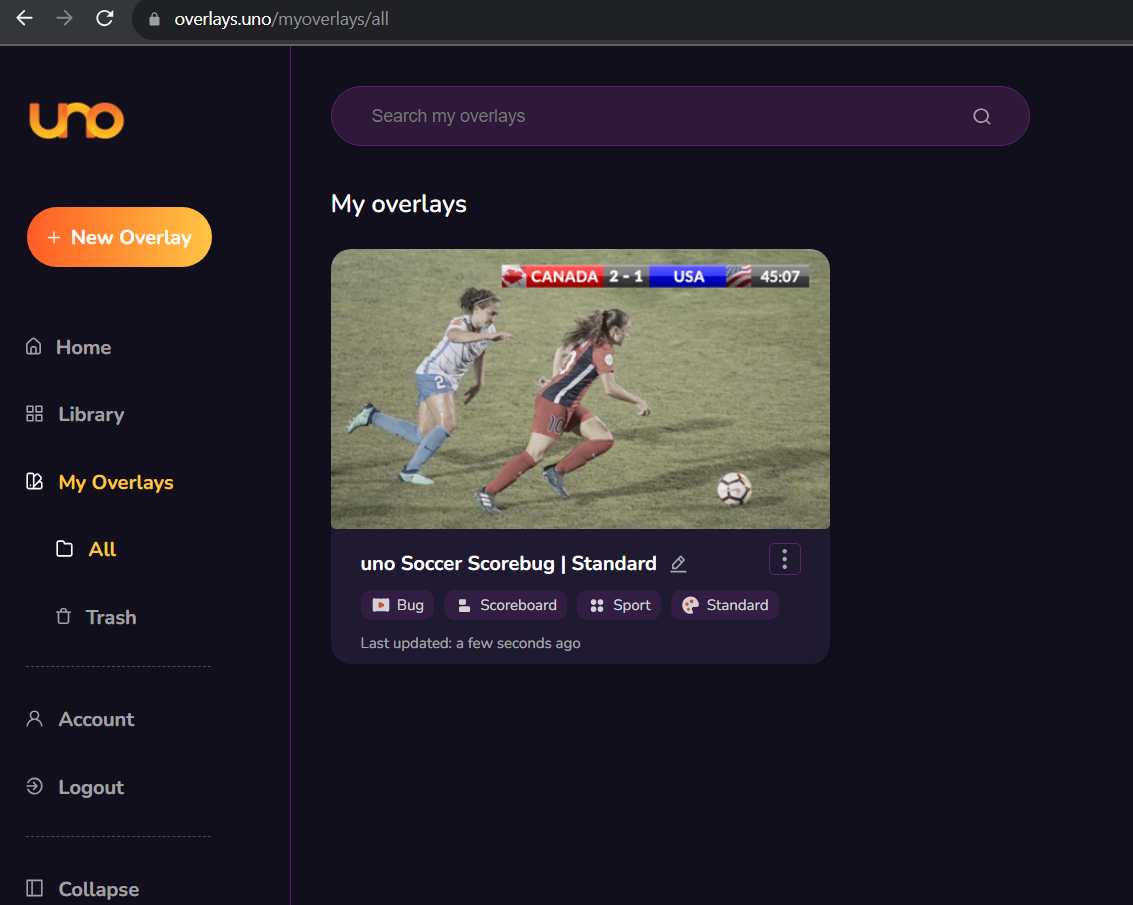
This should take you to the Dashboard below.
Double-click on the item you want to use under ‘My Overlays’ and you are ready to move on!
Take some time to familiarise yourself with the dashboard. It is split up into several sections, with the navigation along the middle of the page.
Please note: These options may change depending on the template being used.
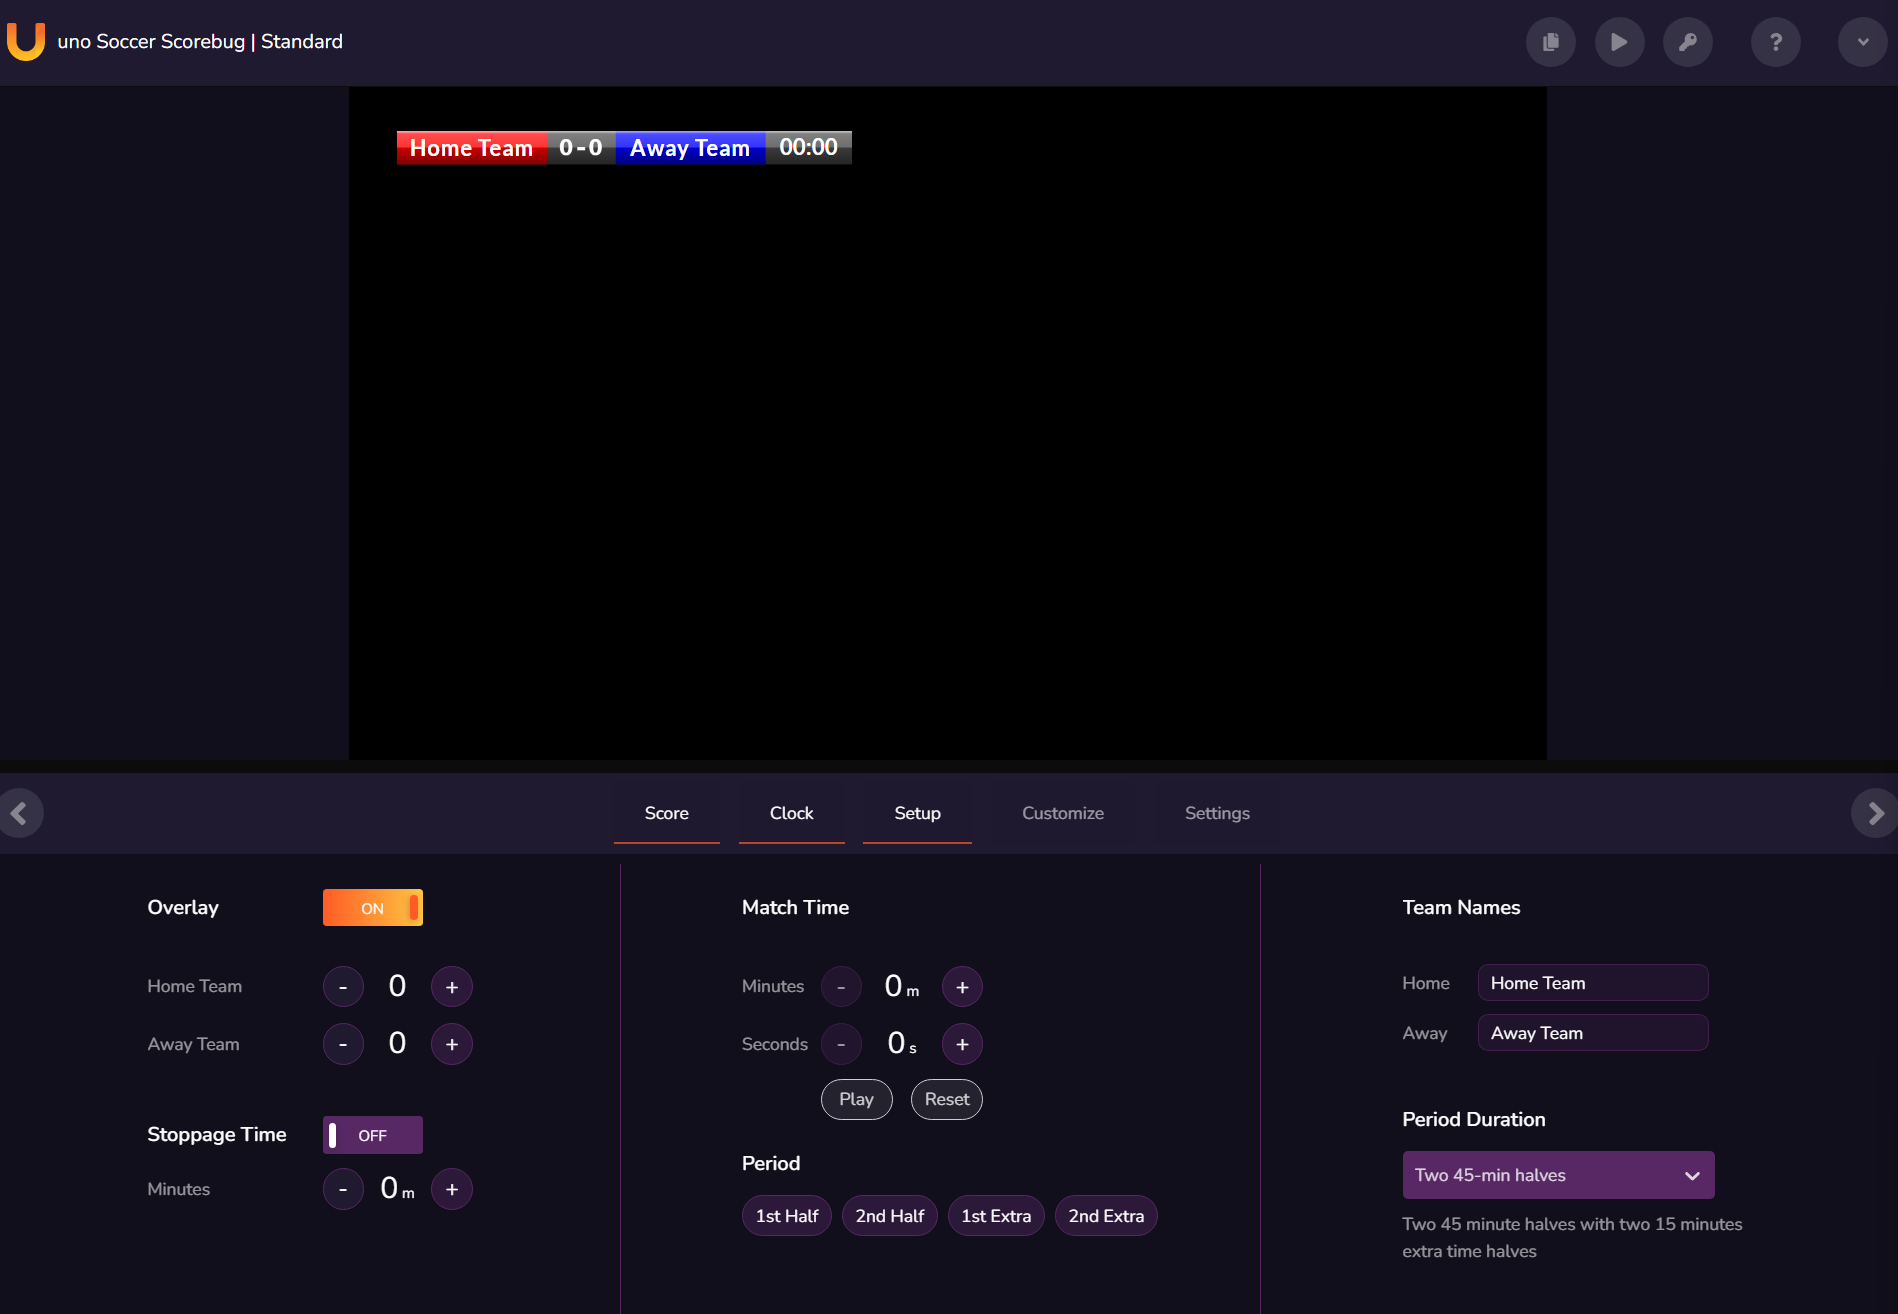
The next step is to customise your scoreboard. This example scoreboard has a few options that can be changed, such as teams names, colours, logos etc. Each scoreboard has different options available.
To change the team names click on the ‘Setup’ tab, once these have been changed when you click off the text box you will see the scoreboard in the preview has been updated. If you click on the ‘Customize’ tab you will be able to add your colours, logos to change the branding of the team sections which will be updated in the preview.
Once customised, you are ready to connect you scoreboard overlay to OBS.
Before heading to OBS, in the overlays.uno scoreboard control page, click on the ‘Copy Output URL’ button on the top left;
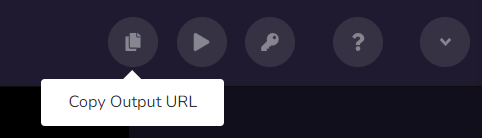
When you press this a little green pop-up will appear at the top letting you know the link has been copied to the clipboard;

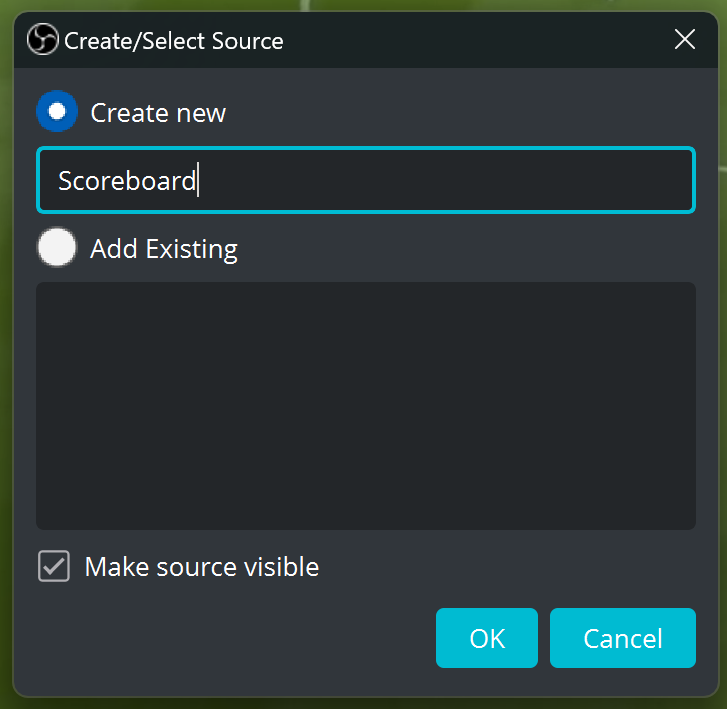
Now head over to OBS, navigate to the Sources panel and click on the (+) symbol to add a new source, then select the Browser option, Name your source, ‘Scoreboard – Uno’ for example and select OK;
On the next screen in the URL text box delete the default link and paste the link from Uno. Change the width and height to match your video source (Most likely HD so 1920×1080).
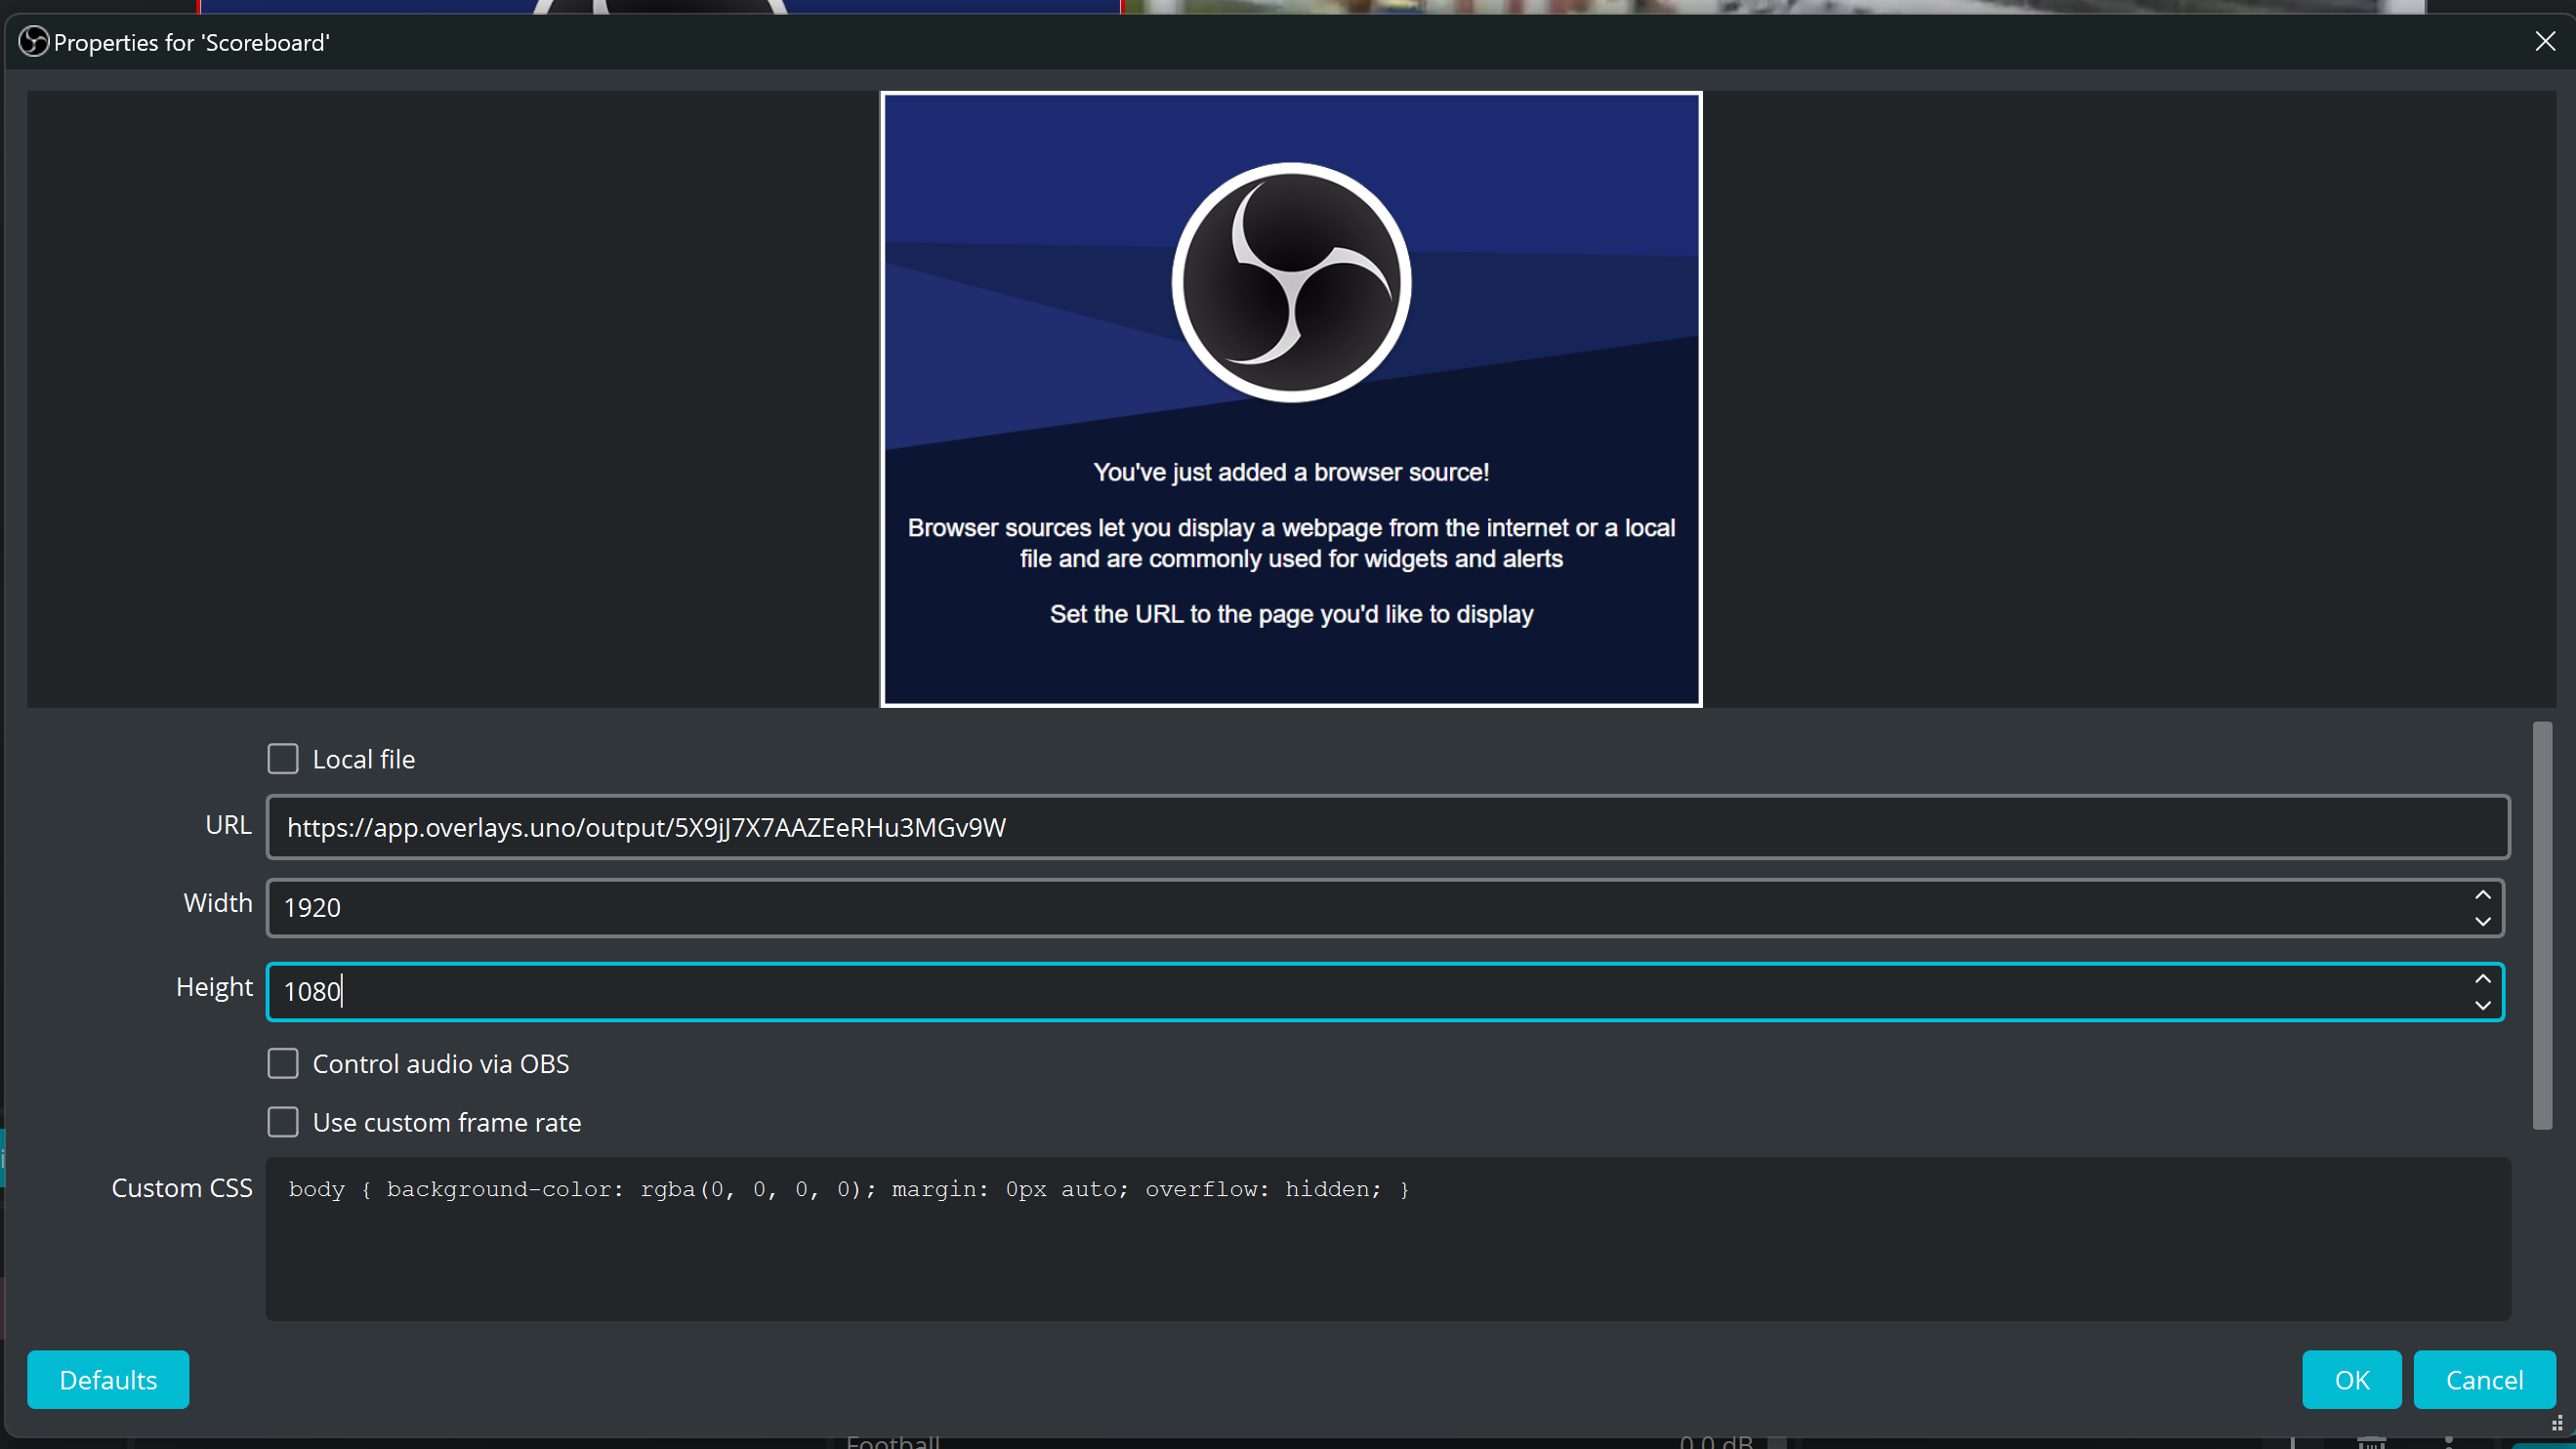
When finished, select ‘OK’.
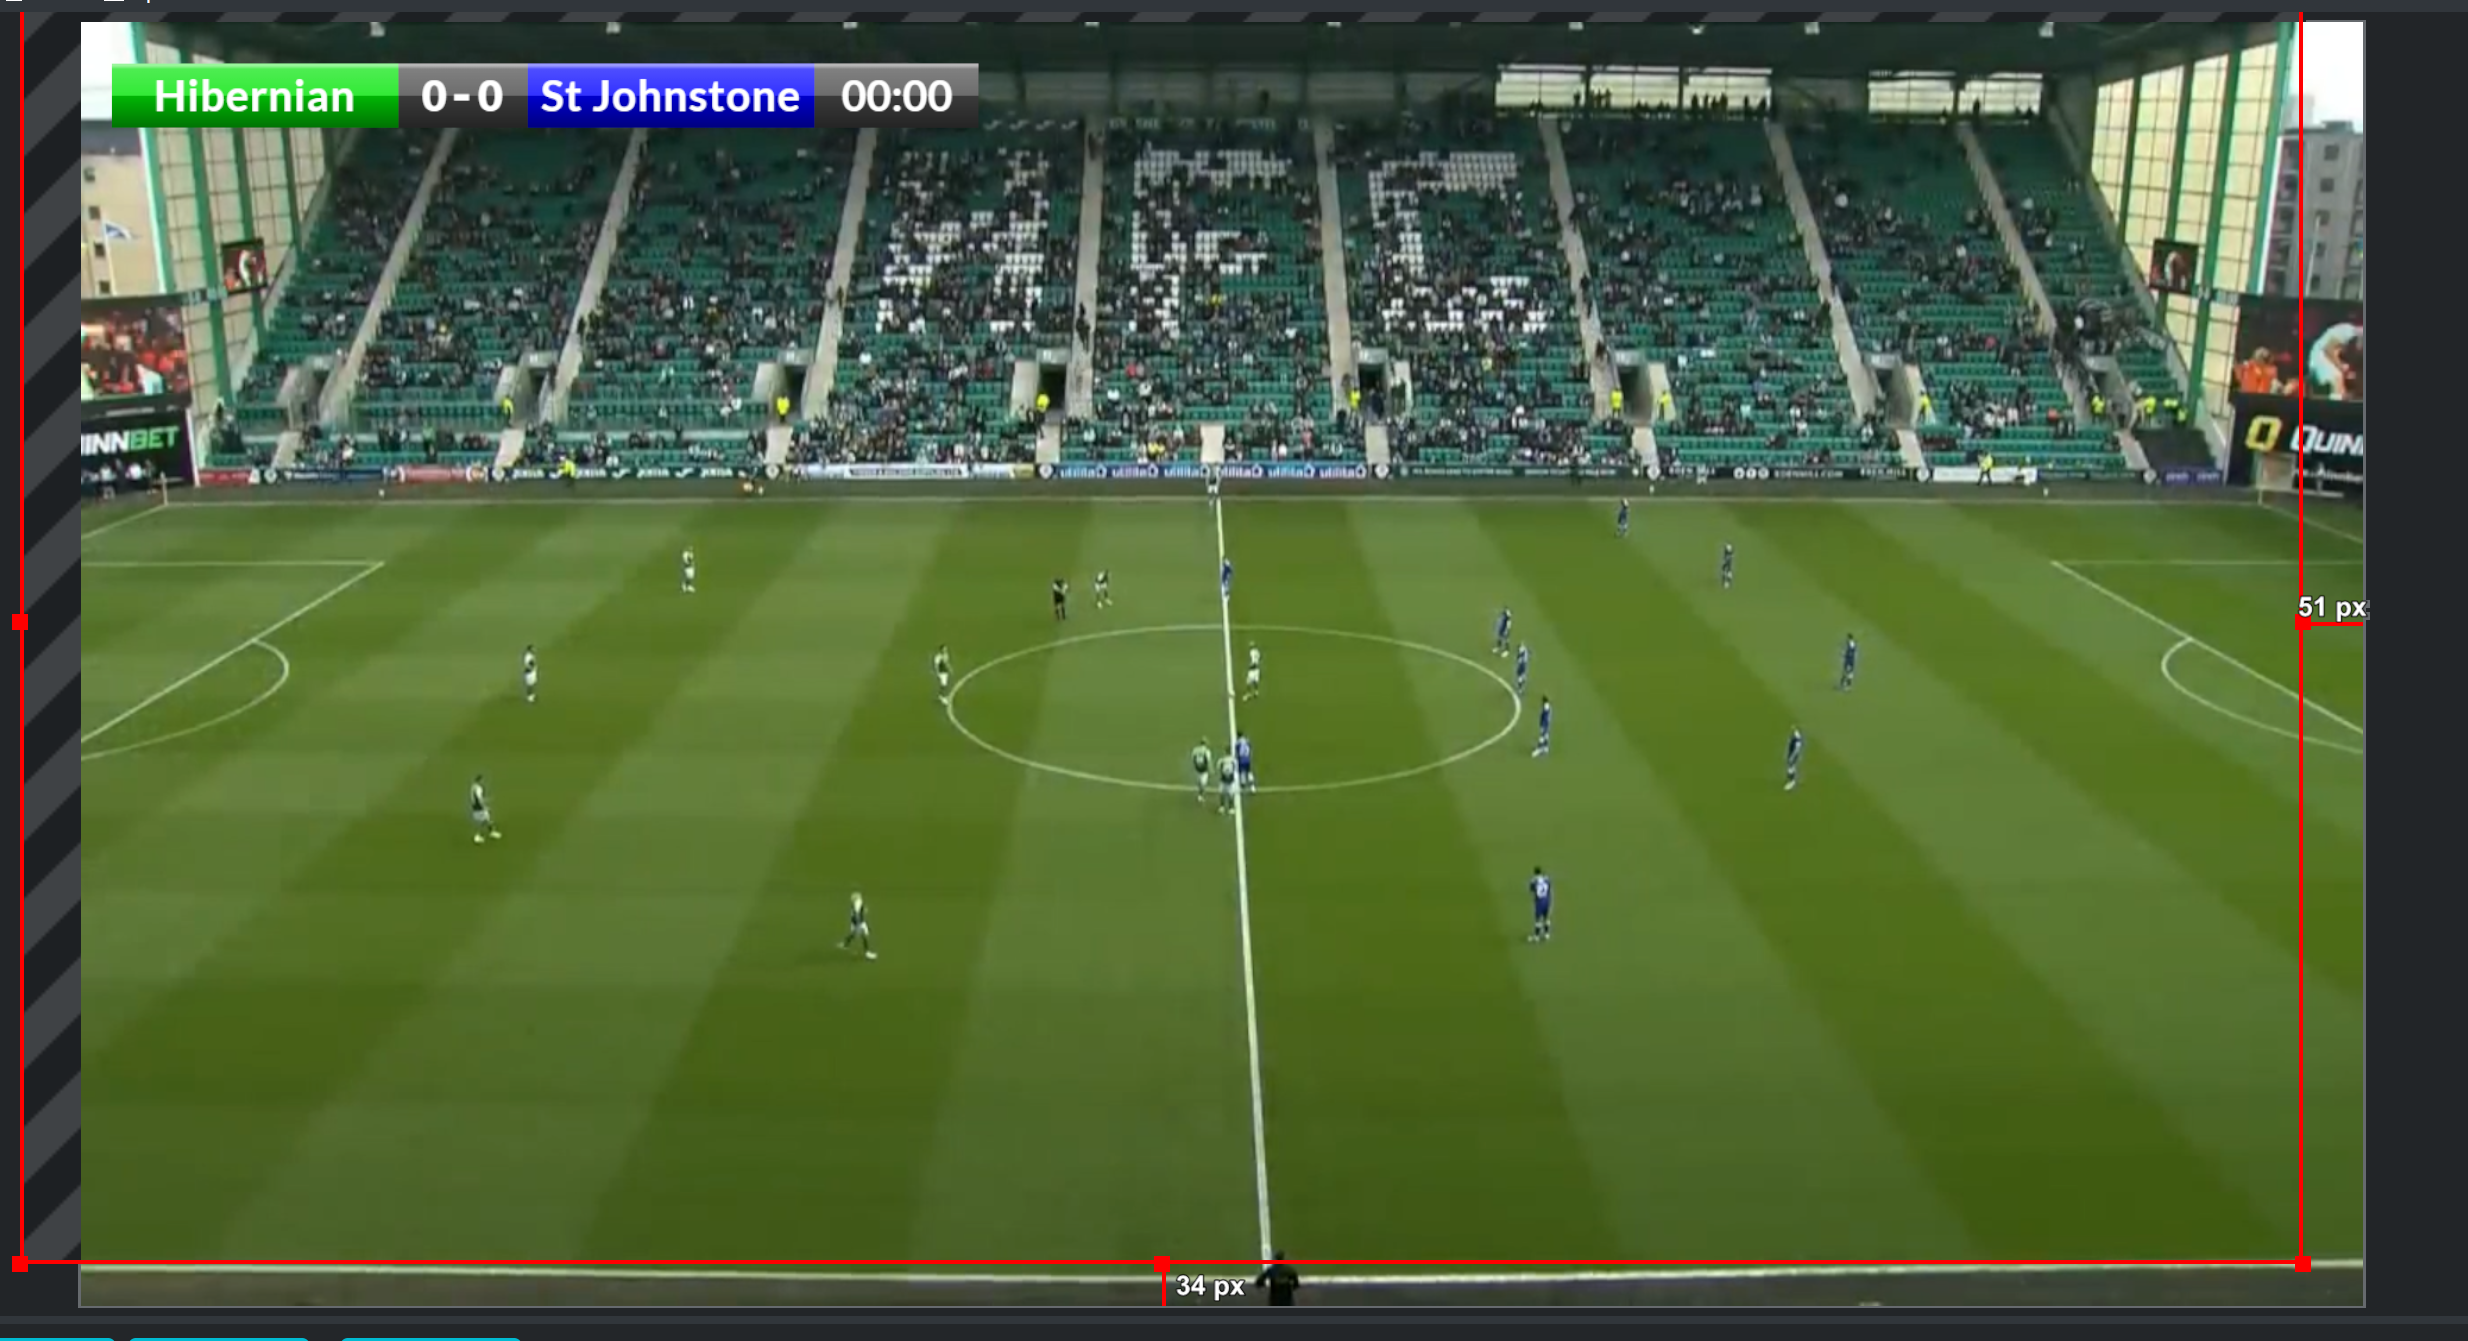
After a few seconds, the scoreboard should animate into the screen. The position of the scoreboard can be changed and once you’re happy with this then you can move on to the next step.
If you want to control the scoreboard from the same computer that’s running OBS then we would suggest using dual monitors so you can monitor OBS and use the scoreboard functions at the same time. If you are limited to a single screen you can use a smartphone or iPad to control the scoreboard, which may be useful as you can control this from anywhere.
Changing the score
To control the scoreboard from the web browser on your computer, simply head back to singular.live, and you should still be on the control page and click on the ‘Score tab’.
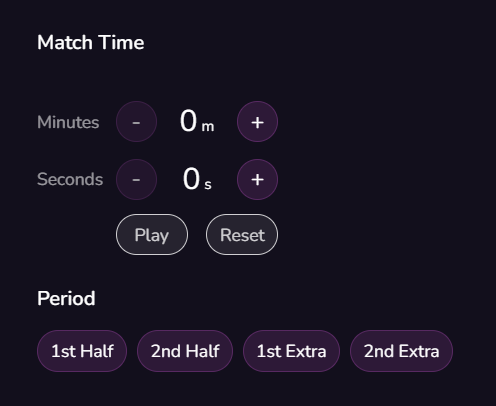
Adjusting the time
Next, click on the Clock tab:
These two tabs will be used when the game is about to start and while it is live. This will require human input throughout the broadcast to keep scoring live. There is an option to have an outside source such as the system that runs the digital scoreboards in a stadium (this requires a paid version).
Smartphone/iPad Control
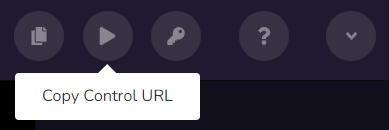
On Uno, next to the ‘Copy Output URL’ there is the the ‘Copt Control URL’:
This will copy the controller page link (another way is to just copy the link in the address bar), and open that link on your mobile device, such as a smartphone or iPad.
The controller page will open, and you can control the scoreboard from this, even if you close the browser on the computer.
A few tips for using the mobile version;
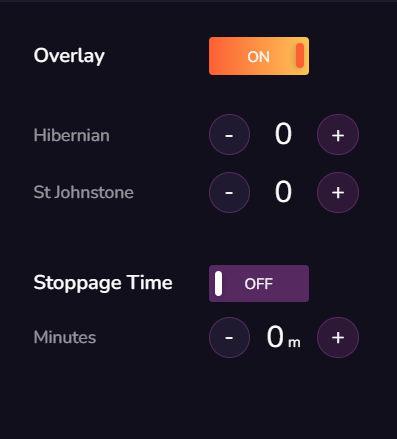
It is typically best practice to have the scoreboard set to ‘overlay – off’ when going live, with most scoreboards appearing several seconds after the event start time/kick-off time. Here’s a football-specific flow to follow below;
Your Brand is your public-facing part of your Vendor account. Give it a name, description, profile image, and cover image that makes you easily recognisable. You'll take this brand across the web as you (and affiliates) embed and share your content.
You are now signed up and are logged in to Recast for Business.
IMPORTANT: If you intend to use Recast's streaming tools please now get in touch with your Recast partnership manager or email partnersupport@recast.tv to request access to Recast Stream. We'll activate these on your account and they will then appear on as menu items in your Recast for Business account.
To add additional admins for your channel, first make sure they have signed up for a Recast user account and ask them to share their account User Name
You can upload or schedule your first piece of content by clicking the ‘New Video’ button and selecting the content type or try adding an Access Pass. For more information, please follow these links:
Recast enables you to upload and sell access to video content. This guide will explain exactly how to start selling your vertical video content.
Give your video a title and a description. Catchy titles will help users find your content and encourage them to purchase it when they do.
Once your content is published, you’re ready to arrange the content on your widget.
Recast widgets consist of two different types of sections:
For more information on arranging content on your widget, click here.
If you have both portrait and landscape format content to sell in your Recast Embed Widget, we recommend organising the different sizes into their own custom sections on your widget. Learn more about adding a custom section to your widget here.
The time it will take to upload your video depends on how large the file size is and your internet upload speed. Make sure not to close the platform when you are uploading, as this will interrupt the upload, and you will have to repeat it.
Once uploaded, the video will show as processing. Please note it can take a while to process, depending on your upload speed. This is so we can create HD, high, medium, and low-quality versions.
Once you have finalised your video upload, it can be accessed via the ‘Video Uploads’ button, where you can edit & view your video.
Please note: If you try to close the Upload a Video form before the setup has completed, you will be asked to discard or save the Video Upload Draft.
If you choose to save the draft, it will be available on the Unpublished Video Uploads list, which is found in the ‘Video Uploads’ section. If you choose to discard, the draft will be permanently deleted.
File Type
.mp4 (recommended).mov (recommended)
Video Codec
h.264 (recommended)h.265/HEVC
Audio Codec
AAC
Resolution
We support resolutions up to 1080p 16:9. We suggest these standard resolutions:
1920×10801280×720960×540640×360
Aspect Ratio
We support both 16:9 landscape and 9:16 portrait resolutions. If your video doesn’t match one of the above aspects ratios, we will pad the video with black bars.
Frame Rate
We support constant frame rates up to 60fps. Here are some standard frame rates we would suggest using:
242530485060
Note: You may encounter difficulties when uploading content with a variable frame rate. If you receive a “processing failed” error when uploading variable frame rate content, we suggest converting this to constant frame rate and try the upload again.
Many iOS devices have variable frame rate enabled on their camera by default, we suggest disabling this if you encounter issues uploading video shot on iOS devices.
Video Bitrate
ResolutionLow frame rate (24-30 fps)High frame rate (48-60 fps)1920×10808 Mbps12 Mbps1280×7205 Mbps8 Mbps960×5402 Mbps4 Mbps640×3601 Mbps2 Mbps
Audio Bitrate
128 kbps
Audio Channels
Stereo
Colour
We currently only support SDR videos. For these please use the standard BT.709 colourspace
Scan Type
We currently only support progressive scan video. You can upload interlaced videos but we are unable to deinterlace these.
Video Length
Up to 6 hours. If you need to upload longer duration videos, please reach out to techsupport@recast.tv and we can discuss solutions.
File Size
Up to 30 GB
Subtitles
Not currently supported. If you require subtitles on your video, we suggest burning these into the video itself.
1. Go to Sell > Live Events and click the ‘+ Live Event’ button from the toolbar within Recast for Business
Please note: If this option is not available you can contact partnersupport@recast.tv to enable it on your account.
2. You will need to add a title, description and thumbnail image for your event.
Thumbnail specifications:
3. Select whether or not you wish to upload your own promo trailer for the event. This will appear on your Widget.
4. Select the appropriate categories. Categories appear on your widget to allow your users to find your content easily. You can automatically request new categories to be added if required.
5. Select whether or not your stream contains advertising.
6. When setting up an event, you can either choose to go live immediately or schedule your event for a later date.
7. Select your price. Our recommended pricing guidance takes into consideration the length of your stream and what other Vendors would typically charge for a live event.
8. You can select which countries you want your content to be available in when scheduling an event. This can then be edited at any time, e.g. if you require temporary geo-blocking for broadcast deals already in place.
You can find an up-to-date list of the countries Recast is currently available here. You can also create a default list of countries you want your content to be available in, so you don’t have to select countries every time you set up an event.
9. The share value is the amount any third party will earn when either Sharing your content using Share & Earn links, or hosting your content using Host & Earn Embed Widgets.
10. Adding DRM (Digital Rights Management) gives you additional protection on your content from being illegally downloaded and shared. To do so, click "Enable DRM:
11. Click Schedule Event to complete the set up of your live stream.
For more information on generating Replays, either manually or automatically, click here.
Head to business.recast.tv/api-register. Before you set up your vendor account, you'll be asked to first create a Recast user account, or if you already have one, you can sign-in with your existing user account details.
Now you can set up your Vendor account. This is the person or business that will be paid out any earnings from your sales via Recast. You'll need to provide some details such as the primary contact for the vendor and once you've done that you can start setting up your Brand.
Your Brand is your public-facing part of your Vendor account. Give it a name, description, profile image, and cover image that makes you easily recognisable. You'll take this brand across the web as you (and affiliates) embed and share your content.
You are now signed up and are logged in to Recast for Business.
To add additional admins for your channel, first make sure they have signed up for a Recast fan account and ask them to share their account User Name
Congratulations, you're now all set up and ready to monetise your media. You can find out how to create inventory items and API keys:
You'll be able to manage all your API keys within the API Keys item on the left hand navigation. For each key, you'll be able to:
If you've integrated Recast using our API and have chosen to use Recast's user interface for managing your inventory, then this guide explains how to create and publish inventory items to make them available for to purchase.
You’ll now have the choice of how you publish your video with 2 options:
You'll be directed back to your inventory list. Here you'll see a view of your entire inventory list, with relevant information and actions including the ability to:
As an API client you may find it useful to copy your inventory item ID for use with your integration. To copy the item ID:
Your Brand is your public-facing part of your Vendor account. Add your logo and cover image that makes you easily recognisable to content owners on Recast's distribution marketplace.
You are now signed up and are logged in to Recast for Business.
IMPORTANT: In order to get whitelisted to publish third-party content, you must now contact partnersupport@recastpay.com, confirming the content you would like to publish.
Once whitelisted, a member of the Recast team will let you know, and you'll then be able to start publishing content. For more information on how to Publish content using a Publisher Embed Widget, click here.
And that’s it! You’ll earn from every purchase of content from the widget on your website in line with the revenue split you’ve agreed with the Content Owner.
To add additional admins for your account, first make sure they have signed up for a Recast user account and ask them to share their account User Name
After you have created your Recast for Business account, you can become a Publisher of other Recast Vendors. Please contact us at publishersupport@recast.tv if you’d like to get whitelisted. Once whitelisted, here's how to create an Embed Widget.
1. As a Publisher, you can create widgets containing content from Recast Vendors. First, head to the Your Widgets page in Recast for Business and select ‘Add New’.
2. Give the widget a name and select the option ‘Content from other channels’. You can also give the widget some header text which will be visible on the created widget.
At this point you have two options:
3. Select one (or multiple) channels whose content you’d like to include on your widget.
4. If you selected "Create with Selected videos and events, you'll now be asked to choose to create the widget from either on-demand or live content from the selected channel(s). And if you want to be more precise in the content you are selecting you can specify certain videos or categories of videos.
5. You can now style the widget to suit the colours and content of your brand's website. Use the colour picker or type in the hex ode of the colour you want to apply.
You can also change the font that is displayed on the widget by typing the font family name into the text fields. For this to work correctly:
Be sure to check that the transparency slider (see red box in the below image) is set to the right hand side, otherwise if may not be visible:
Then press ‘Next’ to move to the next stage.
6. Preview your widget and copy the iFrame code, ready for use on your website.
Once you've copied your widget code, go to the web page on your website where you want it to live. How you add the code will depend on the website CMS software you use, but typically website's will allow you to toggle between a "visual" view and a "code" or "text" view in the text editor section. If you go to the latter, you'll be able to drop the embed code straight into the text editor.
Other website CMS's may have a component called " Code embed" or similar, that you can just add to your page before pasting in your Recast Embed widget code. Remember to save and publish the page.
When a user purchases third-party content via a widget you have created, you will earn a percentage of the purchase. This percentage is determined by the content owner when they price their content and set their share percentage.
If you do not want to embed content on your site, you can still earn a revenue share of content you promote, by using Share & Earn links. For a full explanation of how these work, click here.
Using Recast’s Affiliate & Syndication engine, Media Owners are incentivising Affiliates to share their content using unique ‘Share & Earn’ links in return for a pre-agreed revenue share.
Earnings are instantly distributed. Cash out at any time once you’ve surpassed £100 GBP.
This guide includes the best settings to use when streaming from OBS to Recast.
Recast can accept both RTMP and SRT Streaming Protocols from OBS. To select and set up an SRT or RTMP stream input in Recast for Business, go to Technical Tools > Stream Inputs. Learn more here.
Depending on whether you are streaming using SRT or RTMP, the fields you need to copy from Recast for Business and enter into OBS will differ. We've laid out both scenarios as follows.
This guide explains how to add a simple and controllable scoreboard overlay onto your stream.
Go to overlays.uno, then select Login, or Sign up if you don’t have an account.
Once logged in, you should be taken to this page:
Click on the ‘+ New Overlay’ Button, which will show you different options:
Here you can search for the type of overlay you want. For this guide, we have selected the following as an example:
Click on the item, and you should receive the pop-up below:
Click ‘Add to My Overlays’
This should take you to the Dashboard below.
Double-click on the item you want to use under ‘My Overlays’ and you are ready to move on!
Take some time to familiarise yourself with the dashboard. It is split up into several sections, with the navigation along the middle of the page.
Please note: These options may change depending on the template being used.
The next step is to customise your scoreboard. This example scoreboard has a few options that can be changed, such as teams names, colours, logos etc. Each scoreboard has different options available.
To change the team names click on the ‘Setup’ tab, once these have been changed when you click off the text box you will see the scoreboard in the preview has been updated. If you click on the ‘Customize’ tab you will be able to add your colours, logos to change the branding of the team sections which will be updated in the preview.
Once customised, you are ready to connect you scoreboard overlay to OBS.
Before heading to OBS, in the overlays.uno scoreboard control page, click on the ‘Copy Output URL’ button on the top left;
When you press this a little green pop-up will appear at the top letting you know the link has been copied to the clipboard;
Now head over to OBS, navigate to the Sources panel and click on the (+) symbol to add a new source, then select the Browser option, Name your source, ‘Scoreboard – Uno’ for example and select OK;
On the next screen in the URL text box delete the default link and paste the link from Uno. Change the width and height to match your video source (Most likely HD so 1920×1080).
When finished, select ‘OK’.
After a few seconds, the scoreboard should animate into the screen. The position of the scoreboard can be changed and once you’re happy with this then you can move on to the next step.
If you want to control the scoreboard from the same computer that’s running OBS then we would suggest using dual monitors so you can monitor OBS and use the scoreboard functions at the same time. If you are limited to a single screen you can use a smartphone or iPad to control the scoreboard, which may be useful as you can control this from anywhere.
Changing the score
To control the scoreboard from the web browser on your computer, simply head back to singular.live, and you should still be on the control page and click on the ‘Score tab’.
Adjusting the time
Next, click on the Clock tab:
These two tabs will be used when the game is about to start and while it is live. This will require human input throughout the broadcast to keep scoring live. There is an option to have an outside source such as the system that runs the digital scoreboards in a stadium (this requires a paid version).
Smartphone/iPad Control
On Uno, next to the ‘Copy Output URL’ there is the the ‘Copt Control URL’:
This will copy the controller page link (another way is to just copy the link in the address bar), and open that link on your mobile device, such as a smartphone or iPad.
The controller page will open, and you can control the scoreboard from this, even if you close the browser on the computer.
A few tips for using the mobile version;
It is typically best practice to have the scoreboard set to ‘overlay – off’ when going live, with most scoreboards appearing several seconds after the event start time/kick-off time. Here’s a football-specific flow to follow below;
If you would like to create a new account, click here, sign up and create your new Vendor account and Brand.
TIP: A ‘Username’ can be found in Recast in the ‘account details' section of https://account.recast.tv/. If you do not know the correct ‘username’, please contact partnersupport@recast.tv
Please note: Statistics are updated once daily on Recast for Business
Total Purchases: The sum of all purchases of your video(s) from this Channel (in the selected period and for selected videos)
Total Earnings: The sum of all your earnings across your Channel for purchases, shared video purchases (in the selected period and for selected videos)
Earnings Direct: The total of all your earnings from your own videos
Earnings From Videos You Share: The sum of your earnings from others’ videos after being shared by or on this Channel (in the selected time period)
Total Referrals: Total number of Users who have signed up after following a referral link from this brand's account
No. Referrals Spent 200: Total number of Users who have spent 200 Cast Credits after signing up after following a referral link from this brand's account
Avg. Earnings per Video: The average earnings amount per video (in the selected period and for selected videos)
Avg. Daily Referrals: The average per day of the number of Users who have signed up after following a referral link from this brand's account
Total Purchases From Shares: Quantity of all purchases made by Users from links you shared to others’ videos
Avg. Share Purchases Per Video: The average quantity of purchases generated from links you shared per selected video
Avg. Purchase Price: The average price of your videos (in the selected period and for selected videos)
Total Number of videos: The total quantity of all videos uploaded over time
The Data Download feature is now available to all Recast Vendors, which allows you to download opted-in data about your users.
Firstly, as a reminder, users are incentivised to opt-in to sharing their information. They can simply share their email address, or if they complete their Data Profile you’ll have access to the following info:
If this feature is not immediately available to you, you may not have provided us with your privacy policy. To get set up, please contact us on partnersupport@recast.tv to have this feature added to your Recast for Business account. Please provide:
We will ask you to read and agree to our Data Sharing Agreement
This will download a protected zip folder, which will need to be unlocked with a password. The password is available below the download option. Paste the password into your unzip software to gain access to a .csv file. This file contains the information shared from each of your opted-in fans.
When downloading a new version, it will replace the version below and you commit to updating the data you hold as a result. This should be completed at least once every 14 days to keep the user data you hold up to date and adhere to all opt-ins and outs of your fans as per the Data Sharing Agreement.